Description
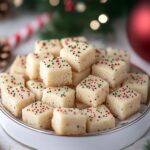
Classic, melt-in-your-mouth shortbread cookies perfect for the holidays or any occasion. Easy to make and endlessly customizable with sprinkles, sanding sugar, or royal icing!
Ingredients
Scale
- 1 cup (2 sticks) unsalted butter, softened
- 1/2 cup granulated sugar
- 1/4 cup powdered sugar, plus more for dusting
- 1 teaspoon vanilla extract
- 2 1/4 cups all-purpose flour, plus more for dusting
- 1/4 teaspoon salt
- Optional: Sprinkles, sanding sugar, or royal icing for decorating
Instructions
- Cream the Butter and Sugars: In a large bowl, or the bowl of your stand mixer fitted with the paddle attachment, cream together the softened butter, granulated sugar, and powdered sugar until light and fluffy. This usually takes about 3-5 minutes on medium speed. Make sure to scrape down the sides of the bowl occasionally to ensure everything is evenly incorporated. The mixture should be pale and airy. This step is crucial for achieving a tender shortbread.
- Add Vanilla Extract: Stir in the vanilla extract until just combined. Don’t overmix at this stage. Overmixing can develop the gluten in the flour, leading to a tougher cookie.
- Combine Dry Ingredients: In a separate medium bowl, whisk together the all-purpose flour and salt. Whisking helps to evenly distribute the salt throughout the flour, ensuring a consistent flavor in every cookie.
- Gradually Add Dry Ingredients to Wet Ingredients: Gradually add the dry ingredients to the wet ingredients, mixing on low speed until just combined. Be careful not to overmix! Overmixing will result in tough cookies. Add the flour in three additions, mixing until just incorporated after each addition. The dough will start to come together and form a ball.
- Form the Dough into a Disc: Turn the dough out onto a lightly floured surface. Gently knead the dough a few times to bring it together into a smooth disc. Be careful not to overwork the dough.
- Chill the Dough: Wrap the dough disc tightly in plastic wrap and refrigerate for at least 1 hour, or preferably 2 hours. This chilling time is essential! It allows the gluten to relax, preventing the cookies from spreading too much during baking and resulting in a more tender texture. The cold dough is also easier to roll out and cut. You can even chill the dough overnight if you prefer.
- Preheat Oven and Prepare Baking Sheets: Preheat your oven to 325°F (160°C). Line baking sheets with parchment paper or silicone baking mats. This will prevent the cookies from sticking and make cleanup a breeze.
- Roll Out the Dough: Remove the chilled dough from the refrigerator and let it sit at room temperature for a few minutes to soften slightly. On a lightly floured surface, roll out the dough to about 1/4 inch thickness. Use a rolling pin and apply even pressure to ensure a uniform thickness. If the dough is sticking, sprinkle a little more flour underneath.
- Cut Out the Cookies: Use your favorite Christmas cookie cutters to cut out shapes from the rolled-out dough. I love using star, tree, and gingerbread man shapes for a festive touch. Dip the cookie cutters in flour before each cut to prevent sticking.
- Place Cookies on Baking Sheets: Carefully transfer the cut-out cookies to the prepared baking sheets, leaving about 1/2 inch space between each cookie.
- Re-roll Scraps: Gather the dough scraps, re-roll them, and cut out more cookies until all the dough is used. Keep in mind that the cookies made from re-rolled dough may be slightly tougher than the first batch, so try to minimize the number of times you re-roll the dough.
- Optional: Dock the Cookies: Use a fork to prick the tops of the cookies a few times. This helps to prevent them from puffing up too much during baking.
- Bake the Cookies: Bake the cookies for 12-15 minutes, or until the edges are lightly golden brown. The baking time will vary depending on the thickness of your cookies and your oven. Keep a close eye on them to prevent burning.
- Cool the Cookies: Remove the baking sheets from the oven and let the cookies cool on the baking sheets for a few minutes before transferring them to a wire rack to cool completely.
- Dust with Powdered Sugar: Once the cookies are completely cool, dust them generously with powdered sugar. This gives them a beautiful snowy appearance.
- Decorate with Sprinkles or Sanding Sugar: If desired, decorate the cookies with sprinkles or sanding sugar before baking or after dusting with powdered sugar.
- Decorate with Royal Icing: For more elaborate decorations, use royal icing to pipe designs onto the cookies. You can find many royal icing recipes online. Let the royal icing dry completely before storing the cookies.
Notes
- Use high-quality butter for the best flavor.
- Don’t overmix the dough, or the cookies will be tough.
- Chilling the dough is essential for preventing spreading.
- Bake at a low temperature for even baking.
- Let the cookies cool completely before decorating or storing.
- Store the cooled cookies in an airtight container at room temperature for up to 5 days. They can also be frozen for longer storage. To freeze, place the cookies in a single layer on a baking sheet and freeze until solid. Then, transfer them to a freezer-safe container or bag. They can be frozen for up to 2 months. Thaw the cookies at room temperature before serving.
- Lemon Shortbread: Add the zest of one lemon to the dough for a bright, citrusy flavor.
- Chocolate Chip Shortbread: Add 1/2 cup of mini chocolate chips to the dough.
- Pecan Shortbread: Add 1/2 cup of chopped pecans to the dough.
- Lavender Shortbread: Add 1 teaspoon of dried lavender to the dough.
- Prep Time: 20 minutes
- Cook Time: 12-15 minutes