
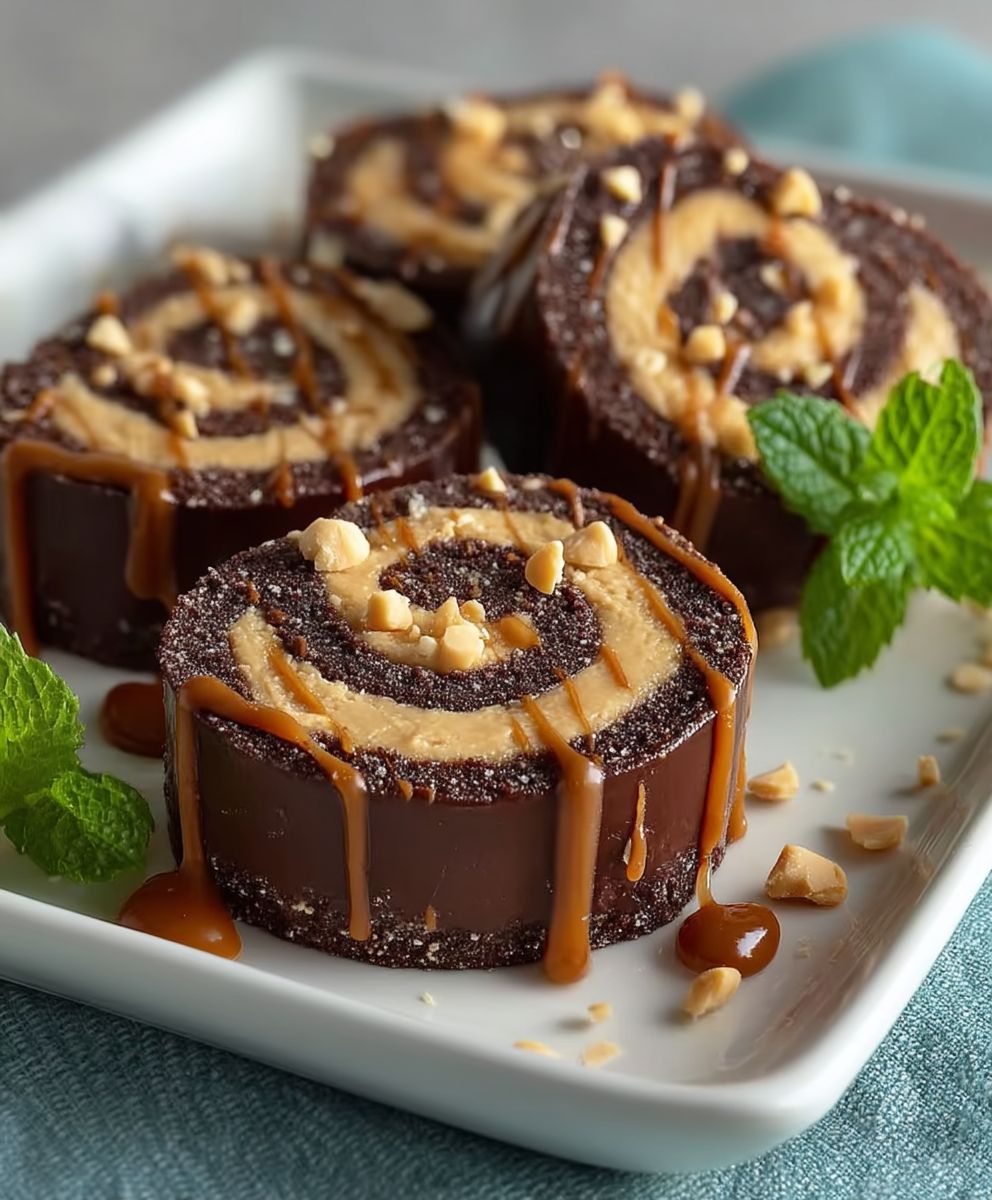
Chocolate Peanut Butter Pinwheels: Prepare to be amazed by these delightful treats that are as fun to make as they are to eat! Imagine layers of flaky pastry swirled with a decadent chocolate peanut butter filling, baked to golden perfection. These aren’t just cookies; they’re an experience, a nostalgic nod to childhood delights with a sophisticated twist.
While the exact origins of pinwheel cookies are somewhat debated, their charm lies in their simplicity and visual appeal, reminiscent of classic pastries found in bakeries worldwide. The combination of chocolate and peanut butter, however, is a distinctly American love affair, a flavor pairing that has captivated taste buds for generations. It’s a marriage of rich, bittersweet chocolate and creamy, salty peanut butter that creates an irresistible harmony.
What makes chocolate peanut butter pinwheels so universally loved? It’s the perfect balance of textures the crisp, buttery pastry gives way to the smooth, melt-in-your-mouth filling. They’re also incredibly convenient; perfect for bake sales, potlucks, or simply a sweet treat to enjoy with a cup of coffee. Plus, the swirling design adds a touch of elegance to any dessert platter. Get ready to impress your friends and family with these easy-to-make, utterly delicious pinwheels!

Ingredients:
- 1 cup (2 sticks) unsalted butter, softened
- 1 cup granulated sugar
- 1 cup packed light brown sugar
- 2 large eggs
- 1 teaspoon vanilla extract
- 3 cups all-purpose flour
- 1 teaspoon baking soda
- 1/2 teaspoon salt
- 1 cup creamy peanut butter
- 1/2 cup unsweetened cocoa powder
- 1/4 cup milk
- 1/2 cup powdered sugar, for dusting
Preparing the Dough:
- First things first, let’s cream together the butter and sugars. In a large bowl (or the bowl of your stand mixer), beat the softened butter, granulated sugar, and brown sugar together until light and fluffy. This usually takes about 3-5 minutes. Don’t rush this step; it’s crucial for a tender cookie!
- Next, beat in the eggs one at a time, making sure each egg is fully incorporated before adding the next. Then, stir in the vanilla extract. The vanilla really enhances the flavors, so don’t skip it!
- In a separate bowl, whisk together the flour, baking soda, and salt. This ensures that the baking soda and salt are evenly distributed throughout the flour, which is important for even baking and flavor.
- Gradually add the dry ingredients to the wet ingredients, mixing on low speed until just combined. Be careful not to overmix the dough, as this can lead to tough cookies. Overmixing develops the gluten in the flour, which we don’t want in this case.
- Now, divide the dough in half. This will make it easier to work with when we add the peanut butter and chocolate.
Creating the Peanut Butter and Chocolate Layers:
- In a medium bowl, combine one half of the dough with the peanut butter. Mix until well combined. The peanut butter dough will be a bit stickier than the plain dough, but that’s okay.
- In another medium bowl, combine the remaining half of the dough with the cocoa powder and milk. Mix until well combined. The chocolate dough should be smooth and easy to work with. If it seems too dry, add a teaspoon of milk at a time until it reaches the right consistency.
Rolling and Assembling the Pinwheels:
- Lightly flour a clean work surface. Roll out the peanut butter dough into a rectangle about 12×15 inches. Try to keep the rectangle as even as possible in thickness. A slightly uneven rectangle is fine, but large differences in thickness will cause the cookies to bake unevenly.
- Repeat with the chocolate dough, rolling it out to the same size rectangle as the peanut butter dough.
- Carefully place the chocolate dough rectangle on top of the peanut butter dough rectangle. You can use a large spatula or gently lift the dough with your hands.
- Starting from one of the long edges, tightly roll up the dough into a log. Try to keep the roll as tight as possible to prevent air pockets from forming.
- Wrap the log tightly in plastic wrap and refrigerate for at least 2 hours, or preferably overnight. This chilling time is crucial! It allows the dough to firm up, making it easier to slice and preventing the cookies from spreading too much during baking.
Baking the Pinwheels:
- Preheat your oven to 375°F (190°C). Line baking sheets with parchment paper. Parchment paper prevents the cookies from sticking and makes cleanup a breeze.
- Remove the dough log from the refrigerator and unwrap it.
- Using a sharp knife, slice the log into 1/4-inch thick rounds. If the dough is too hard to slice easily, let it sit at room temperature for a few minutes.
- Place the cookie slices on the prepared baking sheets, leaving about 1 inch of space between each cookie.
- Bake for 8-10 minutes, or until the edges are lightly golden brown. Keep a close eye on them, as they can burn quickly.
- Remove the baking sheets from the oven and let the cookies cool on the baking sheets for a few minutes before transferring them to a wire rack to cool completely.
Finishing Touches:
- Once the cookies are completely cool, dust them with powdered sugar, if desired. This adds a touch of sweetness and makes them look even more appealing.
- Store the cookies in an airtight container at room temperature for up to 5 days. They also freeze well, so you can make a batch ahead of time and enjoy them later.
Tips for Perfect Pinwheels:
- Softened Butter is Key: Make sure your butter is softened to room temperature before creaming it with the sugars. This will ensure a smooth and creamy mixture.
- Don’t Overmix: Overmixing the dough can lead to tough cookies. Mix until just combined.
- Chill Time is Important: Don’t skip the chilling time! It’s essential for preventing the cookies from spreading too much during baking.
- Sharp Knife for Slicing: Use a sharp knife to slice the dough log into even rounds. A dull knife will squish the dough.
- Even Baking: For even baking, make sure your oven is properly preheated and that the cookies are evenly spaced on the baking sheets.
- Freezing for Later: These cookies freeze beautifully! Wrap them tightly in plastic wrap and store them in a freezer-safe container for up to 2 months.
Variations:
- Nutella Swirl: Instead of chocolate dough, use Nutella for a hazelnut chocolate twist.
- Jam Filling: Spread a thin layer of your favorite jam between the dough layers before rolling.
- Sprinkles: Add sprinkles to the dough or roll the log in sprinkles before chilling for a festive touch.
- Different Nut Butters: Experiment with different nut butters, such as almond butter or cashew butter.
- Espresso Powder: Add a teaspoon of espresso powder to the chocolate dough for a mocha flavor.
Troubleshooting:
- Cookies Spreading Too Much: This is usually caused by not chilling the dough long enough or using too much butter. Make sure to chill the dough for at least 2 hours and measure the butter accurately.
- Dough Too Dry: If the dough seems too dry, add a teaspoon of milk or water at a time until it reaches the right consistency.
- Dough Too Sticky: If the dough is too sticky, add a tablespoon of flour at a time until it’s easier to handle.
- Cookies Burning: If the cookies are burning, lower the oven temperature by 25 degrees and bake for a few minutes less.
Enjoy your delicious homemade Chocolate Peanut Butter Pinwheels! I hope you have as much fun making them as I do. They’re perfect for holidays, parties, or just a special treat.
Conclusion:
So, there you have it! These Chocolate Peanut Butter Pinwheels are truly a must-try for anyone who loves a delightful combination of rich chocolate and creamy peanut butter. They’re incredibly easy to make, require minimal baking time, and are guaranteed to disappear quickly at any gathering. But beyond the simplicity and speed, it’s the sheer deliciousness that makes this recipe a winner. The flaky, buttery pastry perfectly complements the sweet and salty filling, creating a symphony of flavors and textures that will leave you wanting more.
Think of these pinwheels as the ultimate comfort food, perfect for a cozy night in, a fun baking project with the kids, or a crowd-pleasing dessert for your next party. They’re also surprisingly versatile!
Serving Suggestions and Variations:
Don’t be afraid to get creative with your Chocolate Peanut Butter Pinwheels! Here are a few ideas to spark your imagination:
* Ice Cream Sundae Topping: Crumble a warm pinwheel over a scoop of vanilla ice cream for an extra decadent treat. Drizzle with hot fudge and a sprinkle of chopped peanuts for the ultimate sundae experience.
* Breakfast Pastry: While technically a dessert, these pinwheels are also delicious with a cup of coffee in the morning. Warm them slightly in the microwave for a truly indulgent breakfast.
* Chocolate Chip Addition: Add a handful of mini chocolate chips to the peanut butter filling for an extra boost of chocolatey goodness.
* Nutella Swirl: Replace some of the peanut butter with Nutella for a hazelnut twist. The combination of chocolate, peanut butter, and hazelnut is simply divine.
* Pretzel Crunch: Crush some pretzels and sprinkle them on top of the pinwheels before baking for a salty and crunchy contrast.
* Different Nut Butters: Experiment with other nut butters like almond butter, cashew butter, or even sunflower seed butter for a unique flavor profile.
* Glaze it up: After baking and cooling, drizzle a simple powdered sugar glaze over the pinwheels for added sweetness and visual appeal. You can even add a touch of peanut butter extract to the glaze for an extra peanut butter kick.
* Spice it up: Add a pinch of cinnamon or cayenne pepper to the peanut butter filling for a warm and spicy twist.
These are just a few ideas to get you started. The possibilities are endless! Feel free to experiment and create your own signature version of these delicious pinwheels.
I truly believe that this recipe will become a staple in your baking repertoire. It’s a guaranteed crowd-pleaser that’s easy to make and endlessly customizable. The combination of chocolate and peanut butter is a classic for a reason, and these pinwheels showcase it perfectly.
So, what are you waiting for? Gather your ingredients, preheat your oven, and get ready to bake up a batch of these irresistible Chocolate Peanut Butter Pinwheels. I’m confident that you’ll love them as much as I do!
And most importantly, I’d love to hear about your experience! Did you try any of the variations? Did you make any modifications of your own? Share your photos and stories in the comments below. Let’s spread the pinwheel love! Happy baking!
Chocolate Peanut Butter Pinwheels: Easy Recipe & Baking Tips
Delicious and festive Chocolate Peanut Butter Pinwheel Cookies! These swirled treats are perfect for holidays, parties, or a special homemade treat.
Ingredients
- 1 cup (2 sticks) unsalted butter, softened
- 1 cup granulated sugar
- 1 cup packed light brown sugar
- 2 large eggs
- 1 teaspoon vanilla extract
- 3 cups all-purpose flour
- 1 teaspoon baking soda
- 1/2 teaspoon salt
- 1 cup creamy peanut butter
- 1/2 cup unsweetened cocoa powder
- 1/4 cup milk
- 1/2 cup powdered sugar, for dusting (optional)
Instructions
- Cream Butter and Sugars: In a large bowl (or stand mixer), beat softened butter, granulated sugar, and brown sugar until light and fluffy (3-5 minutes).
- Add Eggs and Vanilla: Beat in eggs one at a time, then stir in vanilla extract.
- Combine Dry Ingredients: In a separate bowl, whisk together flour, baking soda, and salt.
- Combine Wet and Dry: Gradually add dry ingredients to wet ingredients, mixing on low speed until just combined. Do not overmix.
- Divide Dough: Divide the dough in half.
- Peanut Butter Layer: In a medium bowl, combine one half of the dough with the peanut butter. Mix until well combined.
- Chocolate Layer: In another medium bowl, combine the remaining half of the dough with the cocoa powder and milk. Mix until well combined. Add milk 1 tsp at a time if needed.
- Roll Out Doughs: Lightly flour a clean work surface. Roll out the peanut butter dough into a rectangle about 12×15 inches. Repeat with the chocolate dough.
- Layer Doughs: Carefully place the chocolate dough rectangle on top of the peanut butter dough rectangle.
- Roll into Log: Starting from one of the long edges, tightly roll up the dough into a log.
- Chill: Wrap the log tightly in plastic wrap and refrigerate for at least 2 hours, or preferably overnight.
- Preheat Oven: Preheat oven to 375°F (190°C). Line baking sheets with parchment paper.
- Slice Cookies: Remove the dough log from the refrigerator and unwrap it. Slice into 1/4-inch thick rounds.
- Bake: Place cookie slices on prepared baking sheets, leaving about 1 inch of space between each cookie. Bake for 8-10 minutes, or until the edges are lightly golden brown.
- Cool: Remove from oven and let cool on baking sheets for a few minutes before transferring to a wire rack to cool completely.
- Dust with Powdered Sugar (Optional): Once the cookies are completely cool, dust them with powdered sugar, if desired.
- Store: Store in an airtight container at room temperature for up to 5 days.
Notes
- Softened butter is key for creaming.
- Don’t overmix the dough.
- Chilling the dough is important to prevent spreading.
- Use a sharp knife for slicing.
- For even baking, make sure your oven is properly preheated and that the cookies are evenly spaced on the baking sheets.
- These cookies freeze beautifully! Wrap them tightly in plastic wrap and store them in a freezer-safe container for up to 2 months.


Leave a Comment