
Chocolate chip cookies easiest recipe? Yes, you read that right! Forget complicated baking techniques and endless ingredient lists. I’m about to share a secret that will revolutionize your cookie game forever. Imagine sinking your teeth into a warm, gooey, perfectly textured chocolate chip cookie, and then imagine making it with minimal effort. Sounds too good to be true? Trust me, it’s not!
The humble chocolate chip cookie, a staple in American households, has a surprisingly rich history. Legend has it that Ruth Graves Wakefield, owner of the Toll House Inn in Massachusetts, accidentally invented the cookie in the 1930s when she chopped up a Nestle chocolate bar and added it to her butter cookie dough. Whether that’s entirely accurate or not, the chocolate chip cookie quickly became a beloved treat, spreading across the nation and eventually the world.
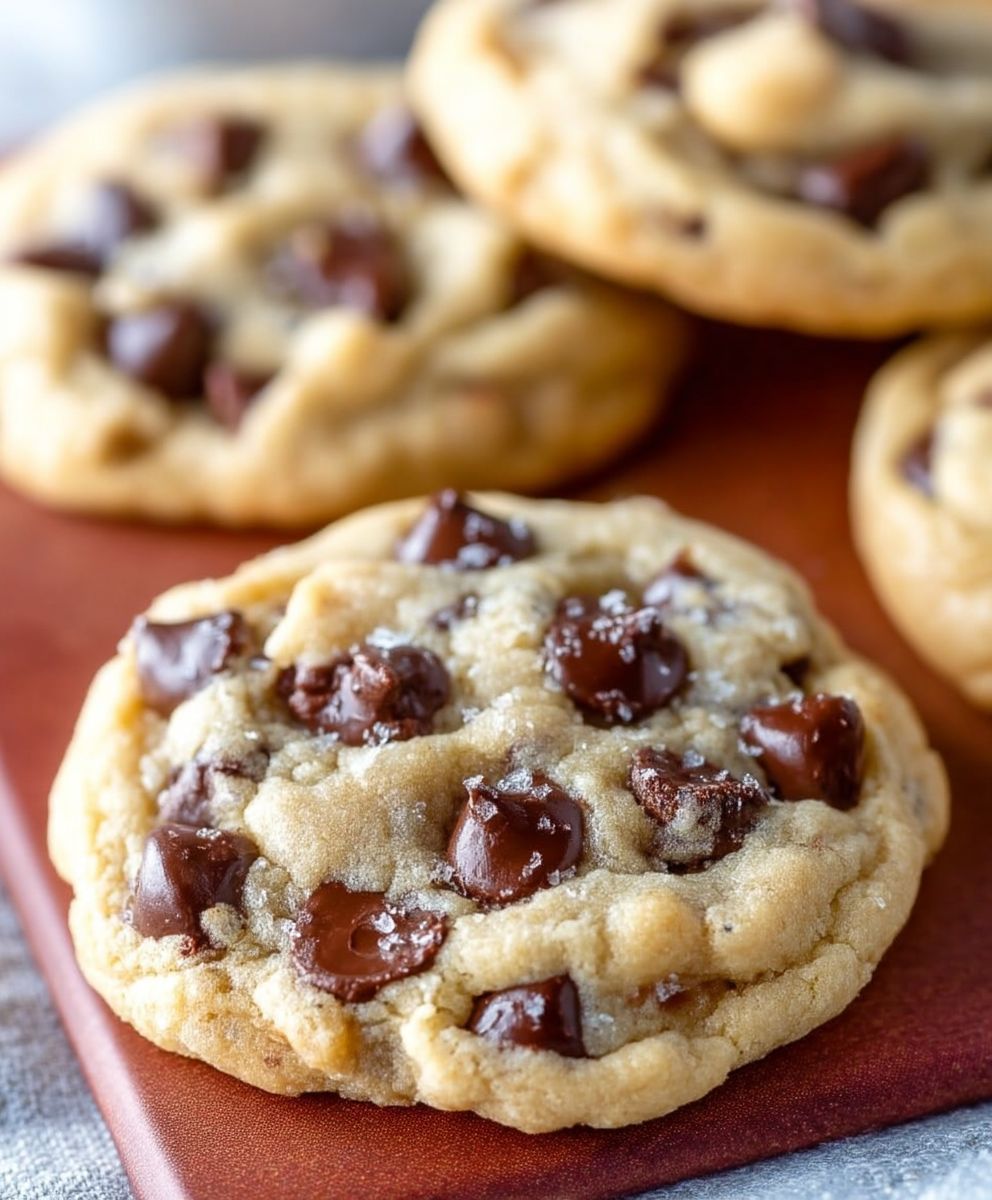
But why are these cookies so universally adored? It’s the perfect combination of textures a slightly crisp edge giving way to a soft, chewy center. The rich, buttery flavor is punctuated by bursts of sweet, melty chocolate. And let’s be honest, the aroma of freshly baked cookies wafting through the house is pure comfort. What I love most about this chocolate chip cookies easiest recipe is that it delivers all of that deliciousness without requiring you to spend hours in the kitchen. So, are you ready to bake up a batch of pure happiness? Let’s get started!

Ingredients:
- 2 1/4 cups all-purpose flour
- 1 teaspoon baking soda
- 1 teaspoon salt
- 1 cup (2 sticks) unsalted butter, softened
- 3/4 cup granulated sugar
- 3/4 cup packed brown sugar
- 1 teaspoon vanilla extract
- 2 large eggs
- 2 cups chocolate chips (semi-sweet or your favorite)
Preparing the Dough:
- Combine Dry Ingredients: In a medium bowl, whisk together the flour, baking soda, and salt. Make sure there are no lumps of baking soda remaining. This ensures even distribution and prevents a bitter taste in your cookies. Set this bowl aside for later.
- Cream Butter and Sugars: In a large bowl (or the bowl of your stand mixer), cream together the softened butter, granulated sugar, and brown sugar until light and fluffy. This usually takes about 3-5 minutes with an electric mixer. The mixture should be noticeably lighter in color and have a smoother texture. Don’t rush this step it’s crucial for achieving the right cookie texture. If using a hand mixer, make sure your butter is very soft to avoid straining the motor.
- Add Vanilla and Eggs: Beat in the vanilla extract until combined. Then, add the eggs one at a time, beating well after each addition. This ensures that each egg is fully incorporated into the batter. Scrape down the sides of the bowl as needed to ensure even mixing.
- Gradually Add Dry Ingredients: Gradually add the dry ingredients to the wet ingredients, mixing on low speed until just combined. Be careful not to overmix! Overmixing develops the gluten in the flour, which can result in tough cookies. Stop mixing as soon as the flour disappears.
- Stir in Chocolate Chips: Gently fold in the chocolate chips until they are evenly distributed throughout the dough. I like to use a rubber spatula for this step to avoid overmixing. You can also add other mix-ins at this point, such as chopped nuts, dried fruit, or sprinkles.
Chilling the Dough (Optional but Recommended):
- Wrap and Chill: Wrap the dough tightly in plastic wrap and refrigerate for at least 30 minutes, or up to 24 hours. Chilling the dough allows the flavors to meld together and prevents the cookies from spreading too thin during baking. If you’re short on time, you can skip this step, but the cookies will be slightly thinner and may not be as flavorful. For longer chilling (over 2 hours), let the dough sit at room temperature for about 15-20 minutes before scooping to soften it slightly.
Baking the Cookies:
- Preheat Oven: Preheat your oven to 375°F (190°C). Make sure your oven rack is positioned in the center of the oven for even baking.
- Prepare Baking Sheets: Line baking sheets with parchment paper or silicone baking mats. This prevents the cookies from sticking and makes cleanup easier. Parchment paper also helps to distribute heat evenly, resulting in more evenly baked cookies.
- Scoop Dough: Use a cookie scoop or spoon to drop rounded tablespoons of dough onto the prepared baking sheets, leaving about 2 inches between each cookie. This allows the cookies to spread without running into each other. If you want larger cookies, use a larger scoop, but be sure to adjust the baking time accordingly.
- Bake: Bake for 9-11 minutes, or until the edges are golden brown and the centers are still slightly soft. The baking time will vary depending on your oven and the size of your cookies. Keep a close eye on them to prevent burning.
- Cool: Remove the baking sheets from the oven and let the cookies cool on the baking sheets for a few minutes before transferring them to a wire rack to cool completely. This allows the cookies to firm up slightly and prevents them from breaking when you move them.
Tips for Perfect Chocolate Chip Cookies:
- Use Room Temperature Butter: Softened butter is essential for creaming properly with the sugars. If your butter is too cold, it won’t cream properly, and your cookies will be dense. If your butter is too melted, your cookies will spread too thin.
- Don’t Overmix: Overmixing the dough develops the gluten in the flour, which can result in tough cookies. Mix until just combined.
- Chill the Dough: Chilling the dough allows the flavors to meld together and prevents the cookies from spreading too thin during baking.
- Use Parchment Paper: Parchment paper prevents the cookies from sticking and makes cleanup easier. It also helps to distribute heat evenly, resulting in more evenly baked cookies.
- Don’t Overbake: Overbaked cookies will be dry and crumbly. Bake until the edges are golden brown and the centers are still slightly soft.
- Cool Completely: Let the cookies cool completely on a wire rack before storing them. This prevents them from becoming soggy.
- Experiment with Flavors: Feel free to add other mix-ins to your cookies, such as chopped nuts, dried fruit, or sprinkles. You can also experiment with different types of chocolate chips, such as milk chocolate, dark chocolate, or white chocolate.
- Adjust Baking Time: Baking times may vary depending on your oven and the size of your cookies. Keep a close eye on them to prevent burning.
- For Chewier Cookies: Use more brown sugar than granulated sugar. Brown sugar contains molasses, which adds moisture and chewiness to the cookies.
- For Crispier Cookies: Use more granulated sugar than brown sugar. Granulated sugar helps the cookies spread and crisp up.
- High Altitude Adjustments: If you live at a high altitude, you may need to adjust the recipe slightly. Try reducing the amount of baking soda by 1/4 teaspoon and adding 1-2 tablespoons of flour. You may also need to reduce the baking time slightly.
- Storage: Store the cooled cookies in an airtight container at room temperature for up to 3 days. You can also freeze the cookies for up to 2 months. To freeze, place the cookies in a single layer on a baking sheet and freeze until solid. Then, transfer the cookies to a freezer-safe bag or container.
- Dough Storage: The cookie dough can be stored in the refrigerator for up to 2 days. Let it sit at room temperature for about 30 minutes before scooping and baking. You can also freeze the dough for up to 2 months. Scoop the dough into individual balls and freeze on a baking sheet until solid. Then, transfer the dough balls to a freezer-safe bag or container. When ready to bake, bake from frozen, adding a few minutes to the baking time.
Troubleshooting:
- Cookies are too flat: This can be caused by using melted butter, not chilling the dough, or overmixing the dough. Make sure to use softened butter, chill the dough for at least 30 minutes, and avoid overmixing.
- Cookies are too dry: This can be caused by overbaking the cookies or using too much flour. Bake the cookies until the edges are golden brown and the centers are still slightly soft. Measure the flour accurately, using the spoon and level method.
- Cookies are too hard: This can be caused by overbaking the cookies or using too much sugar. Bake the cookies until the edges are golden brown and the centers are still slightly soft.
- Cookies are too soft: This can be caused by underbaking the cookies or using too much butter. Bake the cookies until the edges are golden brown and the centers are still slightly soft.
- Cookies are not spreading: This can be caused by using too much flour or not enough butter. Measure the flour accurately, using the spoon and level method. Make sure to use softened butter.
- Cookies are burning: This can be caused by baking the cookies at too high of a temperature or for too long. Reduce the oven temperature and/or baking time.
Conclusion:
So there you have it! These aren’t just any chocolate chip cookies; they’re quite possibly the easiest chocolate chip cookies you’ll ever bake, and trust me, they deliver on flavor and that classic, comforting cookie experience. From the simple ingredient list to the straightforward instructions, this recipe is designed to be foolproof, even for the most novice baker. The slightly crisp edges giving way to a soft, chewy center, studded with melty chocolate chips what’s not to love?
I truly believe this recipe is a must-try for several reasons. First, the speed! You can whip up a batch of these cookies in under 30 minutes, making them perfect for those last-minute cravings or unexpected guests. Second, the minimal cleanup is a huge win. Fewer dishes mean more time to enjoy your freshly baked treats. And finally, the taste! These cookies are perfectly balanced in sweetness, with a rich, buttery flavor that will have everyone reaching for seconds (and thirds!).
But the best part about baking is the opportunity to personalize and experiment. While these cookies are fantastic as is, feel free to get creative with your serving suggestions and variations. For a truly decadent experience, try serving them warm with a scoop of vanilla ice cream and a drizzle of chocolate sauce. Or, if you’re feeling adventurous, crumble them over a bowl of yogurt for a delightful breakfast treat.
Looking for variations? Consider adding a sprinkle of sea salt on top before baking to enhance the sweetness and create a salty-sweet sensation. You could also swap out some of the chocolate chips for chopped nuts, like walnuts or pecans, for added texture and flavor. For a festive twist, add a dash of cinnamon or nutmeg to the dough. And if you’re a fan of dark chocolate, feel free to use dark chocolate chips instead of semi-sweet. The possibilities are endless!
Serving Suggestions:
- Warm with a scoop of vanilla ice cream
- Crumbled over yogurt
- Paired with a glass of cold milk
- As a base for an ice cream sandwich
Variations:
- Add a sprinkle of sea salt before baking
- Incorporate chopped nuts (walnuts, pecans, etc.)
- Add a dash of cinnamon or nutmeg
- Use dark chocolate chips
- Substitute brown sugar for a chewier texture
I’m so confident that you’ll love this recipe, and I can’t wait to hear about your baking adventures! So, preheat your oven, gather your ingredients, and get ready to bake the easiest chocolate chip cookies you’ve ever made. Don’t be afraid to experiment and make them your own.
Once you’ve tried this recipe, please come back and share your experience in the comments below. Did you make any variations? What did you think of the taste and texture? I’m always eager to hear your feedback and see your creations. Happy baking! I hope you enjoy these cookies as much as I do. Let me know if you have any questions, and I’ll do my best to help. Now go bake some happiness!
Chocolate Chip Cookies Easiest: The Only Recipe You'll Ever Need
Classic, soft, and chewy chocolate chip cookies. This recipe delivers perfect results every time, with tips for customization and troubleshooting included.
Ingredients
- 2 1/4 cups all-purpose flour
- 1 teaspoon baking soda
- 1 teaspoon salt
- 1 cup (2 sticks) unsalted butter, softened
- 3/4 cup granulated sugar
- 3/4 cup packed brown sugar
- 1 teaspoon vanilla extract
- 2 large eggs
- 2 cups chocolate chips (semi-sweet or your favorite)
Instructions
- Combine Dry Ingredients: In a medium bowl, whisk together the flour, baking soda, and salt. Set aside.
- Cream Butter and Sugars: In a large bowl, cream together the softened butter, granulated sugar, and brown sugar until light and fluffy (3-5 minutes).
- Add Vanilla and Eggs: Beat in the vanilla extract until combined. Add the eggs one at a time, beating well after each addition. Scrape down the sides of the bowl as needed.
- Gradually Add Dry Ingredients: Gradually add the dry ingredients to the wet ingredients, mixing on low speed until just combined. Be careful not to overmix!
- Stir in Chocolate Chips: Gently fold in the chocolate chips until evenly distributed.
- Chill the Dough (Optional but Recommended): Wrap the dough tightly in plastic wrap and refrigerate for at least 30 minutes, or up to 24 hours.
- Preheat Oven: Preheat your oven to 375°F (190°C).
- Prepare Baking Sheets: Line baking sheets with parchment paper or silicone baking mats.
- Scoop Dough: Use a cookie scoop or spoon to drop rounded tablespoons of dough onto the prepared baking sheets, leaving about 2 inches between each cookie.
- Bake: Bake for 9-11 minutes, or until the edges are golden brown and the centers are still slightly soft.
- Cool: Remove the baking sheets from the oven and let the cookies cool on the baking sheets for a few minutes before transferring them to a wire rack to cool completely.
Notes
- Room Temperature Butter: Softened butter is essential for creaming properly with the sugars.
- Don’t Overmix: Overmixing the dough develops the gluten in the flour, which can result in tough cookies. Mix until just combined.
- Chill the Dough: Chilling the dough allows the flavors to meld together and prevents the cookies from spreading too thin during baking.
- Use Parchment Paper: Parchment paper prevents the cookies from sticking and makes cleanup easier.
- Don’t Overbake: Overbaked cookies will be dry and crumbly. Bake until the edges are golden brown and the centers are still slightly soft.
- Cool Completely: Let the cookies cool completely on a wire rack before storing them.
- Experiment with Flavors: Feel free to add other mix-ins to your cookies, such as chopped nuts, dried fruit, or sprinkles. You can also experiment with different types of chocolate chips, such as milk chocolate, dark chocolate, or white chocolate.
- Adjust Baking Time: Baking times may vary depending on your oven and the size of your cookies. Keep a close eye on them to prevent burning.
- For Chewier Cookies: Use more brown sugar than granulated sugar. Brown sugar contains molasses, which adds moisture and chewiness to the cookies.
- For Crispier Cookies: Use more granulated sugar than brown sugar. Granulated sugar helps the cookies spread and crisp up.
- High Altitude Adjustments: If you live at a high altitude, you may need to adjust the recipe slightly. Try reducing the amount of baking soda by 1/4 teaspoon and adding 1-2 tablespoons of flour. You may also need to reduce the baking time slightly.
- Storage: Store the cooled cookies in an airtight container at room temperature for up to 3 days. You can also freeze the cookies for up to 2 months. To freeze, place the cookies in a single layer on a baking sheet and freeze until solid. Then, transfer the cookies to a freezer-safe bag or container.
- Dough Storage: The cookie dough can be stored in the refrigerator for up to 2 days. Let it sit at room temperature for about 30 minutes before scooping and baking. You can also freeze the dough for up to 2 months. Scoop the dough into individual balls and freeze on a baking sheet until solid. Then, transfer the dough balls to a freezer-safe bag or container. When ready to bake, bake from frozen, adding a few minutes to the baking time.


Leave a Comment