
Bulgogi Arancini is a delightful fusion dish that brings together the rich flavors of Korean bulgogi and the comforting texture of Italian arancini. Imagine biting into a crispy, golden-brown rice ball, only to discover a savory filling of marinated beef, garlic, and sesame that transports your taste buds on a culinary adventure. This unique recipe not only showcases the versatility of both cuisines but also highlights the beauty of blending traditions to create something truly special.
As someone who loves experimenting in the kitchen, I find that Bulgogi Arancini is a crowd-pleaser at gatherings, thanks to its irresistible taste and satisfying crunch. The combination of tender beef and creamy risotto creates a mouthwatering experience that keeps everyone coming back for more. Plus, these little bites are perfect for meal prep or as a fun appetizer for parties. Join me as we dive into this delicious recipe that celebrates the best of both worlds!

Ingredients:
- 1 cup cooked short-grain rice
- 1 cup bulgogi beef, cooked and chopped
- 1/2 cup mozzarella cheese, shredded
- 1/4 cup green onions, finely chopped
- 1/4 cup kimchi, finely chopped
- 1/2 teaspoon garlic powder
- 1/2 teaspoon black pepper
- 1/2 teaspoon sesame oil
- 1/2 cup all-purpose flour
- 2 large eggs, beaten
- 1 cup breadcrumbs (panko preferred)
- Vegetable oil, for frying
- Optional: dipping sauce (soy sauce, gochujang, or sweet chili sauce)
Preparing the Filling
1. In a large mixing bowl, combine the cooked short-grain rice, chopped bulgogi beef, shredded mozzarella cheese, finely chopped green onions, and kimchi. 2. Add the garlic powder, black pepper, and sesame oil to the mixture. 3. Mix everything together until well combined. I like to use my hands for this part; it helps to ensure that all the ingredients are evenly distributed. 4. Once mixed, cover the bowl with plastic wrap and place it in the refrigerator for about 30 minutes. This will help the flavors meld together and make the mixture easier to handle when forming the arancini.Forming the Arancini
5. After the filling has chilled, take it out of the refrigerator. 6. With clean hands, scoop about 2 tablespoons of the filling mixture and roll it into a ball. 7. Repeat this process until all the filling is used up. You should end up with about 12-15 arancini balls, depending on the size you prefer. 8. Place the formed arancini on a baking sheet lined with parchment paper. This will prevent them from sticking and make it easier to transfer them to the frying pan later.Breading the Arancini
9. Set up a breading station with three shallow bowls. – In the first bowl, add the all-purpose flour. – In the second bowl, pour in the beaten eggs. – In the third bowl, place the breadcrumbs. 10. Take each arancini ball and roll it in the flour, making sure its fully coated. Shake off any excess flour. 11. Next, dip the floured ball into the beaten eggs, ensuring its completely covered. 12. Finally, roll the ball in the breadcrumbs, pressing gently to ensure the breadcrumbs adhere well. 13. Place the breaded arancini back on the baking sheet. Repeat this process for all the arancini.Cooking the Arancini
14. In a large, deep skillet or pot, pour enough vegetable oil to cover the bottom by about 1 inch. Heat the oil over medium heat until it reaches 350°F (175°C). You can test the oil by dropping in a small piece of bread; if it sizzles and bubbles, its ready. 15. Carefully add a few arancini to the hot oil, making sure not to overcrowd the pan. Fry them in batches if necessary. 16. Cook the arancini for about 3-4 minutes on each side, or until they are golden brown and crispy. Use a slotted spoon to turn them gently, ensuring they cook evenly. 17. Once they are cooked, remove the arancini from the oil and place them on a plate lined with paper towels to drain any excess oil.Serving the Arancini
18. Once all the arancini are cooked, arrange them on a serving platter. 19. If you like, you can drizzle some dipping sauce over the top or serve it on the side. I love using a mix of soy sauce and gochujang for a spicy kick, but sweet chili sauce works wonderfully too! 20. Garnish with additional chopped green onions or sesame seeds for a pop of color and flavor.Enjoying Your Bulgogi Arancini
21. Serve the bulgogi arancini warm, and watch as your friends and family dive in! 22. These little bites are perfect for parties, game nights, or even as a fun appetizer for dinner. 23. Dont forget to share your experience! Id love to hear how your bulg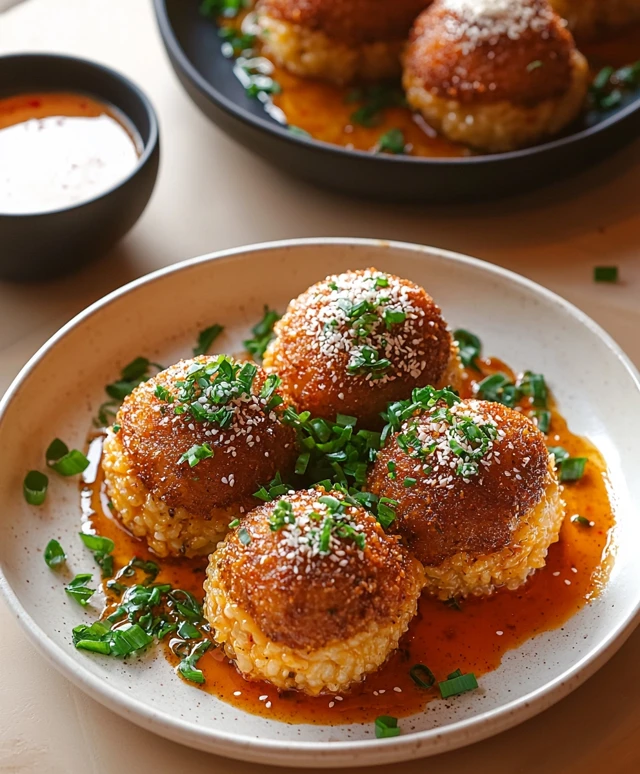
Conclusion:
In conclusion, this Bulgogi Arancini recipe is an absolute must-try for anyone looking to elevate their culinary game. The fusion of Korean flavors with the classic Italian dish creates a unique and delicious experience that is sure to impress your family and friends. The crispy exterior and savory, tender filling make each bite a delightful surprise, and the combination of textures is simply irresistible. For serving suggestions, I recommend pairing these delectable arancini with a side of spicy gochujang aioli or a refreshing cucumber salad to balance the richness. You can also experiment with variations by adding different fillings, such as cheese or vegetables, to suit your taste preferences. The beauty of this recipe lies in its versatility, allowing you to make it your own! I encourage you to give this Bulgogi Arancini recipe a try and share your experience with me. Whether youre hosting a dinner party or just looking for a fun weekend cooking project, I promise you wont be disappointed. Dont forget to snap a few photos and tag me on social mediaI cant wait to see how your creations turn out! Happy cooking! Print
Bulgogi Arancini: A Delicious Fusion of Korean and Italian Flavors
- Total Time: 45 minutes
- Yield: 4 servings 1x
Description
Bulgogi Arancini are delicious Italian rice balls filled with savory Korean bulgogi beef, coated in breadcrumbs, and fried to golden perfection. These fusion treats offer a unique blend of flavors, combining the rich, marinated taste of bulgogi with the crispy, cheesy goodness of traditional arancini. Perfect as an appetizer or snack, they are sure to impress at any gathering.
Ingredients
- 500 g Rinderhackfleisch
- 2 EL Sojasauce
- 1 EL Sesamöl
- 2 EL Zucker
- 3 Zehen Knoblauch, gehackt
- 1 Stück Ingwer, gerieben
- 1 Frühlingszwiebel, gehackt
- 300 g Risottoreis
- 1 l Gemüsebrühe
- 2 Eier
- 100 g Paniermehl
- Öl zum Frittieren
Instructions
- Cook the bulgogi beef according to your recipe or package instructions.
- Prepare the risotto according to your preferred method, allowing it to cool slightly.
- Once the risotto is cool, mix in the cooked bulgogi beef.
- Form the risotto mixture into balls, about the size of a golf ball.
- Roll each ball in flour, then dip in beaten egg, and finally coat with breadcrumbs.
- Heat oil in a deep fryer or large pot to 350°F (175°C).
- Fry the arancini in batches until golden brown and crispy, about 3-4 minutes.
- Remove from oil and drain on paper towels.
- Serve hot with your choice of dipping sauce.
Notes
- Der Teig darf während der Ruhezeit nicht bewegt werden.
- Für ein intensiveres Knoblaucharoma können mehr Zehen verwendet werden.
- Prep Time: 30 minutes
- Cook Time: 30 minutes


Leave a Comment