
Apple pie is more than just a dessert; its a warm embrace of nostalgia and comfort that brings people together. This classic dish has roots that trace back to the early settlers of America, who adapted their recipes from European traditions, creating a beloved staple that has stood the test of time. The sweet, spiced aroma of apple pie baking in the oven is enough to evoke memories of family gatherings and festive celebrations.
What I love most about apple pie is its perfect balance of flavors and texturesthe tender, flaky crust enveloping tender, cinnamon-spiced apples creates a delightful experience with every bite. Whether served warm with a scoop of vanilla ice cream or enjoyed on its own, apple pie is a crowd-pleaser that never fails to impress. Join me as we explore this timeless recipe that continues to hold a special place in our hearts and kitchens.

Ingredients:
- For the Pie Crust:
- 2 ½ cups all-purpose flour
- 1 teaspoon salt
- 1 tablespoon granulated sugar
- 1 cup unsalted butter, chilled and diced
- 6 to 8 tablespoons ice water
- For the Apple Filling:
- 6 to 8 medium-sized apples (a mix of Granny Smith and Honeycrisp works well)
- ¾ cup granulated sugar
- 2 tablespoons all-purpose flour
- 1 teaspoon ground cinnamon
- ¼ teaspoon ground nutmeg
- 1 tablespoon lemon juice
- 1 tablespoon unsalted butter, to dot
- For Assembly:
- 1 egg, beaten (for egg wash)
- 1 tablespoon sugar (for sprinkling on top)
Preparing the Pie Crust
Making the pie crust is the first step, and I find its best to do this ahead of time so it can chill while I prepare the filling.
- In a large mixing bowl, combine the flour, salt, and sugar. Whisk them together until well mixed.
- Add the chilled, diced butter to the flour mixture. Using a pastry cutter or your fingers, work the butter into the flour until the mixture resembles coarse crumbs. You want to see small pea-sized pieces of butter throughout.
- Gradually add the ice water, one tablespoon at a time, mixing gently with a fork after each addition. Stop adding water when the dough begins to come together but is not sticky.
- Turn the dough out onto a lightly floured surface and divide it into two equal portions. Shape each portion into a disk and wrap them in plastic wrap. Refrigerate for at least 1 hour, or overnight if you have the time.
Preparing the Apple Filling
While the crust is chilling, I like to prepare the apple filling. The combination of sweet and tart apples gives the pie a wonderful flavor.
- Peel, core, and slice the apples into thin wedges. I usually aim for about ¼-inch thick slices to ensure they cook evenly.
- In a large mixing bowl, combine the sliced apples with the granulated sugar, flour, cinnamon, nutmeg, and lemon juice. Toss everything together until the apples are well coated. Let the mixture sit for about 15-20 minutes to allow the flavors to meld and the apples to release some of their juices.
Rolling Out the Dough
Once the dough has chilled, its time to roll it out. This part is always exciting for me because it means were getting closer to enjoying that delicious pie!
- Preheat your oven to 425°F (220°C).
- Take one disk of dough out of the refrigerator and let it sit at room temperature for about 5 minutes. This will make it easier to roll out.
- On a lightly floured surface, roll out the dough into a circle about 12 inches in diameter. Make sure to keep the thickness even, about ? inch thick.
- Carefully transfer the rolled-out dough to a 9-inch pie pan. Gently press it into the bottom and sides of the pan, being careful not to stretch the dough.
- Trim any excess dough hanging over the edges, leaving about 1 inch of overhang. This will be folded over the filling later.
- Repeat the rolling process with the second disk of dough, but set it aside for the top crust.
Assembling the Pie
Now comes the fun partassembling the pie! This is where all the hard work pays off.
- Pour the apple filling into the prepared bottom crust, making sure to distribute the apples evenly. Dot the filling with small pieces of butter.
- Take the second rolled-out dough and place it over the apple filling. You can either cut slits in the top crust
Conclusion:
In summary, this apple pie recipe is an absolute must-try for anyone who loves the comforting flavors of home-baked goodness. The combination of sweet, tart apples with a perfectly flaky crust creates a dessert that is not only delicious but also evokes a sense of nostalgia. Whether youre serving it warm with a scoop of vanilla ice cream or enjoying it cold with a dollop of whipped cream, this apple pie is sure to impress your family and friends. Feel free to get creative with your serving suggestions! You can add a sprinkle of cinnamon or nutmeg for an extra layer of flavor, or even mix in some caramel sauce for a decadent twist. If youre feeling adventurous, try using a mix of different apple varieties to enhance the taste and texture of your pie. You could also experiment with a crumb topping instead of a traditional crust for a delightful crunch. I encourage you to give this apple pie recipe a try and share your experience with me! Id love to hear how it turned out for you and any variations you decided to make. Remember, baking is all about having fun and making it your own. So roll up your sleeves, gather your ingredients, and lets create some delicious memories together with this classic apple pie! Print
Apple Pie: The Ultimate Guide to Making the Perfect Dessert
- Total Time: 110 minutes
- Yield: 1 pie (serves 8) 1x
Description
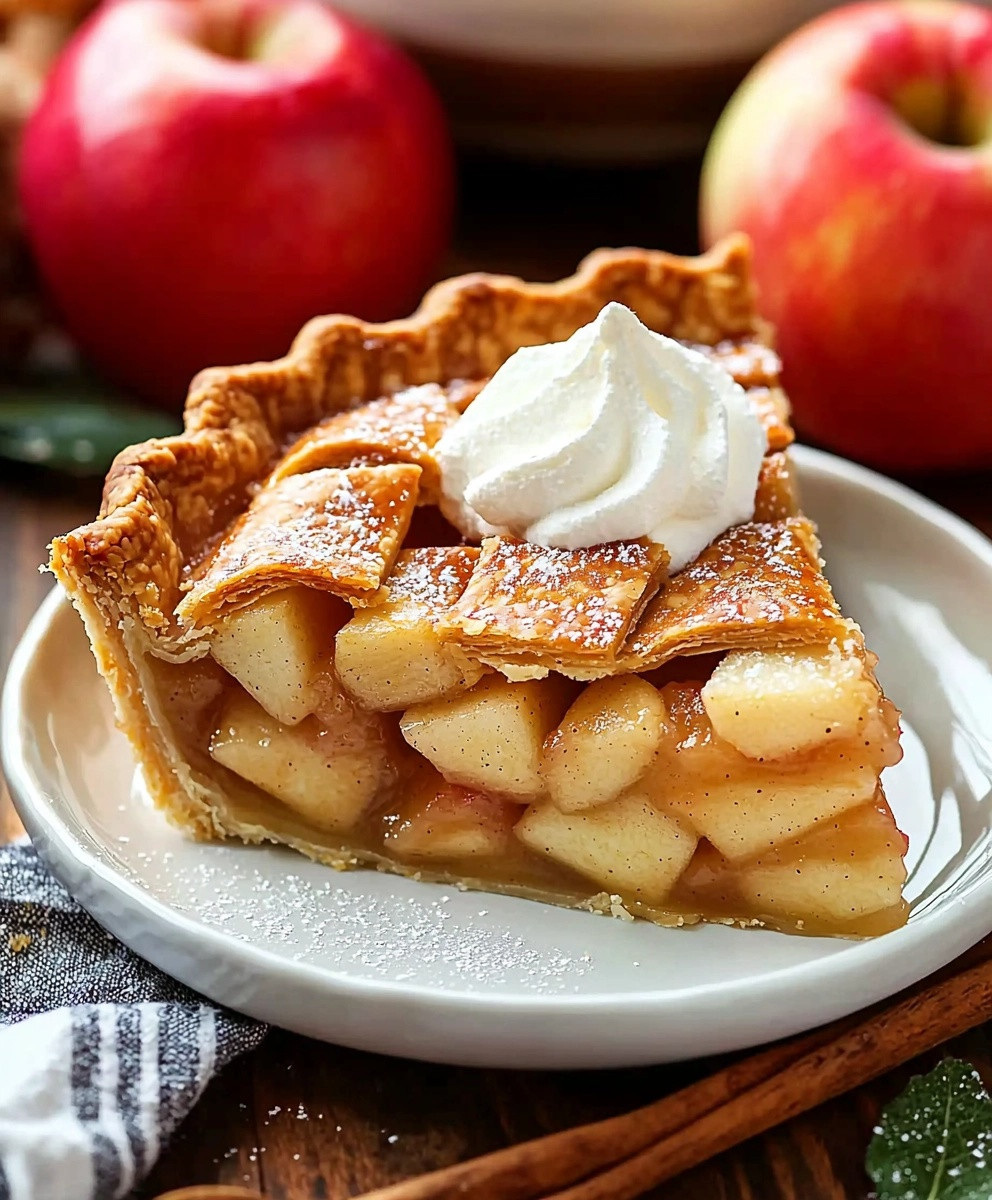
This classic apple pie features a flaky homemade crust filled with a delightful mix of sweet and tart apples, spiced with cinnamon and nutmeg. It’s a comforting dessert perfect for any occasion, best served warm with a scoop of vanilla ice cream.
Ingredients
Scale“`html
- 2 ½ cups all-purpose flour
- 1 teaspoon salt
- 1 tablespoon granulated sugar
- 1 cup unsalted butter, chilled and diced
- 6 to 8 tablespoons ice water
- 6 to 8 medium-sized apples (a mix of Granny Smith and Honeycrisp works well)
- ¾ cup granulated sugar
- 2 tablespoons all-purpose flour
- 1 teaspoon ground cinnamon
- ¼ teaspoon ground nutmeg
- 1 tablespoon lemon juice
- 1 tablespoon unsalted butter, to dot
- 1 egg, beaten (for egg wash)
- 1 tablespoon sugar (for sprinkling on top)
“`
Instructions
- In einer großen Schüssel Mehl, Salz und Hefe vermengen.
- Wasser hinzufügen und zu einem Teig verrühren.
- Knoblauch und Olivenöl unterrühren.
- Teig 12 Stunden ruhen lassen.
- Den Teig auf einer bemehlten Fläche ausrollen.
- Die Füllung gleichmäßig auf den Teig geben.
- Den Teig über die Füllung klappen und die Ränder gut andrücken.
- Die Oberseite des Teigs mit einem scharfen Messer einritzen.
- Im vorgeheizten Ofen 45-50 Minuten backen, bis der Teig goldbraun ist.
- Nach dem Backen den Kuchen aus dem Ofen nehmen und mindestens 2 Stunden abkühlen lassen, bevor er geschnitten wird.
Notes
“`html
- For the best flavor, use a mix of sweet and tart apples.
- You can also add a tablespoon of vanilla extract to the apple filling for an extra layer of flavor.
- Serve warm with a scoop of vanilla ice cream for a delightful dessert!
“`
- Prep Time: 60 minutes
- Cook Time: 50 minutes


Leave a Comment