
Crispy rice: just the name conjures up images of delightful textures and savory flavors, doesn’t it? Imagine sinking your teeth into a perfectly golden, crunchy exterior that gives way to a soft, chewy interior. This isn’t just rice; it’s an experience! I’m thrilled to share my foolproof method for achieving the ultimate crispy rice, a dish that’s surprisingly simple to make yet delivers a restaurant-quality result every time.
While variations of crispy rice exist across many cultures, the version I’m sharing today draws inspiration from Persian tahdig. Tahdig, meaning “bottom of the pot,” is the prized crispy layer of rice that forms at the bottom of the pot during cooking. It’s a testament to resourcefulness and a celebration of texture, transforming what might otherwise be discarded into the most coveted part of the meal.
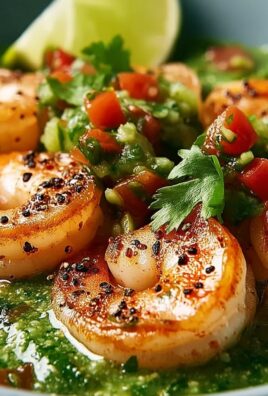
People adore crispy rice for its incredible textural contrast and its versatility. It’s fantastic as a side dish, adding a satisfying crunch to any meal. It can also be elevated into a main course with the addition of flavorful toppings like avocado, spicy tuna, or even a simple fried egg. The possibilities are endless! Plus, it’s a fantastic way to use up leftover cooked rice, making it both delicious and economical. Get ready to transform your ordinary rice into something extraordinary!

Ingredients:
- 2 cups cooked rice, preferably day-old and slightly dried out (long-grain or medium-grain works best)
- 1/4 cup vegetable oil, plus more for frying
- 1 small onion, finely chopped
- 2 cloves garlic, minced
- 1 inch ginger, grated
- 1 red bell pepper, finely diced
- 1 green bell pepper, finely diced
- 1/2 cup frozen peas
- 1/4 cup soy sauce
- 2 tablespoons oyster sauce (optional, but adds great flavor)
- 1 tablespoon sesame oil
- 1 teaspoon sugar
- 1/2 teaspoon white pepper
- 2 large eggs, lightly beaten
- Optional toppings: chopped green onions, sesame seeds, sriracha, fried egg
Preparing the Rice:
Okay, let’s get started! The key to truly crispy rice is using rice that’s a little bit dry. Day-old rice is perfect because it has had time to lose some moisture. If you’re using freshly cooked rice, spread it out on a baking sheet and let it air dry for a couple of hours. This will help it crisp up beautifully in the pan.
Cooking the Aromatics and Vegetables:
- Heat the Oil: In a large wok or skillet (cast iron works great too!), heat 1/4 cup of vegetable oil over medium-high heat. You want the oil to be shimmering but not smoking.
- Sauté the Aromatics: Add the chopped onion and cook until softened and translucent, about 3-5 minutes. Stir frequently to prevent burning.
- Add Garlic and Ginger: Add the minced garlic and grated ginger to the pan. Cook for another minute, until fragrant. Be careful not to burn the garlic, as it can become bitter. The aroma at this stage is just amazing!
- Incorporate the Bell Peppers: Add the diced red and green bell peppers to the wok. Cook for about 3-5 minutes, until they are slightly softened but still have a bit of a bite. We want them to retain some texture.
- Add the Peas: Toss in the frozen peas and cook for another 2-3 minutes, until they are heated through.
- Push Vegetables to the Side: Now, push all the cooked vegetables to one side of the wok or skillet, creating an empty space in the center.
Scrambling the Eggs:
- Pour in the Eggs: Pour the lightly beaten eggs into the empty space in the center of the wok.
- Scramble the Eggs: Let the eggs cook for a few seconds, then use a spatula to scramble them until they are cooked through but still slightly soft.
- Combine with Vegetables: Once the eggs are cooked, mix them in with the vegetables.
Frying the Rice:
- Add the Rice: Add the cooked rice to the wok. Break up any large clumps of rice with your hands or a spatula. You want the rice to be evenly distributed in the pan.
- Stir-Fry the Rice: Stir-fry the rice constantly over medium-high heat for about 5-7 minutes. This is where the magic happens! You want the rice to start to dry out and become slightly crispy. Keep stirring to prevent it from sticking to the pan.
- Add the Sauces: In a small bowl, whisk together the soy sauce, oyster sauce (if using), sesame oil, sugar, and white pepper.
- Pour in the Sauce: Pour the sauce mixture over the rice and stir-fry for another 2-3 minutes, until the rice is evenly coated and the sauce has been absorbed.
- Crisping the Rice (The Key Step!): Now, here’s the secret to getting that amazing crispy texture. Spread the rice out in an even layer in the wok. Press down gently with a spatula to compact it slightly. Let the rice sit undisturbed for 2-3 minutes, allowing the bottom layer to crisp up.
- Flip and Repeat: Use a spatula to flip sections of the rice over. You might need to add a little more oil to the pan if it seems dry. Repeat the process of pressing down and letting the rice crisp up for another 2-3 minutes. Continue flipping and crisping the rice until it reaches your desired level of crispiness. I like mine really crispy, so I usually spend a good 5-7 minutes on this step.
Serving:
- Remove from Heat: Once the rice is crispy to your liking, remove the wok from the heat.
- Serve Immediately: Serve the crispy rice immediately.
- Add Toppings (Optional): Garnish with your favorite toppings, such as chopped green onions, sesame seeds, sriracha, or a fried egg. A fried egg on top is my personal favorite!
Tips for Extra Crispy Rice:
- Use a Hot Pan: Make sure your wok or skillet is nice and hot before adding the rice. This will help it crisp up faster.
- Don’t Overcrowd the Pan: If you’re making a large batch of rice, it’s best to cook it in batches to avoid overcrowding the pan. Overcrowding will lower the temperature of the pan and prevent the rice from crisping up properly.
- Use High Heat: While you don’t want to burn the rice, using medium-high heat is essential for achieving that crispy texture.
- Be Patient: Crisping the rice takes time, so be patient and don’t rush the process. The longer you let it sit undisturbed, the crispier it will become.
- Experiment with Flavors: Feel free to experiment with different vegetables, sauces, and toppings to create your own unique version of crispy rice. You can add shrimp, chicken, tofu, or any other protein you like.
Variations:
- Spicy Crispy Rice: Add a tablespoon of chili garlic sauce or sriracha to the sauce mixture for a spicy kick.
- Vegetarian Crispy Rice: Omit the oyster sauce and use a vegetarian oyster sauce substitute or simply add a little more soy sauce.
- Kimchi Crispy Rice: Add 1/2 cup of chopped kimchi to the wok along with the vegetables for a flavorful and spicy twist.
- Pineapple Crispy Rice: Add 1/2 cup of diced pineapple to the wok along with the vegetables for a sweet and savory flavor.
Storing Leftovers:
Leftover crispy rice can be stored in an airtight container in the refrigerator for up to 3 days. To reheat, spread the rice out on a baking sheet and bake at 350°F (175°C) for 10-15 minutes, or until heated through and crispy again. You can also reheat it in a skillet over medium heat, but it might not be as crispy as the first time.
Enjoy your delicious and crispy rice! I hope you have as much fun making it as I do. Let me know in the comments if you have any questions or if you try any of the variations!

Conclusion:
So, there you have it! This recipe for crispy rice is more than just a dish; it’s an experience. From the satisfying crunch to the customizable toppings, it’s a guaranteed crowd-pleaser and a fantastic way to elevate your weeknight meals or impress guests at your next gathering. I truly believe this will become a staple in your kitchen, just as it has in mine.
Why is this a must-try? Well, beyond the sheer deliciousness, it’s incredibly versatile. You can adapt it to suit any dietary needs or preferences. Vegetarian? Load it up with roasted vegetables and a vibrant tahini dressing. Craving something heartier? Add grilled chicken, shrimp, or even some crumbled sausage. The possibilities are truly endless! Plus, it’s a fantastic way to use up leftover rice, minimizing food waste and maximizing flavor.
Think of this crispy rice as a blank canvas for your culinary creativity. Don’t be afraid to experiment with different flavor combinations. For a spicier kick, try adding a drizzle of sriracha mayo or a sprinkle of chili flakes. For a more refreshing twist, incorporate some fresh herbs like cilantro, mint, or basil.
Serving Suggestions and Variations:
* As an Appetizer: Cut the crispy rice into smaller squares and serve as bite-sized appetizers with a variety of dipping sauces. Think sweet chili sauce, peanut sauce, or even a simple soy sauce with sesame oil.
* As a Main Course: Top the crispy rice with your favorite protein and vegetables for a complete and satisfying meal. Consider adding a fried egg for extra richness.
* As a Side Dish: Serve alongside grilled meats or fish for a textural contrast. The crispy rice adds a delightful crunch to any plate.
* Sweet Variation: Believe it or not, crispy rice can even be transformed into a dessert! Try drizzling it with melted chocolate and sprinkling it with chopped nuts or shredded coconut.
I’m so excited for you to try this recipe and discover the magic of crispy rice for yourself. It’s a dish that’s both comforting and exciting, familiar yet unique. It’s the kind of recipe that you’ll find yourself making again and again, each time adding your own personal touch.
I’m confident that you’ll love this recipe as much as I do. But don’t just take my word for it! Get in the kitchen, give it a try, and let me know what you think. I’m eager to hear about your experiences, your variations, and your favorite toppings. Share your photos and stories in the comments below. What creative combinations did you come up with? What did your family and friends think? I can’t wait to see what you create! Happy cooking, and enjoy your delicious, homemade crispy rice! Remember to tag me in your social media posts so I can see your creations! I’m always looking for new inspiration, and your feedback is invaluable. Let’s build a community of crispy rice enthusiasts!
Crispy Rice: The Ultimate Guide to Making Perfect Crispy Rice
Turn day-old rice into a flavorful meal with this easy recipe. Packed with vegetables, aromatics, and a delicious sauce, this dish is perfect for a quick weeknight dinner.
Ingredients
- 2 cups cooked rice, preferably day-old and slightly dried out (long-grain or medium-grain works best)
- 1/4 cup vegetable oil, plus more for frying
- 1 small onion, finely chopped
- 2 cloves garlic, minced
- 1 inch ginger, grated
- 1 red bell pepper, finely diced
- 1 green bell pepper, finely diced
- 1/2 cup frozen peas
- 1/4 cup soy sauce
- 2 tablespoons oyster sauce (optional, but adds great flavor)
- 1 tablespoon sesame oil
- 1 teaspoon sugar
- 1/2 teaspoon white pepper
- 2 large eggs, lightly beaten
- Optional toppings: chopped green onions, sesame seeds, sriracha, fried egg
Instructions
- Prepare the Rice: If using freshly cooked rice, spread it out on a baking sheet and let it air dry for a couple of hours.
- Heat the Oil: In a large wok or skillet, heat 1/4 cup of vegetable oil over medium-high heat.
- Sauté the Aromatics: Add the chopped onion and cook until softened and translucent, about 3-5 minutes.
- Add Garlic and Ginger: Add the minced garlic and grated ginger to the pan. Cook for another minute, until fragrant.
- Incorporate the Bell Peppers: Add the diced red and green bell peppers to the wok. Cook for about 3-5 minutes, until they are slightly softened.
- Add the Peas: Toss in the frozen peas and cook for another 2-3 minutes, until they are heated through.
- Push Vegetables to the Side: Push all the cooked vegetables to one side of the wok or skillet, creating an empty space in the center.
- Pour in the Eggs: Pour the lightly beaten eggs into the empty space in the center of the wok.
- Scramble the Eggs: Let the eggs cook for a few seconds, then use a spatula to scramble them until they are cooked through but still slightly soft.
- Combine with Vegetables: Once the eggs are cooked, mix them in with the vegetables.
- Add the Rice: Add the cooked rice to the wok. Break up any large clumps of rice with your hands or a spatula.
- Stir-Fry the Rice: Stir-fry the rice constantly over medium-high heat for about 5-7 minutes, until it starts to dry out and become slightly crispy.
- Add the Sauces: In a small bowl, whisk together the soy sauce, oyster sauce (if using), sesame oil, sugar, and white pepper.
- Pour in the Sauce: Pour the sauce mixture over the rice and stir-fry for another 2-3 minutes, until the rice is evenly coated and the sauce has been absorbed.
- Crisping the Rice: Spread the rice out in an even layer in the wok. Press down gently with a spatula to compact it slightly. Let the rice sit undisturbed for 2-3 minutes, allowing the bottom layer to crisp up.
- Flip and Repeat: Use a spatula to flip sections of the rice over. Add a little more oil to the pan if it seems dry. Repeat the process of pressing down and letting the rice crisp up for another 2-3 minutes. Continue flipping and crisping the rice until it reaches your desired level of crispiness.
- Remove from Heat: Once the rice is crispy to your liking, remove the wok from the heat.
- Serve Immediately: Serve the crispy rice immediately.
- Add Toppings (Optional): Garnish with your favorite toppings, such as chopped green onions, sesame seeds, sriracha, or a fried egg.
Notes
- Day-old rice is best for achieving a crispy texture. If using freshly cooked rice, let it air dry for a couple of hours.
- Use a hot wok or skillet to help the rice crisp up faster.
- Don’t overcrowd the pan; cook in batches if necessary.
- Be patient when crisping the rice; the longer you let it sit undisturbed, the crispier it will become.
- Experiment with different vegetables, sauces, and toppings to create your own unique version.
- For a spicy kick, add chili garlic sauce or sriracha to the sauce mixture.
- For vegetarian crispy rice, omit the oyster sauce and use a vegetarian oyster sauce substitute or simply add a little more soy sauce.
- Leftover crispy rice can be stored in an airtight container in the refrigerator for up to 3 days. Reheat in the oven or skillet until heated through and crispy again.


Leave a Comment