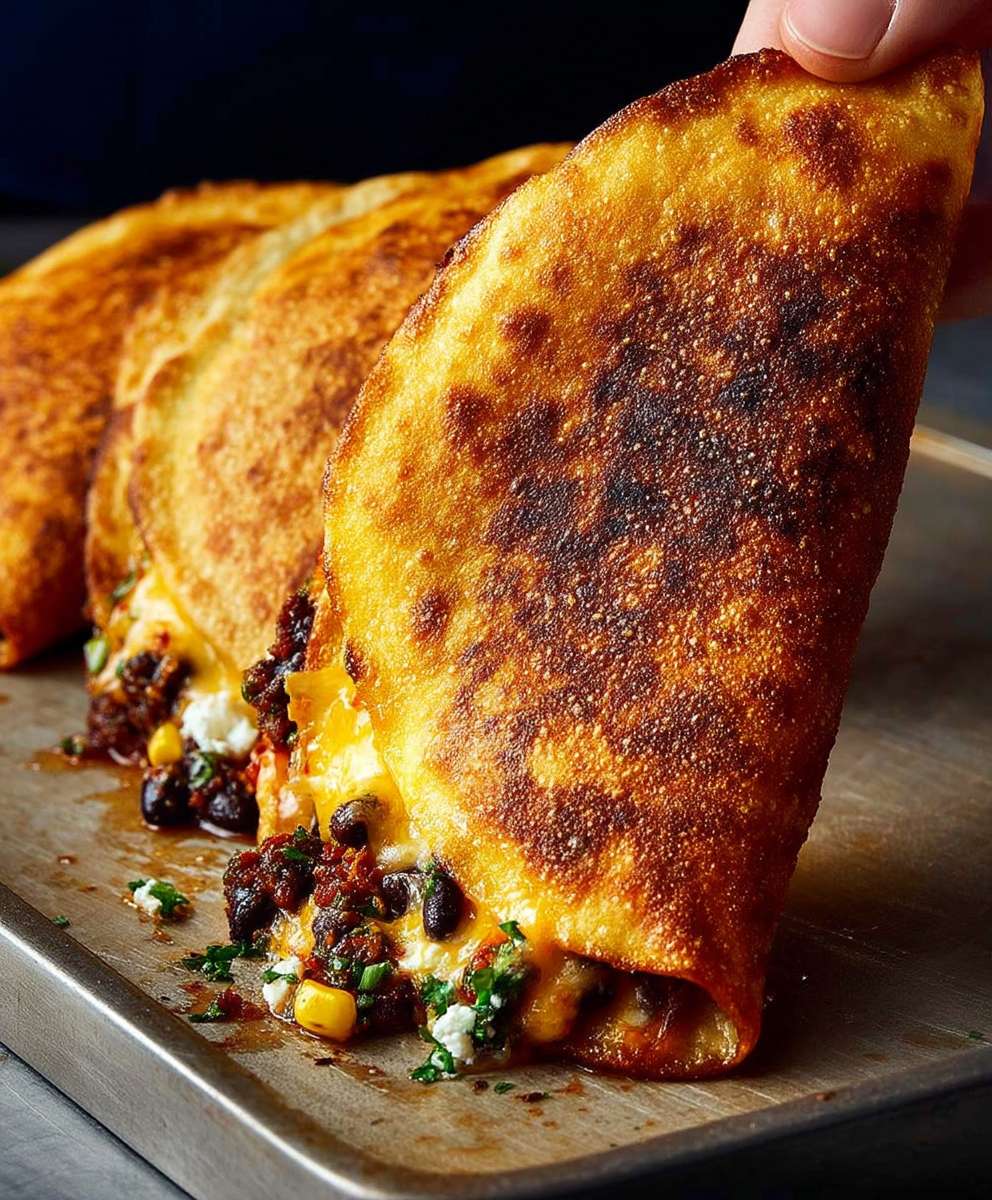
Oven baked quesadillas: the ultimate crowd-pleaser, ready in minutes, and endlessly customizable! Forget standing over a hot stove flipping individual quesadillas this method is a game-changer for busy weeknights or when you’re feeding a hungry group. Imagine perfectly melted cheese, your favorite fillings bubbling with flavor, all nestled between crispy, golden tortillas. Are you ready to ditch the skillet and embrace the ease of oven-baked perfection?
Quesadillas, a staple in Mexican cuisine, have a rich history rooted in simple, satisfying comfort food. While their exact origins are debated, they’ve been enjoyed for centuries, evolving from humble street food to a beloved dish enjoyed worldwide. The beauty of the quesadilla lies in its versatility. You can fill it with anything your heart desires, from classic cheese and beans to grilled vegetables, shredded chicken, or even leftover chili.
People adore oven baked quesadillas for so many reasons. The taste is undeniably delicious the combination of warm, melted cheese and savory fillings is simply irresistible. The texture is also a winner, with the crispy tortillas providing a satisfying crunch. But perhaps the biggest draw is the convenience. This oven-baked method allows you to make multiple quesadillas at once, saving you time and effort. Plus, clean-up is a breeze! So, gather your ingredients, preheat your oven, and get ready to experience the magic of oven-baked quesadillas. You won’t be disappointed!
Ingredients:
- 1 tablespoon olive oil
- 1 medium onion, chopped
- 1 bell pepper (any color), chopped
- 1 pound ground beef (or ground turkey/chicken)
- 1 packet taco seasoning
- 1/2 cup water
- 1 (15 ounce) can black beans, rinsed and drained
- 1 (15 ounce) can corn, drained
- 2 cups shredded cheddar cheese (or Mexican blend)
- 1 cup shredded Monterey Jack cheese
- 12 large flour tortillas
- Optional toppings: sour cream, salsa, guacamole, chopped cilantro
Preparing the Filling:
Okay, let’s get started with the heart of our oven-baked quesadillas the delicious filling! This is where we build all the flavor, so pay attention to the details. I promise, it’s super easy!
- Sauté the Vegetables: First, grab a large skillet and heat the olive oil over medium heat. Add the chopped onion and bell pepper. Cook them until they’re softened and slightly translucent, which should take about 5-7 minutes. Stir them occasionally to prevent burning. We want them nice and tender, not charred.
- Brown the Ground Beef: Now, add the ground beef (or your choice of ground meat) to the skillet. Break it up with a spoon or spatula as it cooks. Cook until the meat is browned all over, making sure there are no pink bits left. Drain off any excess grease. Nobody wants greasy quesadillas!
- Season with Taco Seasoning: Sprinkle the taco seasoning over the browned beef. Pour in the water. Stir everything together well, ensuring the seasoning is evenly distributed. Bring the mixture to a simmer and let it cook for about 5 minutes, allowing the flavors to meld together beautifully. The water will help the seasoning coat the meat evenly and prevent it from being too dry.
- Add Beans and Corn: Stir in the rinsed and drained black beans and corn. Cook for another 2-3 minutes, just until everything is heated through. Give it a good stir to combine all the ingredients. At this point, taste the filling and adjust the seasoning if needed. Maybe a pinch of salt or a dash of chili powder? It’s all up to your preference!
- Remove from Heat: Once the filling is heated through and the flavors are combined, remove the skillet from the heat. Set it aside while we prepare the tortillas.
Assembling the Quesadillas:
Now comes the fun part assembling our quesadillas! This is where we transform simple tortillas and filling into cheesy, baked goodness. Get ready to get your hands a little messy!
- Preheat the Oven: Preheat your oven to 375°F (190°C). This is crucial for getting that perfect golden-brown, crispy tortilla.
- Prepare the Baking Sheet: Lightly grease a large baking sheet. This will prevent the quesadillas from sticking and ensure they release easily after baking. You can use cooking spray or a little bit of olive oil.
- Assemble the First Layer: Lay out a tortilla on a flat surface. Sprinkle about 1/4 cup of shredded cheddar cheese (or Mexican blend) evenly over half of the tortilla. This layer of cheese will act as a “glue” to hold the filling in place.
- Add the Filling: Spoon about 1/2 cup of the ground beef mixture over the cheese on the same half of the tortilla. Spread it out evenly, leaving a little space around the edges. We don’t want the filling to spill out when we fold it.
- Add the Second Layer of Cheese: Sprinkle about 1/4 cup of shredded Monterey Jack cheese over the filling. This cheese will add a nice, melty texture and a slightly different flavor profile.
- Fold the Tortilla: Carefully fold the other half of the tortilla over the filling, creating a half-moon shape. Press down gently to seal the edges.
- Repeat: Repeat steps 3-6 with the remaining tortillas and filling. You should be able to fit several quesadillas on the baking sheet at a time, depending on the size of your baking sheet.
- Arrange on Baking Sheet: Place the assembled quesadillas on the prepared baking sheet, making sure they are not overlapping.
Baking the Quesadillas:
Almost there! Now it’s time to bake our quesadillas to golden-brown perfection. The oven will work its magic, melting the cheese and crisping up the tortillas. The aroma will be irresistible!
- Bake: Bake the quesadillas in the preheated oven for 10-12 minutes, or until the tortillas are golden brown and the cheese is melted and bubbly. Keep a close eye on them, as baking times may vary depending on your oven.
- Flip (Optional): For extra crispy tortillas, you can flip the quesadillas halfway through baking. This will ensure both sides are evenly browned.
- Remove from Oven: Once the quesadillas are golden brown and the cheese is melted, remove them from the oven.
- Let Cool Slightly: Let the quesadillas cool for a few minutes on the baking sheet before cutting them. This will prevent the filling from spilling out and make them easier to handle.
Serving and Enjoying:
The moment we’ve all been waiting for! It’s time to serve and enjoy our delicious oven-baked quesadillas. Get ready for a flavor explosion!
- Cut into Wedges: Using a pizza cutter or a sharp knife, cut each quesadilla into wedges. Usually, I cut them into thirds.
- Serve with Toppings: Serve the quesadillas immediately with your favorite toppings. Sour cream, salsa, guacamole, and chopped cilantro are all excellent choices. Feel free to get creative and add your own personal touch!
- Enjoy! Dig in and enjoy your homemade oven-baked quesadillas! They’re perfect for a quick and easy weeknight meal, a party appetizer, or a fun snack.
Tips and Variations:
- Spice it up: Add a pinch of cayenne pepper or a few dashes of hot sauce to the ground beef mixture for a spicier kick.
- Vegetarian option: Omit the ground beef and add more beans, corn, or other vegetables like zucchini or mushrooms.
- Different cheeses: Experiment with different types of cheese, such as pepper jack, Colby jack, or even a little bit of cream cheese for extra creaminess.
- Add some veggies: Throw in some chopped tomatoes, green onions, or jalapeños for added flavor and texture.
- Make it ahead: You can assemble the quesadillas ahead of time and store them in the refrigerator until you’re ready to bake them. Just add a few extra minutes to the baking time.
- Freezing: These quesadillas freeze well. Assemble them, bake them, let them cool completely, then wrap them individually in plastic wrap and place them in a freezer bag. To reheat, bake them in a preheated oven at 350°F (175°C) until heated through.
Enjoy your delicious and easy oven-baked quesadillas! I hope you love them as much as I do!

Conclusion:
So, there you have it! This oven-baked quesadilla recipe is truly a game-changer, and I wholeheartedly believe it’s a must-try for anyone looking for a quick, easy, and incredibly satisfying meal. Forget standing over a hot stove flipping individual quesadillas this method lets you bake a whole batch at once, making it perfect for weeknight dinners, parties, or even just a fun weekend lunch.
But why is it so special? Well, beyond the sheer convenience, the oven baking method creates a beautifully crispy tortilla exterior while ensuring the cheese inside is perfectly melted and gooey. No more unevenly cooked quesadillas with cold spots! Plus, it’s incredibly versatile. You can customize the fillings to your heart’s content, catering to everyone’s tastes and dietary needs.
Think beyond the basic cheese and chicken! How about adding some seasoned black beans, corn, and bell peppers for a vegetarian fiesta? Or perhaps some shredded pork, caramelized onions, and a smoky chipotle sauce for a more decadent treat? The possibilities are endless!
Serving Suggestions and Variations:
To elevate your oven-baked quesadilla experience, consider these serving suggestions:
* Dips and Toppings: A dollop of sour cream or Greek yogurt is always a welcome addition. Fresh salsa, guacamole, or pico de gallo will add a burst of freshness and flavor. Don’t forget a side of your favorite hot sauce for those who like a little kick!
* Sides: A simple side salad with a light vinaigrette is a great way to balance the richness of the quesadillas. Alternatively, some Mexican rice or refried beans would create a more substantial meal.
* Breakfast Quesadillas: Transform this recipe into a breakfast sensation by adding scrambled eggs, sausage or bacon, and some cheddar cheese. Serve with a side of salsa verde for a zesty morning treat.
* Dessert Quesadillas: Get creative and try a sweet version! Fill the tortillas with Nutella, sliced bananas, and a sprinkle of cinnamon sugar. Bake until golden brown and serve with a scoop of vanilla ice cream.
* Spice it up: Add some diced jalapeños or a pinch of cayenne pepper to your filling for an extra layer of heat.
I’m genuinely excited for you to try this recipe and discover just how easy and delicious it is to make oven-baked quesadillas. It’s a recipe that I find myself turning to time and time again, and I’m confident that it will become a staple in your kitchen as well.
Now it’s your turn!
Don’t be afraid to experiment with different fillings and toppings to create your own signature quesadilla masterpiece. I’m so eager to hear about your culinary adventures. Once you’ve given this recipe a try, please come back and share your experience in the comments below. Let me know what fillings you used, what variations you tried, and what your family and friends thought. Your feedback is invaluable, and it helps inspire others to get creative in the kitchen.
Happy cooking, and I can’t wait to hear all about your delicious oven-baked quesadilla creations! I hope you enjoy this recipe as much as I do. Bon appétit!
Oven Baked Quesadillas: Easy Recipe & Baking Tips
Easy oven-baked quesadillas filled with seasoned ground beef, black beans, corn, and plenty of cheese. A quick and delicious meal the whole family will love!
Ingredients
- 1 tablespoon olive oil
- 1 medium onion, chopped
- 1 bell pepper (any color), chopped
- 1 pound ground beef (or ground turkey/chicken)
- 1 packet taco seasoning
- 1/2 cup water
- 1 (15 ounce) can black beans, rinsed and drained
- 1 (15 ounce) can corn, drained
- 2 cups shredded cheddar cheese (or Mexican blend)
- 1 cup shredded Monterey Jack cheese
- 12 large flour tortillas
- Optional toppings: sour cream, salsa, guacamole, chopped cilantro
Instructions
- Heat olive oil in a large skillet over medium heat. Add onion and bell pepper; cook until softened (5-7 minutes).
- Add ground beef and cook, breaking it up, until browned. Drain any excess grease.
- Stir in taco seasoning and water. Simmer for 5 minutes to meld flavors.
- Add black beans and corn; cook for 2-3 minutes until heated through. Remove from heat.
- Preheat oven to 375°F (190°C). Lightly grease a large baking sheet.
- Lay out a tortilla. Sprinkle 1/4 cup cheddar cheese over half of the tortilla.
- Spoon 1/2 cup of the ground beef mixture over the cheese.
- Sprinkle 1/4 cup Monterey Jack cheese over the filling.
- Fold the tortilla in half and press gently to seal.
- Repeat with remaining tortillas and filling. Arrange on the baking sheet.
- Bake for 10-12 minutes, or until golden brown and cheese is melted and bubbly. Flip halfway through for extra crispiness (optional).
- Let cool slightly before cutting into wedges.
- Serve immediately with your favorite toppings.
Notes
- Spice it up: Add cayenne pepper or hot sauce to the ground beef.
- Vegetarian: Omit ground beef and add more beans, corn, or other vegetables.
- Cheese Variations: Experiment with pepper jack, Colby jack, or cream cheese.
- Add Veggies: Include chopped tomatoes, green onions, or jalapeños.
- Make Ahead: Assemble and refrigerate before baking (add a few minutes to baking time).
- Freezing: Assemble, bake, cool, wrap individually, and freeze. Reheat in a 350°F (175°C) oven until heated through.


Leave a Comment