
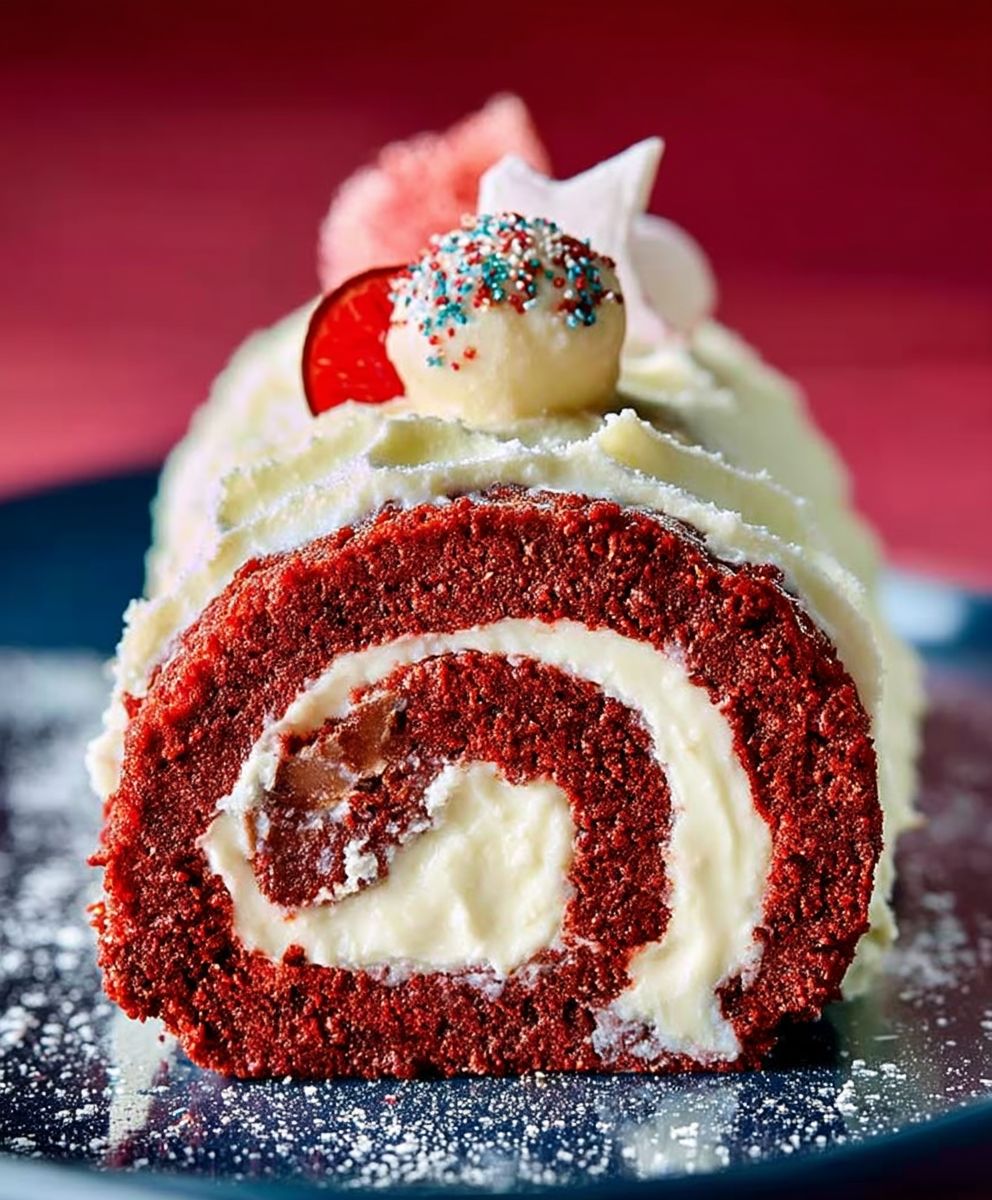
Red velvet roulade, a show-stopping dessert that’s as delightful to look at as it is to eat, is about to become your new favorite baking project! Imagine a moist, tender red velvet sponge cake, swirled around a creamy, tangy filling a perfect balance of flavors and textures that will leave everyone wanting more. Have you ever wondered where this elegant dessert comes from? While red velvet cake itself has roots in the Victorian era, the roulade, or Swiss roll, is a more modern adaptation, allowing for a stunning presentation of this classic flavor profile.
The beauty of a red velvet roulade lies not only in its striking appearance but also in its surprisingly approachable nature. Many people are intimidated by the thought of making a rolled cake, but I’m here to tell you it’s easier than you think! The combination of the slightly tangy buttermilk and cocoa in the cake, paired with the sweet and creamy filling, is simply irresistible. Plus, it’s a fantastic make-ahead dessert, perfect for impressing guests at your next dinner party or simply enjoying a slice (or two!) with a cup of coffee. Get ready to embark on a baking adventure that will reward you with a truly spectacular treat!

Ingredients:
- For the Red Velvet Sponge:
- 1 1/2 cups (192g) all-purpose flour
- 1/4 cup (25g) unsweetened cocoa powder
- 1 teaspoon baking soda
- 1/2 teaspoon salt
- 1 cup (200g) granulated sugar
- 1/2 cup (120ml) vegetable oil
- 1 cup (240ml) buttermilk
- 1 large egg
- 1 teaspoon vanilla extract
- 1 tablespoon red food coloring (gel is recommended for vibrant color)
- 1 teaspoon white vinegar
- For the Cream Cheese Filling:
- 8 ounces (226g) cream cheese, softened
- 1/2 cup (113g) unsalted butter, softened
- 3 cups (360g) powdered sugar
- 1 teaspoon vanilla extract
- Pinch of salt
- For Dusting:
- Powdered sugar, for dusting
Preparing the Red Velvet Sponge
- Preheat and Prepare: First things first, preheat your oven to 350°F (175°C). Grease a 10×15 inch jelly roll pan really well. I like to use baking spray with flour in it, but you can also grease it with shortening and then dust it with flour, making sure to tap out any excess. Line the bottom of the pan with parchment paper, leaving an overhang on the two longer sides. This overhang will be your best friend when it comes to lifting the cake out later!
- Combine Dry Ingredients: In a medium bowl, whisk together the flour, cocoa powder, baking soda, and salt. Make sure everything is evenly distributed no one wants a bite of pure baking soda! Set this bowl aside for now.
- Cream Wet Ingredients: In a large bowl (or the bowl of your stand mixer), combine the sugar and vegetable oil. Beat them together until they are well combined. This usually takes about a minute or two.
- Add Buttermilk and Egg: Gradually add the buttermilk to the sugar and oil mixture, mixing until just combined. Then, add the egg and vanilla extract and beat until everything is smooth.
- Incorporate Food Coloring: Now for the fun part the red! Add the red food coloring to the wet ingredients and mix until you achieve your desired shade of red. Remember, gel food coloring will give you a more vibrant color than liquid.
- The Vinegar Reaction: In a small bowl, combine the white vinegar and baking soda. It will fizz up that’s exactly what you want! This reaction helps create a light and airy texture in the cake.
- Combine Wet and Dry: Add the vinegar mixture to the wet ingredients and mix quickly. Then, gradually add the dry ingredients to the wet ingredients, mixing until just combined. Be careful not to overmix! Overmixing can lead to a tough cake.
- Pour and Spread: Pour the batter into the prepared jelly roll pan and spread it evenly. Use an offset spatula to make sure the batter reaches all the corners.
- Bake: Bake for 12-15 minutes, or until a toothpick inserted into the center comes out clean. Keep a close eye on it you don’t want to overbake the sponge, as it will become dry and crack when you roll it.
Rolling the Sponge Cake
- Prepare for Rolling: While the cake is baking, prepare a clean kitchen towel by dusting it generously with powdered sugar. This will prevent the cake from sticking to the towel.
- Invert and Roll: As soon as the cake comes out of the oven, immediately invert it onto the prepared towel. Carefully peel off the parchment paper from the bottom of the cake.
- Roll It Up: Starting from one of the shorter ends, gently roll the cake up in the towel. Be careful not to press too hard, as you don’t want to crack the cake.
- Cool Completely: Place the rolled cake on a wire rack and let it cool completely. This is crucial! Cooling the cake in the rolled position helps it retain its shape and prevents it from cracking when you fill it later.
Making the Cream Cheese Filling
- Cream Cheese and Butter: In a large bowl (or the bowl of your stand mixer), beat the softened cream cheese and butter together until they are light and fluffy. This usually takes about 3-5 minutes. Make sure your cream cheese and butter are truly softened this will prevent lumps in your filling.
- Add Powdered Sugar: Gradually add the powdered sugar to the cream cheese mixture, beating on low speed until it is fully incorporated. Be careful not to add all the powdered sugar at once, as it can create a cloud of dust!
- Vanilla and Salt: Add the vanilla extract and a pinch of salt to the filling and beat until everything is smooth and creamy. Taste the filling and adjust the sweetness if needed.
Assembling the Red Velvet Roulade
- Unroll the Cake: Once the cake is completely cool, carefully unroll it. Be gentle it might crack a little, but that’s okay!
- Spread the Filling: Spread the cream cheese filling evenly over the surface of the cake, leaving a small border at the edge closest to you. This will prevent the filling from squeezing out when you roll it up.
- Reroll the Cake: Starting from the same end you rolled it up from before, gently reroll the cake. This time, roll it without the towel.
- Chill: Wrap the roulade tightly in plastic wrap and chill it in the refrigerator for at least 2 hours, or preferably overnight. This will allow the filling to set and the flavors to meld together.
Finishing Touches
- Trim the Ends: Before serving, trim the ends of the roulade to create a clean and even look.
- Dust with Powdered Sugar: Dust the roulade generously with powdered sugar. This adds a touch of sweetness and makes it look extra pretty.
- Slice and Serve: Slice the roulade into 1-inch thick slices and serve. Enjoy! This red velvet roulade is perfect for parties, holidays, or any special occasion.
Conclusion:
This red velvet roulade isn’t just a dessert; it’s an experience. The vibrant color, the delicate sponge, and the creamy filling all combine to create a show-stopping treat that’s surprisingly easy to make. I know, I know, “roulade” sounds intimidating, but trust me, with a little patience and my step-by-step instructions, you’ll be wowing your friends and family in no time. It’s the perfect centerpiece for a holiday gathering, a special birthday celebration, or even just a “treat yourself” kind of weekend.
But why is this red velvet roulade a must-try? Beyond the stunning presentation, it’s the taste that truly sets it apart. The slight tang of the buttermilk in the sponge cake perfectly complements the rich, sweet cream cheese filling. It’s a delightful balance of flavors and textures that will leave you wanting more. Plus, it’s a guaranteed conversation starter! Imagine the looks on your guests’ faces when you present this beautiful creation.
And the best part? It’s incredibly versatile! While I’m partial to the classic cream cheese filling, feel free to experiment with other options. A mascarpone filling would add a touch of Italian elegance, or you could try a stabilized whipped cream for a lighter, airier texture. For a chocolate twist, add a tablespoon or two of cocoa powder to the cream cheese filling. You could even incorporate some chopped nuts, like pecans or walnuts, for added crunch.
Serving suggestions? A simple dusting of powdered sugar is all you need to showcase the roulade’s beauty. However, a drizzle of melted white chocolate or a scattering of fresh berries would also be lovely additions. I personally love serving it with a scoop of vanilla ice cream or a dollop of whipped cream. A cup of strong coffee or a glass of dessert wine would also be the perfect accompaniment.
Don’t be afraid to get creative and make this recipe your own! The possibilities are endless.
Variations to Consider:
* Berry Bliss: Add fresh raspberries or strawberries to the cream cheese filling for a burst of fruity flavor.
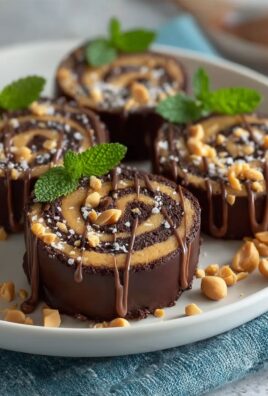
* Chocolate Lover’s Dream: Incorporate chocolate shavings into the filling and drizzle melted chocolate over the finished roulade.
* Nutty Delight: Sprinkle chopped pecans or walnuts over the roulade before rolling it up for added texture and flavor.
* Citrus Zest: Add a teaspoon of orange or lemon zest to the sponge cake batter for a bright, citrusy twist.
I truly believe that anyone can make this red velvet roulade, regardless of their baking experience. Just follow the instructions carefully, and don’t be afraid to ask questions if you get stuck. I’m confident that you’ll be thrilled with the results.
So, what are you waiting for? Gather your ingredients, preheat your oven, and get ready to create a masterpiece! I can’t wait to hear about your experience. Please, please, please, try this recipe!
Once you’ve made your own stunning red velvet roulade, I’d absolutely love to see your creations! Share your photos and stories in the comments below. Let me know what variations you tried and how they turned out. Did you add berries? Did you go crazy with chocolate? I’m eager to hear all about it! Happy baking!
Red Velvet Roulade: A Delicious and Easy Recipe
Moist red velvet sponge cake swirled with tangy cream cheese frosting. Perfect for holidays or special occasions!
Ingredients
- 1 1/2 cups (192g) all-purpose flour
- 1/4 cup (25g) unsweetened cocoa powder
- 1 teaspoon baking soda
- 1/2 teaspoon salt
- 1 cup (200g) granulated sugar
- 1/2 cup (120ml) vegetable oil
- 1 cup (240ml) buttermilk
- 1 large egg
- 1 teaspoon vanilla extract
- 1 tablespoon red food coloring (gel is recommended for vibrant color)
- 1 teaspoon white vinegar
- 8 ounces (226g) cream cheese, softened
- 1/2 cup (113g) unsalted butter, softened
- 3 cups (360g) powdered sugar
- 1 teaspoon vanilla extract
- Pinch of salt
- Powdered sugar, for dusting
Instructions
- Preheat and Prepare: Preheat oven to 350°F (175°C). Grease a 10×15 inch jelly roll pan well. Line the bottom with parchment paper, leaving an overhang on the two longer sides.
- Combine Dry Ingredients: In a medium bowl, whisk together the flour, cocoa powder, baking soda, and salt. Set aside.
- Cream Wet Ingredients: In a large bowl, combine the sugar and vegetable oil. Beat until well combined.
- Add Buttermilk and Egg: Gradually add the buttermilk, mixing until just combined. Add the egg and vanilla extract and beat until smooth.
- Incorporate Food Coloring: Add the red food coloring and mix until you achieve your desired shade of red.
- The Vinegar Reaction: In a small bowl, combine the white vinegar and baking soda. It will fizz up.
- Combine Wet and Dry: Add the vinegar mixture to the wet ingredients and mix quickly. Gradually add the dry ingredients, mixing until just combined. Be careful not to overmix!
- Pour and Spread: Pour the batter into the prepared jelly roll pan and spread it evenly.
- Bake: Bake for 12-15 minutes, or until a toothpick inserted into the center comes out clean.
- Prepare for Rolling: While the cake is baking, prepare a clean kitchen towel by dusting it generously with powdered sugar.
- Invert and Roll: As soon as the cake comes out of the oven, immediately invert it onto the prepared towel. Carefully peel off the parchment paper from the bottom of the cake.
- Roll It Up: Starting from one of the shorter ends, gently roll the cake up in the towel.
- Cool Completely: Place the rolled cake on a wire rack and let it cool completely.
- Cream Cheese and Butter: In a large bowl, beat the softened cream cheese and butter together until they are light and fluffy.
- Add Powdered Sugar: Gradually add the powdered sugar to the cream cheese mixture, beating on low speed until it is fully incorporated.
- Vanilla and Salt: Add the vanilla extract and a pinch of salt to the filling and beat until everything is smooth and creamy. Taste the filling and adjust the sweetness if needed.
- Unroll the Cake: Once the cake is completely cool, carefully unroll it.
- Spread the Filling: Spread the cream cheese filling evenly over the surface of the cake, leaving a small border at the edge closest to you.
- Reroll the Cake: Starting from the same end you rolled it up from before, gently reroll the cake. This time, roll it without the towel.
- Chill: Wrap the roulade tightly in plastic wrap and chill it in the refrigerator for at least 2 hours, or preferably overnight.
- Trim the Ends: Before serving, trim the ends of the roulade to create a clean and even look.
- Dust with Powdered Sugar: Dust the roulade generously with powdered sugar.
- Slice and Serve: Slice the roulade into 1-inch thick slices and serve. Enjoy!
Notes
- Gel food coloring will give you a more vibrant red color than liquid food coloring.
- Make sure your cream cheese and butter are truly softened to prevent lumps in the filling.
- Cooling the cake in the rolled position helps it retain its shape and prevents it from cracking when you fill it later.
- Chilling the roulade allows the filling to set and the flavors to meld together.

Leave a Comment