
Adobo Chicken: the very words conjure up images of savory, melt-in-your-mouth chicken simmered in a rich, tangy sauce. Have you ever experienced that incredible aroma wafting through your kitchen, promising a meal thats both comforting and bursting with flavor? If not, you’re in for a treat! This isn’t just a recipe; it’s an invitation to explore a cornerstone of Filipino cuisine.
Adobo, derived from the Spanish word “adobar” meaning “to marinade,” is more than just a dish; it’s a culinary technique deeply woven into the fabric of Filipino culture. Historians believe that the practice of preserving meat in vinegar and salt predates refrigeration, making adobo a practical and delicious solution. Over time, soy sauce, garlic, peppercorns, and bay leaves were added, creating the complex and unforgettable flavor profile we know and love today.
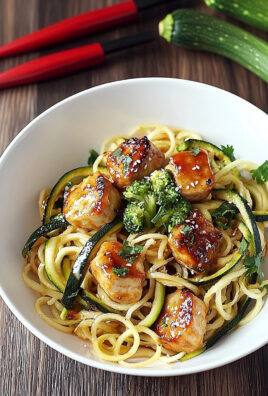
What makes Adobo Chicken so universally appealing? It’s the perfect balance of salty, sour, and savory notes that dance on your palate. The chicken becomes incredibly tender as it braises in the flavorful sauce, absorbing all the deliciousness. Plus, it’s incredibly versatile! Serve it with steamed rice, noodles, or even as a filling for tacos or sandwiches. And let’s not forget the convenience factor this is a one-pot wonder that’s relatively easy to prepare, making it a weeknight dinner champion. Get ready to discover why this dish is a beloved staple in Filipino households and beyond!

Ingredients:
- 2 lbs Chicken pieces (thighs and drumsticks work best, but you can use any cut)
- 1 large Onion, sliced
- 6 cloves Garlic, minced
- 1/2 cup Soy sauce (I prefer low sodium)
- 1/4 cup White vinegar (or apple cider vinegar)
- 1 tbsp Black peppercorns, crushed
- 2 Bay leaves
- 1 tbsp Brown sugar (optional, but adds a nice depth of flavor)
- 2 tbsp Cooking oil (vegetable or canola oil)
- 1 cup Water (or chicken broth for extra flavor)
- Salt to taste (be careful, soy sauce is already salty!)
- Optional: 1-2 Thai chilies, sliced (for some heat)
- Optional: 1 tbsp Fish sauce (for extra umami)
Preparing the Chicken and Aromatics:
- First, let’s prep our chicken. Pat the chicken pieces dry with paper towels. This helps them brown better later on.
- Next, in a large bowl, combine the chicken pieces with the sliced onion, minced garlic, crushed black peppercorns, and bay leaves. Make sure the chicken is well coated with these aromatics. I like to massage the mixture into the chicken a little bit to really get the flavors going.
- If you’re using the optional Thai chilies, add them now. Remember to be careful when handling chilies and avoid touching your eyes!
- Now, pour in the soy sauce and vinegar. Toss everything together to ensure the chicken is evenly coated.
- If you’re using the optional fish sauce, add it now for that extra umami kick.
- Let the chicken marinate for at least 30 minutes, or even better, for a few hours in the refrigerator. The longer it marinates, the more flavorful it will be. I often marinate it overnight!
Cooking the Adobo:
- Heat the cooking oil in a large pot or Dutch oven over medium-high heat. Make sure the pot is large enough to accommodate all the chicken pieces without overcrowding.
- Carefully add the chicken pieces to the pot, making sure not to overcrowd it. Brown the chicken on all sides. This step is crucial for developing a rich, savory flavor. Don’t rush it! You might need to do this in batches.
- Once the chicken is browned, remove it from the pot and set it aside.
- In the same pot, add the marinade (including the onions, garlic, peppercorns, and bay leaves) and bring it to a simmer.
- If you’re using the brown sugar, add it now and stir until it dissolves. The brown sugar will add a touch of sweetness and help to balance the acidity of the vinegar.
- Let the marinade simmer for about 5-10 minutes, allowing the flavors to meld together and the onions to soften.
- Now, return the browned chicken pieces to the pot.
- Pour in the water (or chicken broth) until the chicken is almost covered.
- Bring the mixture to a boil, then reduce the heat to low, cover the pot, and simmer for about 30-45 minutes, or until the chicken is cooked through and tender. The cooking time will depend on the size of the chicken pieces.
- Check the chicken for doneness. The internal temperature should reach 165°F (74°C). You can use a meat thermometer to check.
- During the last 15 minutes of cooking, you can remove the lid to allow the sauce to reduce and thicken. This will concentrate the flavors even more.
- Taste the sauce and adjust the seasoning as needed. Add salt to taste, but remember that the soy sauce is already salty, so be careful not to over-salt.
Serving and Enjoying:
- Remove the bay leaves before serving.
- Serve the adobo chicken hot over steamed rice. The flavorful sauce is perfect for soaking into the rice.
- Garnish with chopped green onions or cilantro, if desired.
- Adobo is even better the next day! The flavors continue to develop as it sits.
- Store any leftovers in an airtight container in the refrigerator for up to 3-4 days.
Tips and Variations:
- Chicken Cuts: While I prefer using chicken thighs and drumsticks because they stay moist and flavorful during the long cooking process, you can use any cut of chicken you like. Chicken breasts will work, but be careful not to overcook them, as they can become dry.
- Vinegar: I usually use white vinegar or apple cider vinegar, but you can experiment with other types of vinegar, such as cane vinegar or rice vinegar. Each type of vinegar will impart a slightly different flavor to the adobo.
- Soy Sauce: I recommend using low-sodium soy sauce to control the saltiness of the dish. You can always add more salt to taste, but it’s difficult to remove salt once it’s been added.
- Sweetness: The brown sugar is optional, but I find that it adds a nice depth of flavor and helps to balance the acidity of the vinegar. You can also use honey or maple syrup as a substitute.
- Spice Level: If you like your adobo spicy, you can add more Thai chilies or use a spicier type of chili. You can also add a pinch of red pepper flakes.
- Potatoes: Some people like to add potatoes to their adobo. If you want to add potatoes, peel and cube them and add them to the pot along with the chicken.
- Hard-boiled Eggs: Another popular addition is hard-boiled eggs. Add them to the pot during the last 15 minutes of cooking to warm them through.
- Coconut Milk: For a richer and creamier adobo, you can add a can of coconut milk during the last 15 minutes of cooking. This will create a delicious and flavorful sauce.
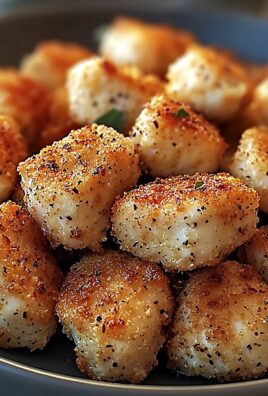
- Crispy Adobo Flakes: For a fun twist, you can shred the cooked chicken and pan-fry it until it’s crispy. Serve the crispy adobo flakes over rice with the adobo sauce.
- Pressure Cooker/Instant Pot: You can also make adobo in a pressure cooker or Instant Pot. Follow the same steps as above, but reduce the cooking time to about 15-20 minutes on high pressure. Be sure to release the pressure naturally for 10 minutes before releasing the remaining pressure manually.
Troubleshooting:
- Sauce is too thin: If the sauce is too thin, you can remove the lid and simmer it for a longer period of time to allow it to reduce and thicken. You can also add a cornstarch slurry (1 tablespoon cornstarch mixed with 2 tablespoons cold water) to the sauce during the last few minutes of cooking.
- Sauce is too salty: If the sauce is too salty, you can add a little bit of water or chicken broth to dilute it. You can also add a pinch of sugar to help balance the saltiness.
- Chicken is dry: If the chicken is dry, it may have been overcooked. Be sure to check the chicken for doneness regularly and remove it from the pot as soon as it’s cooked through.
- Chicken is not tender: If the chicken is not tender, it may need to be cooked for a longer period of time. Continue to simmer the chicken until it’s tender.
Nutritional Information (Approximate):
(Note: Nutritional information is an estimate and may vary depending on the specific ingredients and portion sizes used.)
- Calories: Approximately 350-450 per serving
- Protein: 30-40g
- Fat: 20-30g
- Carbohydrates: 10-15g
Enjoy your delicious homemade Adobo Chicken! I hope you love it as much as I do. It’s a comforting and flavorful dish that’s perfect for any occasion.

Conclusion:
This Adobo Chicken recipe isn’t just another chicken dish; it’s a flavor explosion waiting to happen in your kitchen. The perfect balance of savory soy sauce, tangy vinegar, pungent garlic, and a hint of sweetness creates a symphony of tastes that will have your taste buds singing. Trust me, once you try this, it’ll become a staple in your regular meal rotation. It’s incredibly easy to make, requires minimal ingredients, and delivers maximum flavor what more could you ask for?
But the best part? It’s incredibly versatile! Serve it over fluffy white rice to soak up all that delicious sauce, or try it with quinoa for a healthier option. For a low-carb alternative, cauliflower rice works wonders. You can even shred the chicken and use it as a filling for tacos or burritos, adding a unique Filipino twist to your favorite Mexican dishes.
Looking for variations? Experiment with different types of vinegar! Apple cider vinegar adds a subtle sweetness, while rice vinegar offers a milder tang. A splash of coconut milk at the end of cooking will create a richer, creamier sauce. If you’re feeling adventurous, add a chili pepper or two for a spicy kick. Don’t be afraid to play around with the ingredients and find the perfect balance that suits your palate.
And the beauty of this Adobo Chicken is that it’s just as good (if not better!) the next day. The flavors meld together even more overnight, making it perfect for meal prepping or leftovers. Pack it for lunch, enjoy it for a quick dinner, or even use it as a topping for salads. The possibilities are endless!
I truly believe that this recipe is a must-try for anyone who loves flavorful, easy-to-make meals. It’s a fantastic introduction to Filipino cuisine and a guaranteed crowd-pleaser. It’s also a great way to impress your friends and family with your culinary skills, even if you’re a beginner cook. The simplicity of the recipe belies the incredible depth of flavor it delivers.
So, what are you waiting for? Gather your ingredients, put on your apron, and get ready to embark on a culinary adventure. I’m confident that you’ll love this Adobo Chicken as much as I do.
Once you’ve tried it, I’d absolutely love to hear about your experience! Did you make any variations? What did you serve it with? What did your family think? Share your photos and stories in the comments below. Your feedback is invaluable and helps me continue to create recipes that you’ll love. Happy cooking, and enjoy your delicious Adobo Chicken! I can’t wait to see what you create!
Adobo Chicken: The Ultimate Guide to Filipino Comfort Food
Tender chicken simmered in a savory, tangy, and slightly sweet soy sauce and vinegar-based sauce. A flavorful and comforting Filipino dish perfect over rice.
Ingredients
- 2 lbs Chicken pieces (thighs and drumsticks work best, but you can use any cut)
- 1 large Onion, sliced
- 6 cloves Garlic, minced
- 1/2 cup Soy sauce (I prefer low sodium)
- 1/4 cup White vinegar (or apple cider vinegar)
- 1 tbsp Black peppercorns, crushed
- 2 Bay leaves
- 1 tbsp Brown sugar (optional, but adds a nice depth of flavor)
- 2 tbsp Cooking oil (vegetable or canola oil)
- 1 cup Water (or chicken broth for extra flavor)
- Salt to taste (be careful, soy sauce is already salty!)
- Optional: 1-2 Thai chilies, sliced (for some heat)
- Optional: 1 tbsp Fish sauce (for extra umami)
Instructions
- Prepare the Chicken and Aromatics: Pat the chicken pieces dry with paper towels. In a large bowl, combine the chicken pieces with the sliced onion, minced garlic, crushed black peppercorns, and bay leaves. Massage the mixture into the chicken. Add Thai chilies, if using. Pour in the soy sauce and vinegar. Toss everything together. Add fish sauce, if using. Let the chicken marinate for at least 30 minutes, or up to overnight in the refrigerator.
- Cook the Adobo: Heat the cooking oil in a large pot or Dutch oven over medium-high heat. Carefully add the chicken pieces to the pot, making sure not to overcrowd it. Brown the chicken on all sides. Remove the chicken from the pot and set it aside.
- In the same pot, add the marinade (including the onions, garlic, peppercorns, and bay leaves) and bring it to a simmer. Add the brown sugar, if using, and stir until it dissolves. Let the marinade simmer for about 5-10 minutes.
- Return the browned chicken pieces to the pot. Pour in the water (or chicken broth) until the chicken is almost covered.
- Bring the mixture to a boil, then reduce the heat to low, cover the pot, and simmer for about 30-45 minutes, or until the chicken is cooked through and tender (internal temperature should reach 165°F (74°C)).
- During the last 15 minutes of cooking, remove the lid to allow the sauce to reduce and thicken.
- Taste the sauce and adjust the seasoning as needed. Add salt to taste, but be careful not to over-salt.
- Serve: Remove the bay leaves before serving. Serve the adobo chicken hot over steamed rice. Garnish with chopped green onions or cilantro, if desired.
Notes
- Chicken Cuts: Thighs and drumsticks are recommended, but any cut can be used. Adjust cooking time accordingly.
- Vinegar: White or apple cider vinegar are standard, but cane or rice vinegar can be used for different flavor profiles.
- Soy Sauce: Low-sodium soy sauce is recommended to control saltiness.
- Sweetness: Brown sugar is optional; honey or maple syrup can be substituted.
- Spice Level: Adjust the amount of Thai chilies or add red pepper flakes for more heat.
- Variations: Consider adding potatoes, hard-boiled eggs, or coconut milk.
- Crispy Adobo Flakes: Shred cooked chicken and pan-fry until crispy.
- Pressure Cooker/Instant Pot: Cook on high pressure for 15-20 minutes, followed by a 10-minute natural pressure release.
- Troubleshooting:
- Sauce is too thin: Simmer uncovered or add a cornstarch slurry.
- Sauce is too salty: Add water or chicken broth, or a pinch of sugar.
- Chicken is dry: Check for doneness regularly and remove from pot when cooked through.
- Chicken is not tender: Continue to simmer until tender.
Leave a Comment