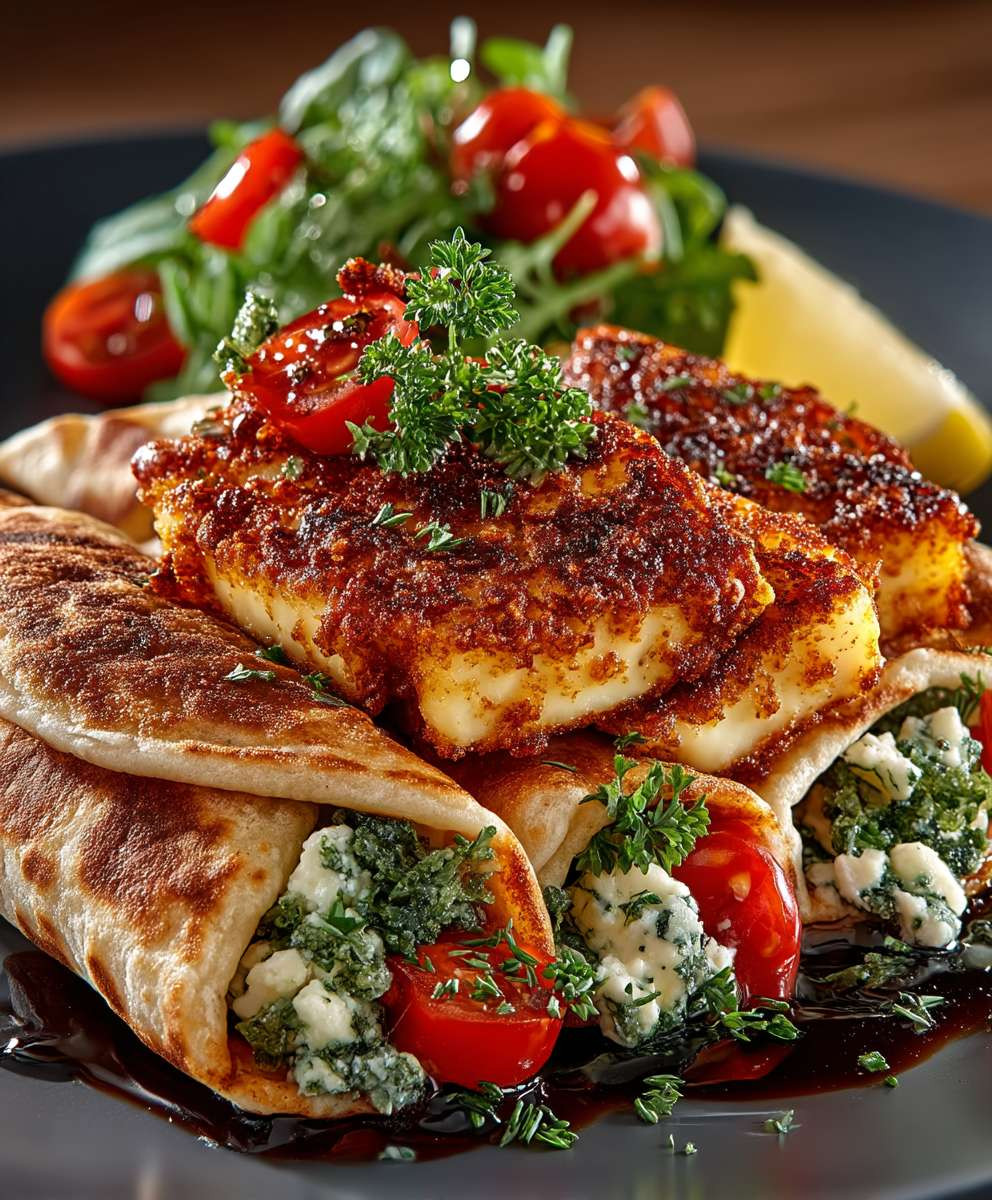
Halloumi wraps are the answer to your quick, delicious, and satisfying lunch or dinner cravings! Imagine biting into a warm, soft tortilla filled with salty, squeaky halloumi cheese, crisp vegetables, and a tangy sauce that ties it all together. It’s a flavor explosion that will leave you wanting more.
While halloumi itself hails from Cyprus, where it has been made for centuries, the concept of wrapping delicious fillings in flatbread is a global culinary tradition. From Mexican burritos to Middle Eastern shawarmas, cultures around the world have embraced the convenience and versatility of wraps. These halloumi wraps take that concept and elevate it with the unique texture and flavor of halloumi.
What makes these wraps so irresistible? It’s the perfect combination of textures and tastes. The halloumi, grilled or pan-fried to golden perfection, offers a delightful squeakiness and a salty, savory flavor. The fresh vegetables provide a satisfying crunch and a burst of freshness, while the sauce adds a creamy, tangy element that complements the other ingredients perfectly. Plus, they’re incredibly easy to customize to your liking! Whether you’re a vegetarian, a meat-lover, or simply looking for a healthy and delicious meal, halloumi wraps are a fantastic option. So, let’s get wrapping!
Ingredients:
- 2 blocks (8 ounces each) Halloumi cheese, sliced into ¼-inch thick pieces
- 4 large flour tortillas (10-12 inch diameter)
- 1 red bell pepper, thinly sliced
- 1 yellow bell pepper, thinly sliced
- 1 red onion, thinly sliced
- 2 cups baby spinach
- ½ cup hummus (store-bought or homemade)
- ¼ cup olive oil, divided
- 2 tablespoons lemon juice
- 1 teaspoon dried oregano
- ½ teaspoon garlic powder
- Salt and freshly ground black pepper to taste
- Optional toppings: Sriracha, hot sauce, tzatziki sauce, chopped fresh parsley
Preparing the Vegetables:
- Slice the bell peppers and red onion: Start by washing and drying the bell peppers and red onion. Remove the stems and seeds from the bell peppers and slice them thinly. Peel the red onion and slice it thinly as well. Aim for consistent slices so they cook evenly.
- Sauté the vegetables: Heat 2 tablespoons of olive oil in a large skillet over medium heat. Add the sliced bell peppers and red onion to the skillet. Season with a pinch of salt and pepper. Cook, stirring occasionally, until the vegetables are softened and slightly caramelized, about 8-10 minutes. You want them to be tender but still have a bit of bite.
- Season the vegetables: Once the vegetables are cooked to your liking, stir in the dried oregano and garlic powder. Cook for another minute, allowing the spices to bloom and release their flavors. Remove the vegetables from the skillet and set aside in a bowl.
- Prepare the spinach: If using pre-washed baby spinach, you can skip this step. Otherwise, wash the spinach thoroughly and pat it dry. This will prevent the wraps from becoming soggy.
Cooking the Halloumi:
- Prepare the halloumi: Pat the halloumi slices dry with paper towels. This is crucial for getting a good sear on the cheese. Excess moisture will prevent it from browning properly.
- Heat the skillet: Heat the remaining 2 tablespoons of olive oil in the same skillet over medium-high heat. Make sure the skillet is hot before adding the halloumi.
- Sear the halloumi: Carefully place the halloumi slices in the hot skillet, making sure not to overcrowd the pan. You may need to cook the halloumi in batches. Cook for 2-3 minutes per side, or until golden brown and slightly crispy. The halloumi should develop a nice crust.
- Remove from skillet: Once the halloumi is cooked, remove it from the skillet and set aside on a plate.
Assembling the Wraps:
- Warm the tortillas: Warm the tortillas according to package directions. You can warm them in a dry skillet, in the microwave, or in the oven. Warming the tortillas makes them more pliable and easier to roll. I prefer using a dry skillet for a few seconds on each side.
- Spread the hummus: Spread a generous layer of hummus over each tortilla, leaving a small border around the edges. The hummus acts as a glue to hold the wrap together and adds a creamy, flavorful element.
- Add the spinach: Arrange a layer of baby spinach over the hummus. Don’t overfill the wrap, as it will be difficult to roll.
- Add the sautéed vegetables: Top the spinach with the sautéed bell peppers and red onion. Distribute the vegetables evenly over the spinach.
- Add the halloumi: Place the seared halloumi slices on top of the vegetables. Arrange them so that each bite will have a piece of halloumi.
- Drizzle with lemon juice: Drizzle a little lemon juice over the filling. This adds a bright, tangy flavor that complements the other ingredients.
- Season with salt and pepper: Add a pinch of salt and pepper to taste. Remember that halloumi is naturally salty, so you may not need much additional salt.
- Roll the wraps: To roll the wraps, fold in the sides of the tortilla, then tightly roll it up from the bottom. Secure the wrap with a toothpick if necessary.
Serving and Optional Additions:
- Cut and serve: Cut the wraps in half on a diagonal and serve immediately.
- Optional toppings: Offer a variety of optional toppings, such as Sriracha, hot sauce, tzatziki sauce, or chopped fresh parsley. These toppings allow everyone to customize their wraps to their liking.
- Serving suggestions: These halloumi wraps are delicious on their own, but they can also be served with a side salad, such as a Greek salad or a simple green salad. They also pair well with roasted vegetables or a side of couscous.
- Make ahead tips: You can prepare the vegetables and halloumi ahead of time and store them separately in the refrigerator. When you’re ready to assemble the wraps, simply warm the tortillas and assemble the ingredients. This is a great way to save time on busy weeknights.
- Variations: Feel free to experiment with different vegetables and toppings. Some other great additions include roasted eggplant, zucchini, sun-dried tomatoes, olives, or feta cheese. You can also use different types of cheese, such as grilled paneer or mozzarella.
- Storage: Leftover halloumi wraps can be stored in the refrigerator for up to 2 days. Reheat them in a skillet or in the microwave before serving. The tortillas may become slightly soggy after being refrigerated, but they will still taste delicious.
- Tips for perfect halloumi: Make sure your pan is hot before adding the halloumi. This will help it develop a nice sear. Don’t overcrowd the pan, as this will lower the temperature and prevent the halloumi from browning properly. Pat the halloumi dry with paper towels before cooking to remove excess moisture.
- Hummus variations: You can use different flavors of hummus, such as roasted red pepper hummus, garlic hummus, or spicy hummus. Homemade hummus is always a great option, and it’s surprisingly easy to make.
- Tortilla options: You can use different types of tortillas, such as whole wheat tortillas, spinach tortillas, or gluten-free tortillas. Choose the type that you prefer or that fits your dietary needs.
- Spice it up: If you like a little heat, add a pinch of red pepper flakes to the vegetables or drizzle the wraps with hot sauce.

Conclusion:
This isn’t just another recipe; it’s a passport to flavor town! Seriously, these Halloumi Wraps are a game-changer for lunch, a delightful light dinner, or even a crowd-pleasing appetizer. The combination of salty, squeaky halloumi, fresh veggies, and that zingy sauce is simply irresistible. If you’re looking for a quick, easy, and incredibly satisfying meal, look no further. I truly believe this will become a staple in your kitchen, just as it has in mine.
But why are these wraps a must-try? It’s the perfect balance of textures and tastes. The halloumi offers a satisfying chewiness and a salty punch, while the crisp vegetables provide a refreshing contrast. And that sauce? It ties everything together with a creamy, tangy embrace that will leave you wanting more. Plus, it’s incredibly versatile! You can easily adapt it to your own preferences and dietary needs.
Looking for serving suggestions? These Halloumi Wraps are fantastic on their own, but they also pair beautifully with a side of sweet potato fries or a light salad. For a heartier meal, consider adding some grilled chicken or chickpeas to the wrap. And don’t be afraid to experiment with different vegetables! Roasted red peppers, zucchini, or even some shredded carrots would be delicious additions.
Variations are endless! If you’re feeling adventurous, try using different types of wraps. Whole wheat tortillas, spinach wraps, or even gluten-free options would all work well. You could also swap out the sauce for something different. A spicy sriracha mayo, a creamy avocado dressing, or even a simple drizzle of olive oil and lemon juice would all be delicious alternatives. For a spicier kick, add a pinch of red pepper flakes to the halloumi while it’s frying. If you’re vegetarian or vegan, you can easily adapt this recipe by using a plant-based halloumi alternative. There are some fantastic options available these days that mimic the texture and flavor of traditional halloumi surprisingly well.
Ready to get cooking? I’m confident that you’ll love these Halloumi Wraps as much as I do. They’re quick, easy, and packed with flavor. Plus, they’re a great way to get your daily dose of vegetables. Don’t be afraid to get creative and experiment with different ingredients to make them your own.
I’m so excited for you to try this recipe! Once you do, please come back and share your experience in the comments below. I’d love to hear what you think and what variations you came up with. Did you add any special ingredients? Did you try a different sauce? Did you serve them with a particular side dish? Your feedback is invaluable and helps me to improve my recipes and create even more delicious content for you.
So, go ahead, grab your ingredients, and get ready to enjoy the best Halloumi Wraps you’ve ever tasted! Happy cooking! I can’t wait to hear all about your culinary adventures. Remember to tag me in your photos on social media I love seeing your creations! Let’s spread the Halloumi Wrap love!
Halloumi Wraps: The Ultimate Guide to Delicious and Easy Recipes
Savory Halloumi Wraps filled with sautéed bell peppers, red onion, spinach, and creamy hummus. A quick and delicious vegetarian meal!
Ingredients
- 2 blocks (8 ounces each) Halloumi cheese, sliced into ¼-inch thick pieces
- 4 large flour tortillas (10-12 inch diameter)
- 1 red bell pepper, thinly sliced
- 1 yellow bell pepper, thinly sliced
- 1 red onion, thinly sliced
- 2 cups baby spinach
- ½ cup hummus (store-bought or homemade)
- ¼ cup olive oil, divided
- 2 tablespoons lemon juice
- 1 teaspoon dried oregano
- ½ teaspoon garlic powder
- Salt and freshly ground black pepper to taste
- Optional toppings: Sriracha, hot sauce, tzatziki sauce, chopped fresh parsley
Instructions
- Prepare the Vegetables: Wash and slice the bell peppers and red onion thinly.
- Sauté the Vegetables: Heat 2 tablespoons of olive oil in a large skillet over medium heat. Add the sliced bell peppers and red onion, season with salt and pepper, and cook until softened and slightly caramelized (8-10 minutes).
- Season the Vegetables: Stir in the dried oregano and garlic powder. Cook for another minute, then remove from skillet and set aside.
- Prepare the Spinach: Wash and dry the spinach thoroughly.
- Prepare the Halloumi: Pat the halloumi slices dry with paper towels.
- Sear the Halloumi: Heat the remaining 2 tablespoons of olive oil in the same skillet over medium-high heat. Place the halloumi slices in the hot skillet (cook in batches if needed) and cook for 2-3 minutes per side, or until golden brown and slightly crispy. Remove from skillet and set aside.
- Warm the Tortillas: Warm the tortillas according to package directions (dry skillet recommended).
- Assemble the Wraps: Spread a generous layer of hummus over each tortilla, leaving a small border.
- Add Fillings: Arrange a layer of baby spinach over the hummus, followed by the sautéed bell peppers and red onion, and then the seared halloumi slices.
- Season: Drizzle with lemon juice and add a pinch of salt and pepper to taste.
- Roll the Wraps: Fold in the sides of the tortilla, then tightly roll it up from the bottom. Secure with a toothpick if necessary.
- Serve: Cut the wraps in half on a diagonal and serve immediately with optional toppings like Sriracha, hot sauce, tzatziki sauce, or chopped fresh parsley.
Notes
- Make sure your pan is hot before adding the halloumi for a good sear.
- Pat the halloumi dry to remove excess moisture.
- Warm the tortillas to make them more pliable.
- Don’t overfill the wraps.
- Halloumi is naturally salty, so use salt sparingly.
- Prepare the vegetables and halloumi ahead of time and store them separately in the refrigerator.
- Experiment with different vegetables and toppings.
- Leftover halloumi wraps can be stored in the refrigerator for up to 2 days.
- You can use different flavors of hummus.
- You can use different types of tortillas.
- If you like a little heat, add a pinch of red pepper flakes to the vegetables or drizzle the wraps with hot sauce.


Leave a Comment