
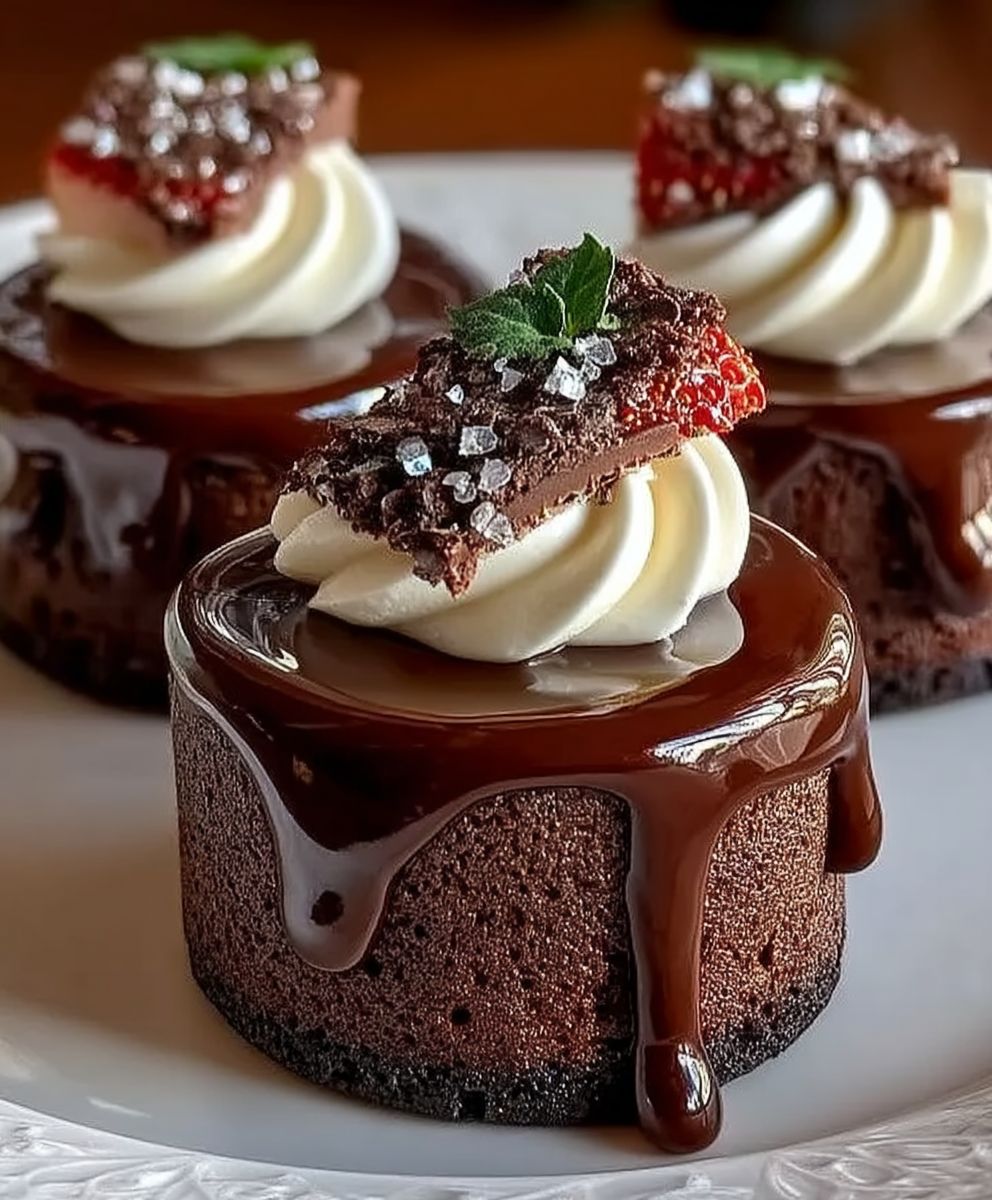
Chocolate Royale Mini Cakes: Prepare to be transported to a realm of pure chocolate bliss with these decadent, bite-sized treats! Imagine sinking your teeth into a moist, intensely chocolatey cake, its richness perfectly balanced by a smooth, luxurious ganache. These aren’t just cakes; they’re an experience, a miniature indulgence fit for royalty (hence the name!).
While the exact origins of the “Royale” designation are shrouded in a bit of mystery, the concept of rich, chocolate cakes has been a symbol of celebration and indulgence for centuries. Chocolate, once reserved for the elite, has become a beloved ingredient worldwide, and these mini cakes perfectly capture that sense of special occasion. They’re elegant enough for a sophisticated dessert spread, yet simple enough to whip up for a cozy night in.
What makes Chocolate Royale Mini Cakes so irresistible? It’s the perfect combination of textures and flavors. The tender crumb of the cake, the velvety smoothness of the ganache, and the intense chocolate flavor create a symphony in your mouth. Plus, their individual size makes them incredibly convenient no slicing required! They’re perfect for portion control (if you can resist having more than one!) and are always a crowd-pleaser. Get ready to bake up a batch of these delightful mini cakes and experience chocolate heaven!

Ingredients:
- For the Chocolate Cakes:
- 1 cup (2 sticks) unsalted butter, softened
- 1 ½ cups granulated sugar
- 4 large eggs
- 1 teaspoon vanilla extract
- 1 ¾ cups all-purpose flour
- ¾ cup unsweetened cocoa powder
- 1 ½ teaspoons baking powder
- ¾ teaspoon baking soda
- ¾ teaspoon salt
- 1 cup buttermilk
- ½ cup hot brewed coffee
- For the Chocolate Ganache:
- 12 ounces semi-sweet chocolate, finely chopped
- 1 cup heavy cream
- 2 tablespoons unsalted butter
- 1 tablespoon light corn syrup (optional, for shine)
- For the Raspberry Filling:
- 12 ounces fresh raspberries
- ¼ cup granulated sugar
- 1 tablespoon lemon juice
- 1 teaspoon cornstarch (optional, for thickening)
- For Decoration (Optional):
- Fresh raspberries
- Chocolate shavings
- Powdered sugar
Preparing the Chocolate Cakes:
- Cream the Butter and Sugar: In a large mixing bowl, cream together the softened butter and granulated sugar until light and fluffy. This usually takes about 3-5 minutes with an electric mixer. Make sure to scrape down the sides of the bowl occasionally to ensure everything is evenly mixed. This step is crucial for creating a tender cake crumb.
- Incorporate the Eggs and Vanilla: Beat in the eggs one at a time, making sure each egg is fully incorporated before adding the next. Then, stir in the vanilla extract. The vanilla enhances the chocolate flavor, so don’t skip it!
- Combine Dry Ingredients: In a separate bowl, whisk together the all-purpose flour, unsweetened cocoa powder, baking powder, baking soda, and salt. Whisking ensures that the leavening agents (baking powder and baking soda) are evenly distributed throughout the flour mixture, which is essential for a consistent rise.
- Alternate Wet and Dry Ingredients: Gradually add the dry ingredients to the wet ingredients, alternating with the buttermilk. Begin and end with the dry ingredients. So, add about one-third of the dry ingredients, then half of the buttermilk, then another third of the dry ingredients, the remaining buttermilk, and finally the last third of the dry ingredients. Mix until just combined. Be careful not to overmix, as this can lead to a tough cake.
- Add Hot Coffee: Stir in the hot brewed coffee. The coffee enhances the chocolate flavor and adds moisture to the cake. Don’t worry, you won’t taste the coffee itself! The batter will be quite thin, but that’s okay.
- Prepare the Mini Cake Pans: Preheat your oven to 350°F (175°C). Grease and flour your mini cake pans (or use cupcake liners). I prefer using mini cake pans for a more elegant presentation, but cupcake liners work just as well for a more casual treat. If using mini cake pans, make sure to grease them really well to prevent the cakes from sticking.
- Fill the Pans: Fill each mini cake pan about two-thirds full with the batter. This will allow the cakes to rise without overflowing.
- Bake the Cakes: Bake for 18-22 minutes, or until a wooden skewer inserted into the center comes out clean. The baking time may vary depending on your oven, so keep an eye on them.
- Cool the Cakes: Let the cakes cool in the pans for 10 minutes before inverting them onto a wire rack to cool completely. This prevents them from sticking and allows them to cool evenly.
Making the Chocolate Ganache:
- Chop the Chocolate: Finely chop the semi-sweet chocolate and place it in a heatproof bowl. The finer the chocolate is chopped, the more easily it will melt.
- Heat the Cream: In a saucepan, heat the heavy cream over medium heat until it just begins to simmer. Do not boil the cream.
- Pour Cream over Chocolate: Pour the hot cream over the chopped chocolate. Let it sit for about a minute to allow the heat to melt the chocolate.
- Whisk Until Smooth: Gently whisk the mixture until the chocolate is completely melted and the ganache is smooth and glossy.
- Add Butter and Corn Syrup (Optional): Stir in the butter and corn syrup (if using). The butter adds richness and shine, while the corn syrup helps to prevent the ganache from becoming grainy.
- Cool the Ganache: Let the ganache cool slightly until it thickens to a spreadable consistency. This usually takes about 30-60 minutes at room temperature, or you can speed up the process by placing it in the refrigerator for a shorter period, checking it frequently.
Preparing the Raspberry Filling:
- Combine Raspberries, Sugar, and Lemon Juice: In a medium saucepan, combine the fresh raspberries, granulated sugar, and lemon juice. The lemon juice helps to brighten the flavor of the raspberries.
- Cook the Mixture: Cook over medium heat, stirring occasionally, until the raspberries break down and the mixture thickens slightly. This usually takes about 10-15 minutes.
- Thicken with Cornstarch (Optional): If you want a thicker filling, whisk the cornstarch with a tablespoon of cold water to create a slurry. Stir the slurry into the raspberry mixture and cook for another minute or two, until thickened.
- Cool the Filling: Remove from heat and let the raspberry filling cool completely. As it cools, it will thicken further.
Assembling the Mini Cakes:
- Level the Cakes (Optional): If the tops of your mini cakes are uneven, use a serrated knife to carefully level them. This will create a more uniform appearance.
- Slice the Cakes: Using a serrated knife, carefully slice each mini cake horizontally into two layers.
- Spread Raspberry Filling: Spread a generous layer of the cooled raspberry filling onto the bottom layer of each cake.
- Top with Second Layer: Carefully place the top layer of the cake back on top of the raspberry filling.
- Frost with Ganache: Frost the top and sides of each mini cake with the cooled chocolate ganache. You can use an offset spatula for a smooth finish or create a more rustic look.
- Decorate (Optional): Decorate the mini cakes with fresh raspberries, chocolate shavings, and/or a dusting of powdered sugar. Get creative and have fun with it!
- Chill (Optional): For best results, chill the assembled mini cakes in the refrigerator for at least 30 minutes before serving. This will allow the ganache to set and the flavors to meld together.
Conclusion:
And there you have it! These Chocolate Royale Mini Cakes are truly a must-try for any chocolate lover. From the rich, decadent flavor to the perfectly moist texture, these little cakes are guaranteed to impress. They’re surprisingly simple to make, yet deliver a gourmet experience that will have everyone asking for seconds (and the recipe!).
But why are these mini cakes so special? It’s the combination of high-quality cocoa powder, the touch of espresso that enhances the chocolate notes, and the careful balance of wet and dry ingredients that creates that melt-in-your-mouth sensation. Plus, the individual portions make them perfect for portion control (if you can resist eating more than one!) and elegant enough for any special occasion.
Now, let’s talk about serving suggestions and variations because the possibilities are endless! For a classic presentation, dust the mini cakes with powdered sugar and serve them with a dollop of freshly whipped cream or a scoop of vanilla bean ice cream. A few fresh raspberries or strawberries on the side add a pop of color and a burst of fruity flavor that complements the chocolate beautifully.
If you’re feeling adventurous, try drizzling the cakes with a homemade chocolate ganache or a salted caramel sauce. A sprinkle of chopped nuts, like pecans or walnuts, adds a delightful crunch. For a more sophisticated touch, consider adding a hint of liqueur to the batter, such as Kahlua or Frangelico. This will infuse the cakes with a subtle, yet complex flavor that will elevate them to the next level.
Another fun variation is to add chocolate chips to the batter. Milk chocolate, dark chocolate, or even white chocolate chips would all work well. You could also experiment with different extracts, such as almond or peppermint, to create unique flavor combinations. For a truly decadent experience, try filling the mini cakes with a layer of chocolate mousse or a creamy cheesecake filling before baking.
These Chocolate Royale Mini Cakes are also incredibly versatile. They’re perfect for afternoon tea, dessert parties, or even as a special treat for yourself after a long day. They can be made ahead of time and stored in an airtight container for several days, making them ideal for entertaining. You can even freeze them for longer storage, ensuring that you always have a delicious chocolate fix on hand.
I truly believe that this recipe will become a staple in your baking repertoire. It’s a crowd-pleaser that’s sure to impress, and it’s so easy to customize to your own personal preferences. So, what are you waiting for? Grab your ingredients, preheat your oven, and get ready to bake some seriously delicious mini cakes!
I’m so excited for you to try this recipe and experience the joy of baking (and eating!) these amazing Chocolate Royale Mini Cakes. Once you’ve made them, I would absolutely love to hear about your experience. Did you make any variations? What did you think of the flavor and texture? Share your photos and comments with me I can’t wait to see what you create! Happy baking!
Chocolate Royale Mini Cakes: The Ultimate Decadent Dessert
Decadent mini chocolate cakes layered with a tangy raspberry filling and rich chocolate ganache. Perfect for a special occasion or a delightful treat!
Ingredients
- 1 cup (2 sticks) unsalted butter, softened
- 1 ½ cups granulated sugar
- 4 large eggs
- 1 teaspoon vanilla extract
- 1 ¾ cups all-purpose flour
- ¾ cup unsweetened cocoa powder
- 1 ½ teaspoons baking powder
- ¾ teaspoon baking soda
- ¾ teaspoon salt
- 1 cup buttermilk
- ½ cup hot brewed coffee
- 12 ounces semi-sweet chocolate, finely chopped
- 1 cup heavy cream
- 2 tablespoons unsalted butter
- 1 tablespoon light corn syrup (optional, for shine)
- 12 ounces fresh raspberries
- ¼ cup granulated sugar
- 1 tablespoon lemon juice
- 1 teaspoon cornstarch (optional, for thickening)
- Fresh raspberries
- Chocolate shavings
- Powdered sugar
Instructions
- Preheat oven to 350°F (175°C). Grease and flour mini cake pans (or use cupcake liners).
- Cream together softened butter and sugar until light and fluffy (3-5 minutes).
- Beat in eggs one at a time, then stir in vanilla extract.
- In a separate bowl, whisk together flour, cocoa powder, baking powder, baking soda, and salt.
- Gradually add dry ingredients to wet ingredients, alternating with buttermilk, beginning and ending with dry ingredients. Mix until just combined.
- Stir in hot brewed coffee.
- Fill each mini cake pan about two-thirds full with batter.
- Bake for 18-22 minutes, or until a wooden skewer inserted into the center comes out clean.
- Let cakes cool in pans for 10 minutes before inverting onto a wire rack to cool completely.
- Finely chop the semi-sweet chocolate and place it in a heatproof bowl.
- In a saucepan, heat the heavy cream over medium heat until it just begins to simmer. Do not boil the cream.
- Pour the hot cream over the chopped chocolate. Let it sit for about a minute to allow the heat to melt the chocolate.
- Gently whisk the mixture until the chocolate is completely melted and the ganache is smooth and glossy.
- Stir in the butter and corn syrup (if using).
- Let the ganache cool slightly until it thickens to a spreadable consistency (30-60 minutes at room temperature, or shorter in the refrigerator).
- In a medium saucepan, combine raspberries, sugar, and lemon juice.
- Cook over medium heat, stirring occasionally, until raspberries break down and mixture thickens slightly (10-15 minutes).
- If desired, whisk cornstarch with a tablespoon of cold water to create a slurry. Stir the slurry into the raspberry mixture and cook for another minute or two, until thickened.
- Remove from heat and let the raspberry filling cool completely.
- If the tops of your mini cakes are uneven, use a serrated knife to carefully level them.
- Using a serrated knife, carefully slice each mini cake horizontally into two layers.
- Spread a generous layer of the cooled raspberry filling onto the bottom layer of each cake.
- Carefully place the top layer of the cake back on top of the raspberry filling.
- Frost the top and sides of each mini cake with the cooled chocolate ganache.
- Decorate with fresh raspberries, chocolate shavings, and/or a dusting of powdered sugar (optional).
- Chill the assembled mini cakes in the refrigerator for at least 30 minutes before serving (optional).
Notes
- Creaming the butter and sugar well is crucial for a tender cake crumb.
- Whisking the dry ingredients ensures even distribution of leavening agents.
- Don’t overmix the cake batter.
- The hot coffee enhances the chocolate flavor. You won’t taste the coffee itself.
- Grease mini cake pans well to prevent sticking.
- The ganache should be cooled to a spreadable consistency before frosting.
- Chilling the assembled cakes allows the ganache to set and the flavors to meld.


Leave a Comment