
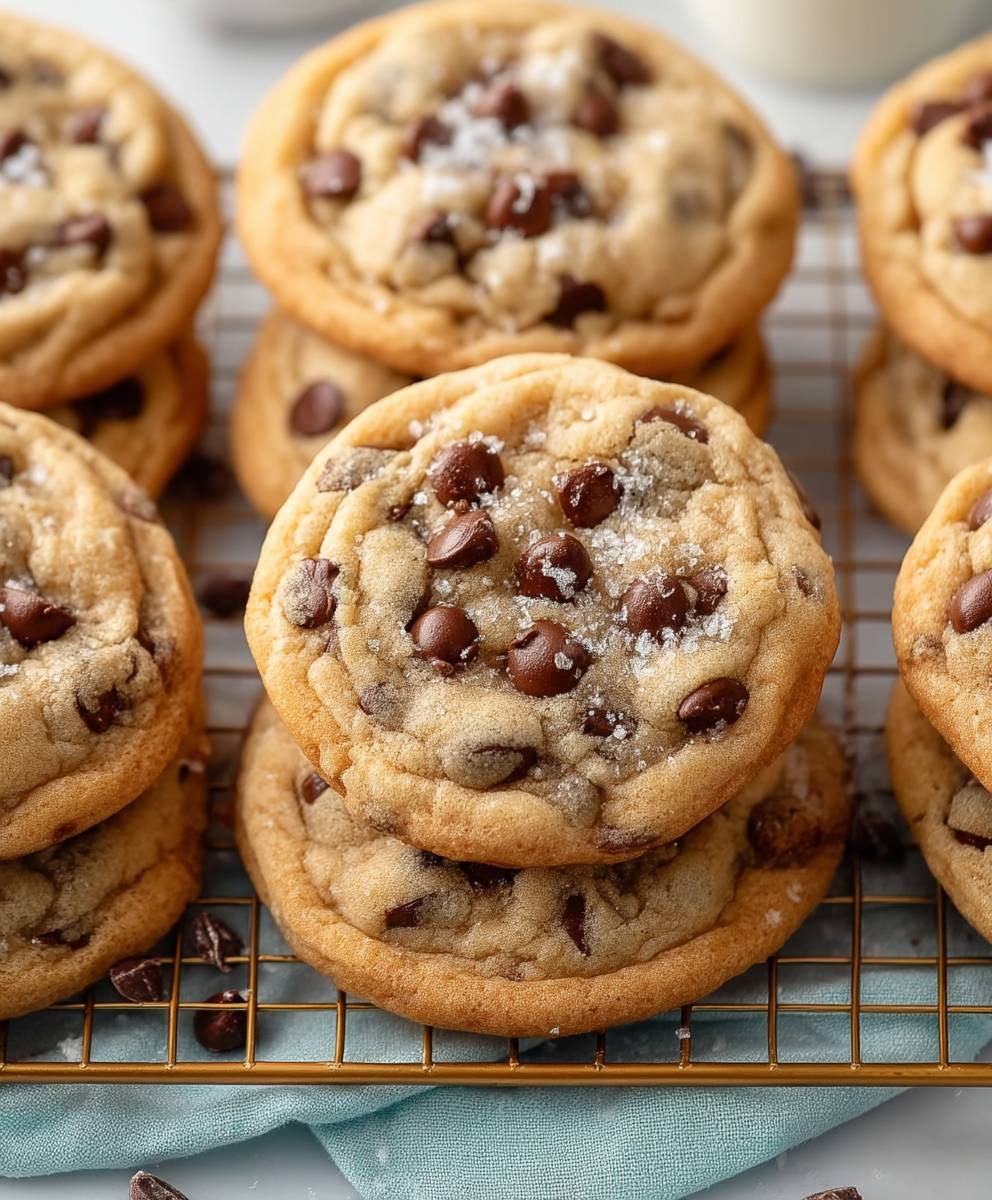
Chocolate chip cookies bakery style, warm from the oven, are a universal language of comfort and joy. Is there anything quite as enticing as that first whiff of vanilla and melting butter, promising a treat that’s both familiar and utterly irresistible? I think not! These aren’t just any chocolate chip cookies; we’re talking about the kind you find behind the glass counter at your favorite bakery the ones that are perfectly golden brown, slightly crisp on the edges, and gloriously gooey in the center.
While the exact origins of the chocolate chip cookie are relatively modern (thank you, Ruth Wakefield, in the 1930s!), its impact on baking is undeniable. It quickly became a staple in American households and bakeries alike, spreading its delicious influence worldwide. What makes these chocolate chip cookies bakery style so beloved? It’s the perfect balance of textures and flavors. The slightly crisp edges give way to a soft, chewy interior, punctuated by pockets of rich, melted chocolate. They’re also incredibly versatile perfect with a glass of cold milk, a scoop of vanilla ice cream, or simply enjoyed on their own as a little moment of pure bliss. Get ready to recreate that bakery magic in your own kitchen!

Ingredients:
- 2 cups (250g) all-purpose flour
- 1 teaspoon baking soda
- 1 teaspoon salt
- 1 cup (2 sticks or 226g) unsalted butter, softened
- 1 cup (200g) granulated sugar
- 1 cup (200g) packed brown sugar
- 2 large eggs
- 2 teaspoons vanilla extract
- 2 cups (340g) semi-sweet chocolate chips
- 1 cup (115g) chopped walnuts or pecans (optional, but highly recommended!)
- 2 tablespoons milk (if needed, for dough consistency)
- Coarse sea salt, for sprinkling (optional)
Preparing the Dough:
- Combine Dry Ingredients: In a medium bowl, whisk together the flour, baking soda, and salt. Make sure everything is evenly distributed. This ensures that the baking soda works properly and the salt balances the sweetness. Set aside for later.
- Cream Butter and Sugars: In a large bowl (or the bowl of your stand mixer), cream together the softened butter, granulated sugar, and brown sugar until light and fluffy. This usually takes about 3-5 minutes with an electric mixer. The mixture should be pale and airy. Don’t rush this step it’s crucial for achieving that perfect cookie texture. Scrape down the sides of the bowl occasionally to ensure everything is evenly incorporated.
- Incorporate Eggs and Vanilla: Beat in the eggs one at a time, mixing well after each addition. Then, stir in the vanilla extract. The vanilla really enhances the flavor of the cookies, so don’t skimp on it! Make sure each egg is fully incorporated before adding the next.
- Gradually Add Dry Ingredients: Gradually add the dry ingredients to the wet ingredients, mixing on low speed until just combined. Be careful not to overmix! Overmixing develops the gluten in the flour, which can result in tough cookies. Mix until you see the flour just disappear.
- Fold in Chocolate Chips and Nuts: Fold in the chocolate chips and chopped nuts (if using). I like to use a rubber spatula for this step to avoid overmixing. Make sure the chocolate chips and nuts are evenly distributed throughout the dough.
- Check Dough Consistency: If the dough seems too dry or crumbly, add the milk, one tablespoon at a time, until it comes together. The dough should be soft and slightly sticky, but not wet. You should be able to form it into balls without it falling apart.
- Chill the Dough (Important!): Cover the bowl with plastic wrap and chill the dough in the refrigerator for at least 30 minutes, or up to 24 hours. Chilling the dough allows the flavors to meld together and prevents the cookies from spreading too thin while baking. This is a crucial step for achieving those thick, chewy, bakery-style cookies. If you chill it longer than a few hours, you might need to let it sit at room temperature for a few minutes to soften slightly before scooping.
Baking the Cookies:
- Preheat Oven: Preheat your oven to 375°F (190°C). Make sure your oven rack is in the center position.
- Prepare Baking Sheets: Line baking sheets with parchment paper. This prevents the cookies from sticking and makes cleanup a breeze. I highly recommend using parchment paper for even baking.
- Scoop Dough: Use a cookie scoop (about 1.5 tablespoons) to scoop the dough onto the prepared baking sheets, leaving about 2 inches between each cookie. If you don’t have a cookie scoop, you can use a spoon to measure out the dough. I like to use a slightly heaping scoop for bakery-style cookies.
- Sprinkle with Sea Salt (Optional): If desired, sprinkle the tops of the cookies with coarse sea salt. This adds a nice salty-sweet contrast that really elevates the flavor.
- Bake: Bake for 9-11 minutes, or until the edges are golden brown and the centers are still slightly soft. The baking time may vary depending on your oven, so keep a close eye on them. Don’t overbake the cookies, as they will continue to bake slightly as they cool.
- Cool: Remove the baking sheets from the oven and let the cookies cool on the baking sheets for a few minutes before transferring them to a wire rack to cool completely. This allows the cookies to set up properly and prevents them from breaking.
Tips for Perfect Bakery-Style Cookies:
- Use Room Temperature Butter: Softened butter is key for creaming properly with the sugars. It should be soft enough to easily cream, but not melted.
- Don’t Overmix: Overmixing develops the gluten in the flour, resulting in tough cookies. Mix until just combined.
- Chill the Dough: Chilling the dough is essential for preventing the cookies from spreading too thin and for developing the flavors.
- Use High-Quality Chocolate Chips: The quality of the chocolate chips will affect the flavor of the cookies. I recommend using semi-sweet chocolate chips for a classic flavor.
- Don’t Overbake: Overbaked cookies will be dry and crumbly. Bake until the edges are golden brown and the centers are still slightly soft.
- Cool Completely: Let the cookies cool completely before storing them. This prevents them from sticking together.
- Experiment with Flavors: Feel free to add other ingredients to the dough, such as different types of nuts, dried fruit, or spices.
- For extra chewy cookies: Substitute bread flour for half of the all-purpose flour. Bread flour has a higher protein content, which will result in a chewier texture.
- For thinner, crispier cookies: Use melted butter instead of softened butter.
- For a richer flavor: Use brown butter instead of regular butter. To make brown butter, melt the butter in a saucepan over medium heat, stirring constantly, until it turns a nutty brown color. Let it cool slightly before using.
Storing Your Delicious Cookies:
Store the cooled cookies in an airtight container at room temperature for up to 3 days. You can also freeze the cookies for up to 2 months. To freeze, place the cookies in a single layer on a baking sheet and freeze until solid. Then, transfer them to a freezer bag or container. Thaw the cookies at room temperature before serving.
You can also freeze the cookie dough! Scoop the dough into balls and place them on a baking sheet lined with parchment paper. Freeze until solid, then transfer them to a freezer bag or container. When you’re ready to bake, simply bake the frozen dough balls for a few minutes longer than the recipe calls for.
Troubleshooting:
Cookies are too flat:
- Dough was not chilled long enough.
- Oven temperature is too low.
- Too much butter was used.
Cookies are too dry:
- Cookies were overbaked.
- Too much flour was used.
Cookies are too hard:
- Cookies were overbaked.
- Too much sugar was used.
Cookies are not spreading:
- Dough was chilled for too long.
- Not enough butter was used.
Enjoy your homemade bakery-style chocolate chip cookies! I hope these tips and tricks help you bake the perfect batch every time.
Conclusion:
So, there you have it! These aren’t just any chocolate chip cookies; they’re a ticket to bakery-style bliss right in your own kitchen. I truly believe this recipe is a must-try because it delivers that perfect balance of crispy edges and a soft, chewy center, loaded with melty chocolate chips in every single bite. Forget those flat, disappointing cookies these are thick, golden, and utterly irresistible. The secret, as you now know, lies in the browned butter and the chilling time, both of which contribute to a depth of flavor and texture you simply won’t find in your average cookie recipe.
But the best part? This recipe is incredibly versatile! While I’m a purist at heart and adore these chocolate chip cookies bakery style exactly as written, there’s plenty of room for experimentation. Feeling adventurous? Try adding a sprinkle of sea salt on top before baking to enhance the sweetness and create a delightful salty-sweet contrast. Or, for a richer, more decadent experience, swap out some of the semi-sweet chocolate chips for dark chocolate chunks.
For serving suggestions, the possibilities are endless! Of course, they’re absolutely divine warm, straight from the oven with a cold glass of milk. But they’re also fantastic crumbled over ice cream, used as the base for an ice cream sandwich, or even dipped in melted chocolate for an extra special treat. I’ve even been known to sneak a cookie or two with my morning coffee don’t judge!
And don’t limit yourself to just chocolate chips! Consider adding chopped nuts like walnuts or pecans for a nutty crunch. Or, for a festive twist, incorporate dried cranberries and white chocolate chips during the holiday season. A dash of cinnamon or nutmeg can also add a warm, comforting flavor. Get creative and make these cookies your own!
Serving Suggestions:
- Warm with a glass of cold milk
- Crumbled over vanilla ice cream
- As the base for an ice cream sandwich
- Dipped in melted chocolate
- Paired with your morning coffee
Variations:
- Add a sprinkle of sea salt before baking
- Use dark chocolate chunks instead of semi-sweet chips
- Incorporate chopped nuts (walnuts, pecans, etc.)
- Add dried cranberries and white chocolate chips for a festive twist
- A dash of cinnamon or nutmeg for a warm, comforting flavor
I’m so confident that you’ll love this recipe, and I can’t wait to hear about your baking adventures! Seriously, these chocolate chip cookies bakery style are a game-changer. They’re perfect for sharing with friends and family, bringing to potlucks, or simply enjoying as a well-deserved treat after a long day.
So, what are you waiting for? Preheat that oven, gather your ingredients, and get ready to bake the best chocolate chip cookies you’ve ever tasted. I promise, you won’t be disappointed. And when you do, please, please, please share your experience! Leave a comment below, tag me in your photos on social media I want to see your beautiful, golden-brown creations! Let me know what variations you tried, what your family thought, and any tips or tricks you discovered along the way. Happy baking! I hope you enjoy these chocolate chip cookies bakery style as much as I do!
Chocolate Chip Cookies Bakery Style: The Ultimate Recipe
Classic, chewy chocolate chip cookies with a bakery-style texture. Packed with chocolate chips and optional nuts, perfect for satisfying your sweet tooth.
Ingredients
- 2 cups (250g) all-purpose flour
- 1 teaspoon baking soda
- 1 teaspoon salt
- 1 cup (2 sticks or 226g) unsalted butter, softened
- 1 cup (200g) granulated sugar
- 1 cup (200g) packed brown sugar
- 2 large eggs
- 2 teaspoons vanilla extract
- 2 cups (340g) semi-sweet chocolate chips
- 1 cup (115g) chopped walnuts or pecans (optional, but highly recommended!)
- 2 tablespoons milk (if needed, for dough consistency)
- Coarse sea salt, for sprinkling (optional)
Instructions
- Combine Dry Ingredients: In a medium bowl, whisk together the flour, baking soda, and salt. Set aside.
- Cream Butter and Sugars: In a large bowl (or stand mixer), cream together the softened butter, granulated sugar, and brown sugar until light and fluffy (3-5 minutes). Scrape down the sides of the bowl occasionally.
- Incorporate Eggs and Vanilla: Beat in the eggs one at a time, mixing well after each addition. Stir in the vanilla extract.
- Gradually Add Dry Ingredients: Gradually add the dry ingredients to the wet ingredients, mixing on low speed until just combined. Be careful not to overmix.
- Fold in Chocolate Chips and Nuts: Fold in the chocolate chips and chopped nuts (if using).
- Check Dough Consistency: If the dough seems too dry, add the milk, one tablespoon at a time, until it comes together.
- Chill the Dough: Cover the bowl with plastic wrap and chill the dough in the refrigerator for at least 30 minutes, or up to 24 hours.
- Preheat Oven: Preheat your oven to 375°F (190°C).
- Prepare Baking Sheets: Line baking sheets with parchment paper.
- Scoop Dough: Use a cookie scoop (about 1.5 tablespoons) to scoop the dough onto the prepared baking sheets, leaving about 2 inches between each cookie.
- Sprinkle with Sea Salt (Optional): If desired, sprinkle the tops of the cookies with coarse sea salt.
- Bake: Bake for 9-11 minutes, or until the edges are golden brown and the centers are still slightly soft.
- Cool: Remove the baking sheets from the oven and let the cookies cool on the baking sheets for a few minutes before transferring them to a wire rack to cool completely.
Notes
- Use room temperature butter for best results.
- Don’t overmix the dough.
- Chilling the dough is essential for preventing the cookies from spreading too thin.
- Use high-quality chocolate chips for the best flavor.
- Don’t overbake the cookies.
- Cool completely before storing.
- Experiment with flavors by adding different types of nuts, dried fruit, or spices.
- For extra chewy cookies: Substitute bread flour for half of the all-purpose flour.
- For thinner, crispier cookies: Use melted butter instead of softened butter.
- For a richer flavor: Use brown butter instead of regular butter.


Leave a Comment