
Cherry Pie Homemade just the words conjure up images of warm kitchens, the sweet scent of baking fruit, and happy smiles around a table. But what if I told you that achieving that perfect, picture-worthy cherry pie is easier than you think? Forget store-bought fillings and soggy crusts! I’m going to guide you through creating a truly unforgettable cherry pie homemade experience, from start to finish.
The history of cherry pie stretches back centuries, with variations appearing across Europe and eventually making its way to America. It’s become a symbol of Americana, often associated with comfort, tradition, and celebrations. Think Fourth of July picnics and Thanksgiving feasts cherry pie is a star!
But why is it so beloved? Well, the combination of tart cherries nestled in a flaky, buttery crust is simply irresistible. The slight tang of the fruit is perfectly balanced by the sweetness of the filling and the richness of the pastry. Plus, a homemade cherry pie offers a satisfying textural contrast the soft, juicy cherries against the crisp, golden crust. And let’s be honest, the aroma alone is enough to make anyone’s mouth water. So, are you ready to bake a pie that will impress your family and friends? Let’s get started!

Ingredients:
- For the Crust:
- 2 ½ cups all-purpose flour, plus more for dusting
- 1 teaspoon salt
- 1 cup (2 sticks) unsalted butter, very cold and cut into ½-inch cubes
- ½ cup vegetable shortening, very cold
- 6-8 tablespoons ice water
- For the Cherry Filling:
- 6 cups fresh sweet cherries, pitted (or frozen, thawed and drained)
- ¾ cup granulated sugar (adjust to taste depending on cherry sweetness)
- ¼ cup cornstarch
- 2 tablespoons lemon juice
- 1 teaspoon almond extract
- ¼ teaspoon salt
- 2 tablespoons unsalted butter, cut into small pieces
- For the Egg Wash (optional):
- 1 large egg
- 1 tablespoon milk or water
- For Sprinkling (optional):
- Turbinado sugar or granulated sugar
Preparing the Pie Crust:
- Combine Dry Ingredients: In a large bowl, whisk together the flour and salt. This ensures the salt is evenly distributed throughout the crust, which is crucial for flavor.
- Cut in the Fat: Add the cold butter and shortening to the flour mixture. Using a pastry blender or your fingertips (work quickly to keep the fat cold!), cut the fat into the flour until the mixture resembles coarse crumbs. You should still see some pea-sized pieces of butter and shortening these are what create flaky layers in the crust. Don’t overmix!
- Add Ice Water: Gradually add the ice water, one tablespoon at a time, mixing gently after each addition. Use just enough water to bring the dough together. Be careful not to add too much water, as this will make the crust tough. The dough should be slightly shaggy but hold together when you pinch it.
- Divide and Chill: Divide the dough in half, flatten each half into a disc, wrap tightly in plastic wrap, and refrigerate for at least 2 hours, or preferably overnight. This chilling time is essential for relaxing the gluten in the flour, which will result in a tender crust. It also allows the fat to firm up, preventing it from melting too quickly during baking.
Making the Cherry Filling:
- Combine Filling Ingredients: In a large bowl, combine the pitted cherries, granulated sugar, cornstarch, lemon juice, almond extract, and salt. Gently toss to coat the cherries evenly. The cornstarch will help to thicken the filling as it bakes, preventing it from becoming too runny. The lemon juice brightens the flavor and balances the sweetness of the cherries, while the almond extract adds a subtle, complementary note.
- Let the Filling Sit: Let the cherry mixture sit for about 15-20 minutes, allowing the juices to release. This will help the cornstarch activate and ensure a thicker filling.
Assembling and Baking the Pie:
- Preheat Oven: Preheat your oven to 400°F (200°C). Place a baking sheet on the lower rack of the oven to catch any drips from the pie.
- Roll Out the Bottom Crust: On a lightly floured surface, roll out one of the dough discs into a 12-inch circle. Carefully transfer the dough to a 9-inch pie plate. Trim the edges of the dough, leaving about a 1-inch overhang. Crimp the edges of the crust decoratively. You can use a fork to crimp, or pinch the edges with your fingers.
- Add the Filling: Pour the cherry filling into the prepared pie crust. Dot the top of the filling with the small pieces of butter. This adds richness and flavor to the filling.
- Roll Out the Top Crust: Roll out the second dough disc into a 12-inch circle. You can either place the entire crust over the filling, or cut it into strips to make a lattice top.
- For a Full Top Crust: If using a full top crust, cut several slits in the top to allow steam to escape during baking. This will prevent the crust from puffing up too much and potentially bursting. Carefully place the crust over the filling. Trim the edges and crimp them together with the bottom crust to seal.
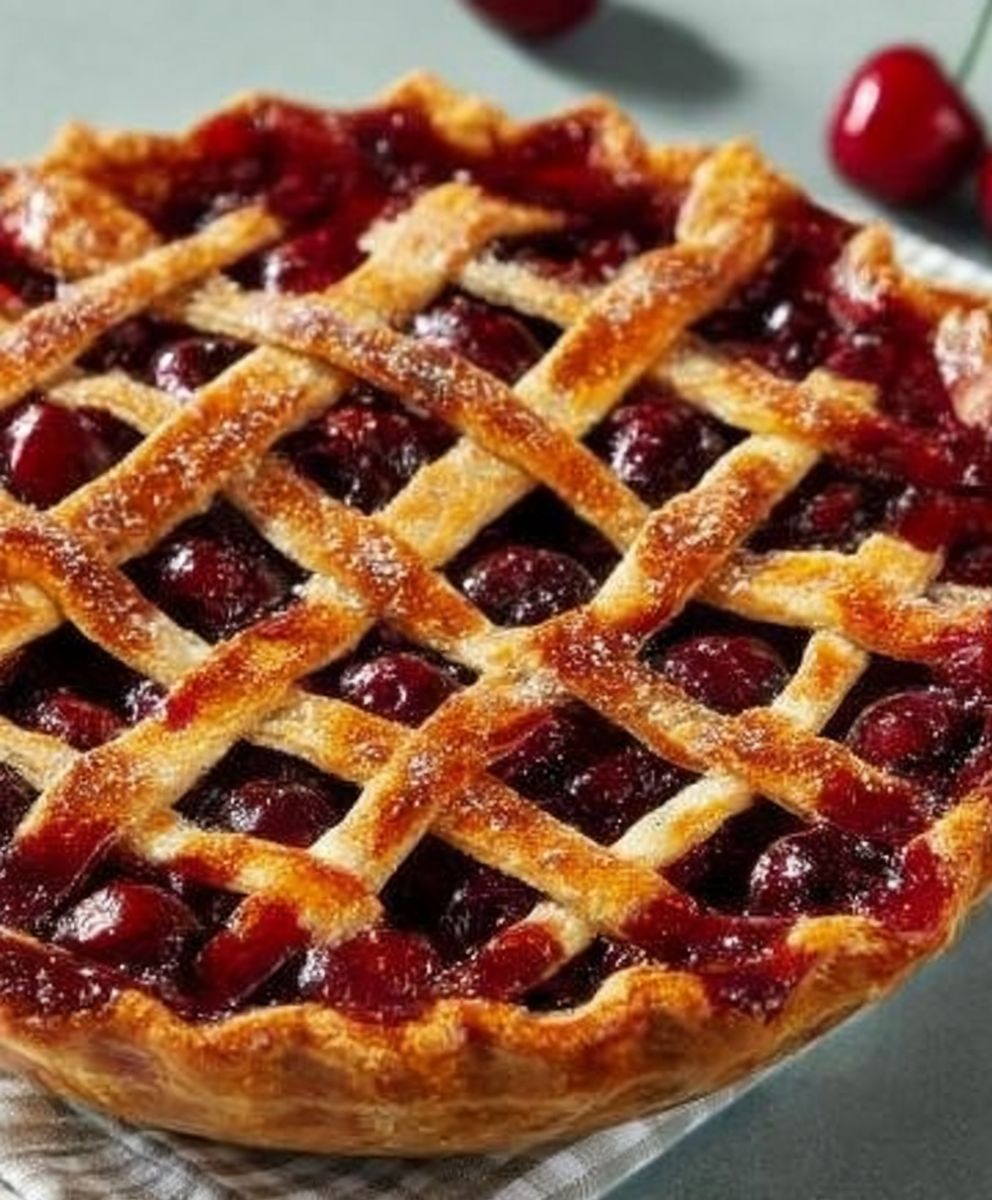
- For a Lattice Top Crust: If making a lattice top, cut the dough into strips. Weave the strips over and under each other to create a lattice pattern. Trim the edges and crimp them to the bottom crust.
- Egg Wash (Optional): In a small bowl, whisk together the egg and milk (or water). Brush the top crust with the egg wash. This will give the crust a beautiful golden-brown color and a glossy finish.
- Sprinkle with Sugar (Optional): Sprinkle the top crust with turbinado sugar or granulated sugar for added sweetness and sparkle.
- Bake: Bake the pie for 45-55 minutes, or until the crust is golden brown and the filling is bubbling. If the crust starts to brown too quickly, you can tent it with aluminum foil.
- Cool Completely: Let the pie cool completely on a wire rack before slicing and serving. This is crucial for allowing the filling to set properly. If you cut into the pie while it’s still warm, the filling will be runny. I know it’s tempting, but patience is key!
Tips for Success:
- Keep Ingredients Cold: The key to a flaky pie crust is to keep the butter and shortening as cold as possible. This prevents the fat from melting into the flour, which would result in a tough crust.
- Don’t Overmix the Dough: Overmixing the dough develops the gluten in the flour, which can make the crust tough. Mix just until the dough comes together.
- Chill the Dough: Chilling the dough allows the gluten to relax and the fat to firm up, resulting in a tender and flaky crust.
- Use Fresh or Frozen Cherries: You can use either fresh or frozen cherries for this recipe. If using frozen cherries, be sure to thaw them completely and drain off any excess liquid before adding them to the filling.
- Adjust Sugar to Taste: The amount of sugar you need will depend on the sweetness of the cherries. Taste the filling before adding it to the crust and adjust the sugar accordingly.
- Prevent a Soggy Bottom Crust: To prevent a soggy bottom crust, you can blind bake the crust for about 15 minutes before adding the filling. To blind bake, line the crust with parchment paper and fill it with pie weights or dried beans. Bake for 15 minutes, then remove the parchment paper and weights and bake for another 5-10 minutes, or until the crust is lightly golden brown.
- Protect the Crust Edges: If the crust edges start to brown too quickly, you can cover them with aluminum foil or use a pie shield.
- Let the Pie Cool Completely: As mentioned before, letting the pie cool completely is essential for allowing the filling to set properly.
Variations:
- Add Spices: You can add a pinch of cinnamon, nutmeg, or cloves to the cherry filling for added flavor.
- Use Different Extracts: Instead of almond extract, you can use vanilla extract or cherry extract.
- Add a Crumble Topping: Instead of a top crust, you can add a crumble topping made from flour, butter, and sugar.
- Make Mini Pies: You can use this recipe to make mini cherry pies. Simply divide the dough and filling into smaller portions and bake for a shorter amount of time.
Serving Suggestions:
- Serve warm with a scoop of vanilla ice cream or whipped cream.
- Dust with powdered sugar before serving.
- Serve with a dollop of Greek yogurt for a tangy twist.
Conclusion:
Well, there you have it! I truly believe this Cherry Pie Homemade recipe is a must-try for anyone who loves that classic, comforting taste of summer. From the flaky, buttery crust to the sweet and tart cherry filling, every bite is an absolute delight. It’s more than just a dessert; it’s a memory waiting to be made, a tradition to be shared, and a slice of pure happiness.
Why is it a must-try? Because it’s simple, satisfying, and bursting with fresh cherry flavor. You control the ingredients, ensuring a pie that’s free from artificial flavors and preservatives. Plus, the aroma that fills your kitchen while it bakes is simply divine! Forget store-bought pies; this homemade version is in a league of its own. The satisfaction of creating something so delicious from scratch is truly rewarding.
But the best part? It’s incredibly versatile! While I love serving it warm with a scoop of vanilla ice cream a classic pairing that never fails there are so many other ways to enjoy this Cherry Pie Homemade masterpiece.
Serving Suggestions and Variations:
* Whipped Cream Dream: A dollop of freshly whipped cream adds a light and airy touch that complements the richness of the pie.
* Cheddar Cheese Pairing: Don’t knock it ’til you try it! A slice of sharp cheddar cheese alongside a warm slice of cherry pie is a surprisingly delicious combination. The savory cheese balances the sweetness of the cherries perfectly.
* Almond Extract Boost: For an extra layer of flavor, add a teaspoon of almond extract to the cherry filling. It enhances the cherry flavor and adds a subtle nutty note.
* Crumb Topping Delight: If you’re not a fan of a top crust, try a crumb topping instead! Combine flour, butter, and sugar to create a buttery, crumbly topping that adds a delightful texture.
* Individual Cherry Pies: Want to make individual servings? Simply divide the dough and filling into smaller pie tins or ramekins. They’re perfect for parties or portion control!
* Cherry Pie Bars: Press the bottom crust into a baking dish, spread the cherry filling on top, and then add a crumb topping. Bake until golden brown and cut into bars. These are great for a grab-and-go treat.
* Spiced Cherry Pie: Add a pinch of cinnamon, nutmeg, or cloves to the cherry filling for a warm and comforting spiced version.
* Lemon Zest Zest: A little lemon zest brightens the cherry flavor and adds a refreshing touch.
I’m so excited for you to try this recipe and experience the joy of baking your own Cherry Pie Homemade. It’s a labor of love, but trust me, it’s worth every minute. The smiles on the faces of your loved ones as they savor each bite will be your greatest reward.
So, gather your ingredients, preheat your oven, and get ready to create a pie that will become a family favorite. And please, don’t be shy! I’d love to hear about your experience. Share your photos, tips, and variations in the comments below. Let’s build a community of cherry pie enthusiasts! Happy baking! I can’t wait to see what delicious creations you come up with. Let me know if you have any questions, and I’ll do my best to help. Enjoy!
Cherry Pie Homemade: The Ultimate Guide to Baking Perfection
A classic homemade cherry pie featuring a flaky, buttery crust and a delightful sweet-tart cherry filling. Perfect for any occasion!
Ingredients
- 2 ½ cups all-purpose flour, plus more for dusting
- 1 teaspoon salt
- 1 cup (2 sticks) unsalted butter, very cold and cut into ½-inch cubes
- ½ cup vegetable shortening, very cold
- 6-8 tablespoons ice water
- 6 cups fresh sweet cherries, pitted (or frozen, thawed and drained)
- ¾ cup granulated sugar (adjust to taste depending on cherry sweetness)
- ¼ cup cornstarch
- 2 tablespoons lemon juice
- 1 teaspoon almond extract
- ¼ teaspoon salt
- 2 tablespoons unsalted butter, cut into small pieces
- 1 large egg
- 1 tablespoon milk or water
- Turbinado sugar or granulated sugar
Instructions
- In a large bowl, whisk together the flour and salt.
- Add the cold butter and shortening to the flour mixture. Using a pastry blender or your fingertips (work quickly to keep the fat cold!), cut the fat into the flour until the mixture resembles coarse crumbs. You should still see some pea-sized pieces of butter and shortening.
- Gradually add the ice water, one tablespoon at a time, mixing gently after each addition. Use just enough water to bring the dough together. The dough should be slightly shaggy but hold together when you pinch it.
- Divide the dough in half, flatten each half into a disc, wrap tightly in plastic wrap, and refrigerate for at least 2 hours, or preferably overnight.
- In a large bowl, combine the pitted cherries, granulated sugar, cornstarch, lemon juice, almond extract, and salt. Gently toss to coat the cherries evenly.
- Let the cherry mixture sit for about 15-20 minutes, allowing the juices to release.
- Preheat your oven to 400°F (200°C). Place a baking sheet on the lower rack of the oven to catch any drips from the pie.
- On a lightly floured surface, roll out one of the dough discs into a 12-inch circle. Carefully transfer the dough to a 9-inch pie plate. Trim the edges of the dough, leaving about a 1-inch overhang. Crimp the edges of the crust decoratively.
- Pour the cherry filling into the prepared pie crust. Dot the top of the filling with the small pieces of butter.
- Roll out the second dough disc into a 12-inch circle. You can either place the entire crust over the filling, or cut it into strips to make a lattice top.
- If using a full top crust, cut several slits in the top to allow steam to escape during baking. Carefully place the crust over the filling. Trim the edges and crimp them together with the bottom crust to seal.
- If making a lattice top, cut the dough into strips. Weave the strips over and under each other to create a lattice pattern. Trim the edges and crimp them to the bottom crust.
- In a small bowl, whisk together the egg and milk (or water). Brush the top crust with the egg wash.
- Sprinkle the top crust with turbinado sugar or granulated sugar for added sweetness and sparkle.
- Bake the pie for 45-55 minutes, or until the crust is golden brown and the filling is bubbling. If the crust starts to brown too quickly, you can tent it with aluminum foil.
- Let the pie cool completely on a wire rack before slicing and serving.
Notes
- Keep Ingredients Cold: The key to a flaky pie crust is to keep the butter and shortening as cold as possible.
- Don’t Overmix the Dough: Overmixing the dough develops the gluten in the flour, which can make the crust tough. Mix just until the dough comes together.
- Chill the Dough: Chilling the dough allows the gluten to relax and the fat to firm up, resulting in a tender and flaky crust.
- Use Fresh or Frozen Cherries: You can use either fresh or frozen cherries for this recipe. If using frozen cherries, be sure to thaw them completely and drain off any excess liquid before adding them to the filling.
- Adjust Sugar to Taste: The amount of sugar you need will depend on the sweetness of the cherries. Taste the filling before adding it to the crust and adjust the sugar accordingly.
- Prevent a Soggy Bottom Crust: To prevent a soggy bottom crust, you can blind bake the crust for about 15 minutes before adding the filling. To blind bake, line the crust with parchment paper and fill it with pie weights or dried beans. Bake for 15 minutes, then remove the parchment paper and weights and bake for another 5-10 minutes, or until the crust is lightly golden brown.
- Protect the Crust Edges: If the crust edges start to brown too quickly, you can cover them with aluminum foil or use a pie shield.
- Let the Pie Cool Completely: Letting the pie cool completely is essential for allowing the filling to set properly.
- Add Spices: You can add a pinch of cinnamon, nutmeg, or cloves to the cherry filling for added flavor.
- Use Different Extracts: Instead of almond extract, you can use vanilla extract or cherry extract.
- Add a Crumble Topping: Instead of a top crust, you can add a crumble topping made from flour, butter, and sugar.
- Make Mini Pies: You can use this recipe to make mini cherry pies. Simply divide the dough and filling into smaller portions and bake for a shorter amount of time.
- Serve warm with a scoop of vanilla ice cream or whipped cream.
- Dust with powdered sugar before serving.
- Serve with a dollop of Greek yogurt for a tangy twist.


Leave a Comment