
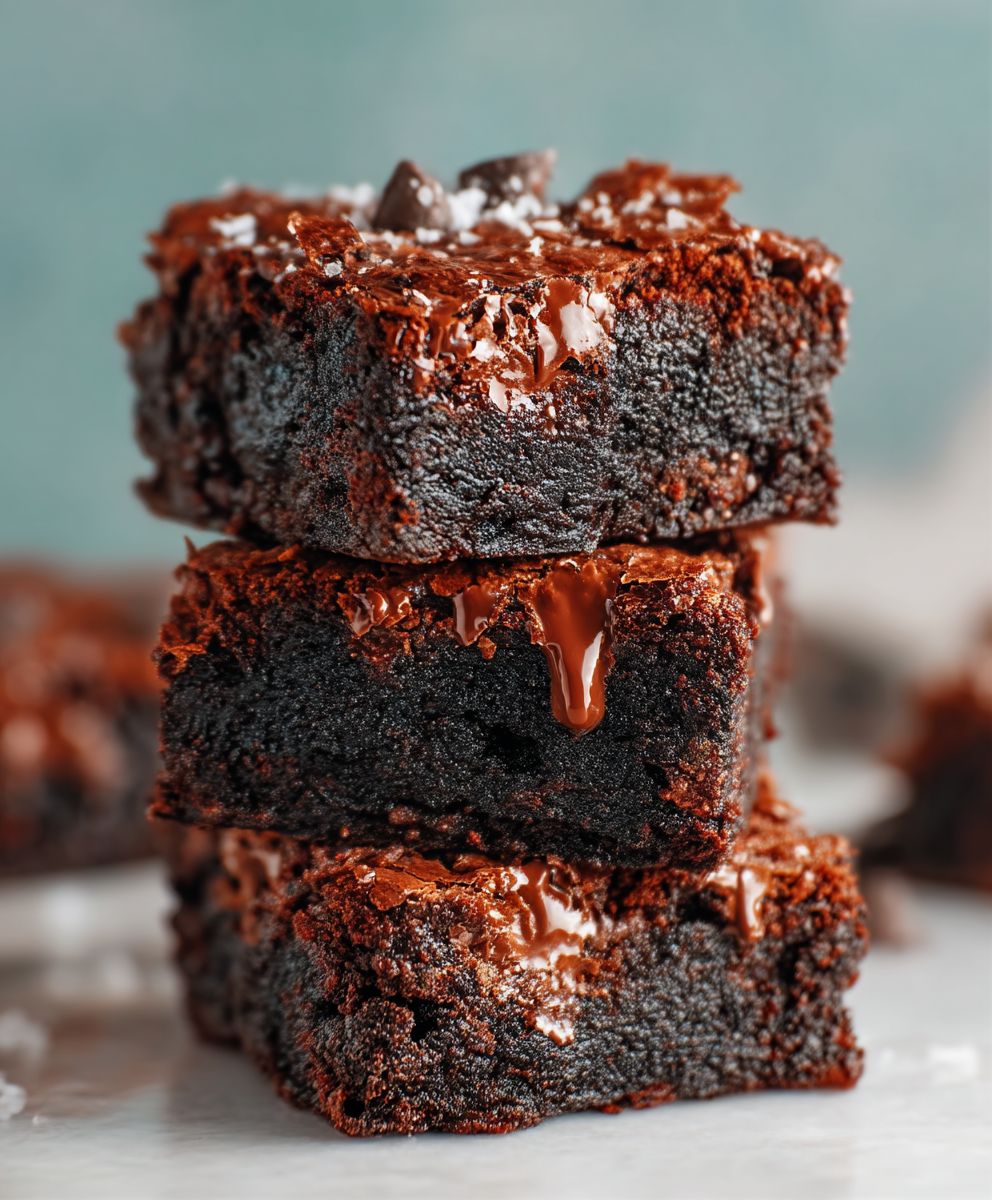
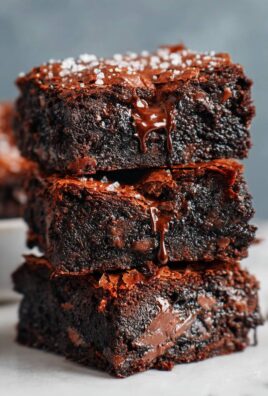
Fudgy Homemade Brownies: Is there anything more comforting than the rich, decadent aroma wafting from your oven as a batch of these treats bakes to perfection? I think not! Forget store-bought mixes; we’re diving headfirst into creating the ultimate brownie experience from scratch. These aren’t just any brownies; they’re intensely fudgy, boasting a crackly top and a melt-in-your-mouth center that will have everyone begging for seconds.
Brownies, in their various forms, have been a beloved American dessert since the late 19th century. While their exact origins are debated, one popular story suggests a cook accidentally added melted chocolate to biscuit dough, resulting in the first brownie. Regardless of their true beginning, brownies quickly became a staple in households across the country, evolving from simple, dense squares to the diverse range of textures and flavors we enjoy today.
What makes a truly great brownie? For many, it’s all about that fudgy texture a dense, moist interior that clings to your fork. Others crave the satisfying chewiness or the delightful contrast of a crisp, crackled top. But above all, it’s the intense chocolate flavor that keeps us coming back for more. This recipe for Fudgy Homemade Brownies delivers on all fronts, offering a simple yet incredibly rewarding baking experience. They are perfect for a cozy night in, a potluck gathering, or simply satisfying that chocolate craving that hits us all from time to time. So, preheat your oven, gather your ingredients, and let’s get baking!

Ingredients:
- 1 cup (2 sticks) unsalted butter, melted
- 2 cups granulated sugar
- 1 cup unsweetened cocoa powder
- 1 teaspoon salt
- 1 teaspoon baking powder
- 1 tablespoon vanilla extract
- 4 large eggs
- 1 cup all-purpose flour
- 1 cup chocolate chips (semi-sweet or dark, your preference!)
- Optional: 1/2 cup chopped walnuts or pecans
Preparing the Brownie Batter
Alright, let’s get started! These brownies are seriously fudgy and delicious, and the best part is, they’re surprisingly easy to make. First things first, preheat your oven to 350°F (175°C). This is crucial to ensure even baking and that perfect, slightly crispy top.
- Melt the Butter: In a large, microwave-safe bowl, melt the butter. You can do this in 30-second intervals, stirring in between, to prevent it from splattering everywhere. Alternatively, you can melt it in a saucepan over low heat. Just make sure it’s completely melted and smooth.
- Combine Wet Ingredients: Once the butter is melted, add the granulated sugar, cocoa powder, salt, and baking powder to the bowl. Whisk everything together until it’s well combined and forms a thick, slightly grainy paste. Don’t worry if it looks a little dry at this stage; the eggs will add the necessary moisture.
- Add Vanilla Extract: Stir in the vanilla extract. This adds a lovely depth of flavor to the brownies. Don’t skip it!
- Incorporate the Eggs: Now, for the eggs. Add them one at a time, mixing well after each addition. This is important because it helps to emulsify the batter and create that signature fudgy texture. Make sure each egg is fully incorporated before adding the next. Overmixing at this stage can lead to tougher brownies, so be gentle but thorough.
- Gently Fold in the Flour: This is where we need to be careful. Add the flour to the wet ingredients and gently fold it in using a spatula. Be careful not to overmix! Overmixing develops the gluten in the flour, which can result in tough, cakey brownies. We want fudgy, not cakey! Fold until just combined, meaning you see no more streaks of flour. A few small lumps are okay.
- Add Chocolate Chips (and Nuts, if using): Finally, fold in the chocolate chips (and chopped nuts, if you’re using them). I personally love using a combination of semi-sweet and dark chocolate chips for a richer flavor, but feel free to use your favorite. Again, be gentle and avoid overmixing.
Baking the Brownies
Now that the batter is ready, it’s time to bake these beauties! The baking time is crucial for achieving that perfect fudgy consistency. We want the center to be slightly gooey, not completely raw.
- Prepare the Baking Pan: Grease and flour an 8×8 inch baking pan. You can also line it with parchment paper, leaving an overhang on the sides. This makes it super easy to lift the brownies out of the pan once they’ve cooled. If you don’t have parchment paper, greasing and flouring works just fine.
- Pour the Batter into the Pan: Pour the brownie batter into the prepared pan and spread it evenly. You can use a spatula or the back of a spoon to smooth out the surface.
- Bake: Bake in the preheated oven for 25-30 minutes, or until a toothpick inserted into the center comes out with moist crumbs attached. Remember, we want fudgy, so a clean toothpick is not the goal here. Start checking at 25 minutes and adjust the baking time as needed, depending on your oven.
- Cool Completely: This is the hardest part, I know! But it’s essential to let the brownies cool completely in the pan before cutting them. This allows them to set properly and prevents them from falling apart. I usually let them cool for at least an hour, or even longer if I can resist the temptation.
Cutting and Serving
The moment we’ve all been waiting for! Time to cut and devour these fudgy masterpieces. Here are a few tips for clean cuts and perfect presentation.
- Loosen the Edges: If you used parchment paper, simply lift the brownies out of the pan using the overhang. If not, run a knife around the edges of the pan to loosen the brownies.
- Cut into Squares: Use a sharp knife to cut the brownies into squares. For clean cuts, wipe the knife clean with a damp cloth after each cut. This prevents the brownies from sticking to the knife and creating messy edges.
- Serve and Enjoy: Serve the brownies at room temperature. They’re delicious on their own, but you can also top them with a scoop of vanilla ice cream, a drizzle of chocolate sauce, or a sprinkle of powdered sugar.
Tips for Extra Fudgy Brownies
Want to take your brownies to the next level of fudgy goodness? Here are a few extra tips and tricks:
- Use High-Quality Cocoa Powder: The quality of your cocoa powder can significantly impact the flavor of your brownies. I recommend using a Dutch-processed cocoa powder for a richer, smoother flavor.
- Don’t Overbake: This is the most important tip! Overbaking will result in dry, cakey brownies. Err on the side of underbaking for that perfect fudgy texture.
- Add Espresso Powder: A teaspoon of espresso powder can enhance the chocolate flavor of the brownies. It won’t make them taste like coffee, but it will add a subtle depth of flavor.
- Use Brown Sugar: Substituting some of the granulated sugar with brown sugar can add a chewy texture and a hint of molasses flavor.
- Chill the Batter: For even fudgier brownies, chill the batter in the refrigerator for at least 30 minutes before baking. This allows the flavors to meld together and helps to create a denser texture.
- Experiment with Toppings: Get creative with your toppings! Try adding chopped nuts, pretzels, caramel sauce, or even a swirl of peanut butter.
Troubleshooting
Sometimes, things don’t go exactly as planned. Here are a few common brownie problems and how to fix them:
- Brownies are too dry: This is usually caused by overbaking. Make sure to check the brownies frequently and remove them from the oven when a toothpick inserted into the center comes out with moist crumbs attached.
- Brownies are too cakey: This can be caused by overmixing the batter. Be gentle when folding in the flour and avoid overmixing.
- Brownies are too gooey: This is usually caused by underbaking. Bake the brownies for a few more minutes, until a toothpick inserted into the center comes out with moist crumbs attached.
- Brownies are sinking in the middle: This can be caused by a few things, including underbaking, using too much liquid, or opening the oven door too frequently during baking. Make sure to bake the brownies for the correct amount of time, use the correct amount of liquid, and avoid opening the oven door unnecessarily.
- Brownies are sticking to the pan: Make sure to grease and flour the baking pan thoroughly before pouring in the batter. You can also line the pan with parchment paper for easy removal.
Storage Instructions
These brownies are best enjoyed fresh, but they can also be stored for later. Here’s how to store them properly:
- Room Temperature: Store the brownies in an airtight container at room temperature for up to 3 days.
- Refrigerator: Store the brownies in an airtight container in the refrigerator for up to 1 week.
- Freezer: Store the brownies in an airtight container in the freezer for up to 3 months. To thaw, simply place the brownies in the refrigerator overnight or at room temperature for a few hours.
Variations
Want to switch things up? Here are a few fun variations on this classic brownie recipe:
- Peanut Butter Swirl Brownies: Swirl peanut butter into the batter before baking for a delicious peanut butter and chocolate combination.
- Salted Caramel Brownies: Drizzle caramel sauce over the baked brownies and sprinkle with sea salt for a sweet and salty treat.
- Mint Chocolate Brownies: Add a few drops of peppermint extract to the batter and top with crushed peppermint candies after baking.
- Cream Cheese Sw
Conclusion:
And there you have it! These Fudgy Homemade Brownies are truly something special, and I genuinely believe they’re a must-try for any brownie lover. From the intensely chocolatey flavor to the perfectly fudgy texture, every bite is pure bliss. Forget the box mixes once you experience the rich, decadent goodness of these homemade brownies, you’ll never go back!
What makes these brownies so irresistible? It’s the combination of high-quality ingredients and the simple, straightforward method. We’re not talking about complicated techniques or hard-to-find items. Just pure, unadulterated brownie perfection, easily achievable in your own kitchen. The deep, dark chocolate flavor comes from using both unsweetened cocoa powder and melted chocolate, creating a multi-layered chocolate experience that will tantalize your taste buds. And that fudgy texture? It’s all about the ratio of ingredients and the careful baking time. We want that slightly gooey center that clings to your fork the hallmark of a truly exceptional brownie.
But the best part about these brownies is their versatility! They’re fantastic on their own, of course, but they also lend themselves beautifully to all sorts of delicious additions and variations.
Serving Suggestions & Variations:
* Classic Indulgence: Serve them warm with a scoop of vanilla ice cream and a drizzle of chocolate sauce. A sprinkle of sea salt adds a delightful contrast to the sweetness.
* Peanut Butter Bliss: Swirl in a generous dollop of peanut butter into the batter before baking for a rich and nutty twist. You can also add peanut butter chips for extra peanut butter flavor.
* Mint Chocolate Magic: Add a few drops of peppermint extract to the batter and top with crushed peppermint candies after baking.
* Espresso Boost: Stir in a teaspoon of instant espresso powder to the batter to enhance the chocolate flavor and add a subtle coffee kick.
* Nutty Delight: Fold in chopped walnuts, pecans, or almonds for added texture and flavor.
* Caramel Craze: Drizzle caramel sauce over the baked brownies and sprinkle with sea salt.
* Brownie Sundaes: Cut the brownies into squares and layer them in a glass with ice cream, whipped cream, chocolate sauce, and your favorite toppings.
* Brownie Parfaits: Crumble the brownies and layer them in a glass with yogurt, berries, and granola for a delicious and healthy treat.Don’t be afraid to experiment and get creative! The possibilities are endless. These Fudgy Homemade Brownies are a blank canvas for your culinary imagination.
I truly hope you’ll give this recipe a try. I’m confident that you’ll love them as much as I do. They’re perfect for a cozy night in, a special occasion, or simply a sweet treat to brighten your day.
Once you’ve baked your own batch of these incredible brownies, I’d absolutely love to hear about your experience! Share your photos and comments on social media using #FudgyHomemadeBrownies or tag me in your posts. Let me know what variations you tried and how they turned out. I’m always eager to see your creations and hear your feedback. Happy baking!
Fudgy Homemade Brownies: The Ultimate Recipe for Chocolate Lovers
Fudgy, decadent brownies with a rich chocolate flavor, made with simple ingredients and easy to customize with your favorite toppings.
Ingredients
- 1 cup (2 sticks) unsalted butter, melted
- 2 cups granulated sugar
- 1 cup unsweetened cocoa powder
- 1 teaspoon salt
- 1 teaspoon baking powder
- 1 tablespoon vanilla extract
- 4 large eggs
- 1 cup all-purpose flour
- 1 cup chocolate chips (semi-sweet or dark, your preference!)
- Optional: 1/2 cup chopped walnuts or pecans
Instructions
- Preheat oven to 350°F (175°C). Grease and flour an 8×8 inch baking pan (or line with parchment paper).
- In a large, microwave-safe bowl, melt the butter.
- Add the granulated sugar, cocoa powder, salt, and baking powder to the bowl. Whisk everything together until well combined.
- Stir in the vanilla extract.
- Add the eggs one at a time, mixing well after each addition.
- Gently fold in the flour using a spatula until just combined (a few small lumps are okay).
- Fold in the chocolate chips (and nuts, if using).
- Pour the brownie batter into the prepared pan and spread it evenly.
- Bake for 25-30 minutes, or until a toothpick inserted into the center comes out with moist crumbs attached.
- Cool completely in the pan before cutting.
- Loosen the edges and cut into squares.
- Serve and enjoy!
Notes
- For extra fudgy brownies, don’t overbake. Err on the side of underbaking.
- Use high-quality cocoa powder for a richer flavor. Dutch-processed is recommended.
- Add a teaspoon of espresso powder to enhance the chocolate flavor.
- Chill the batter for at least 30 minutes before baking for a denser texture.
- Wipe the knife clean with a damp cloth after each cut for clean cuts.
- Store in an airtight container at room temperature for up to 3 days, in the refrigerator for up to 1 week, or in the freezer for up to 3 months.

Leave a Comment