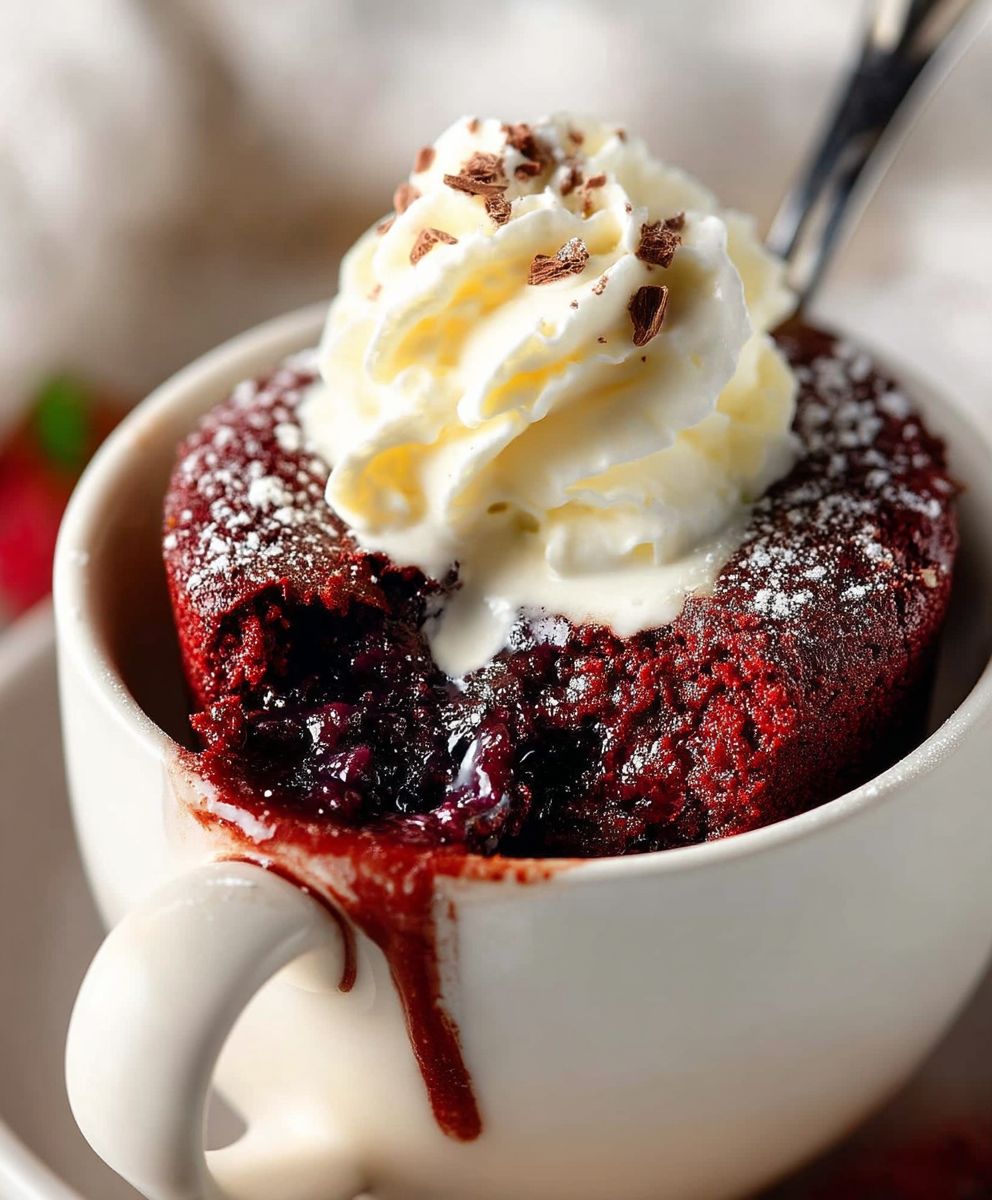
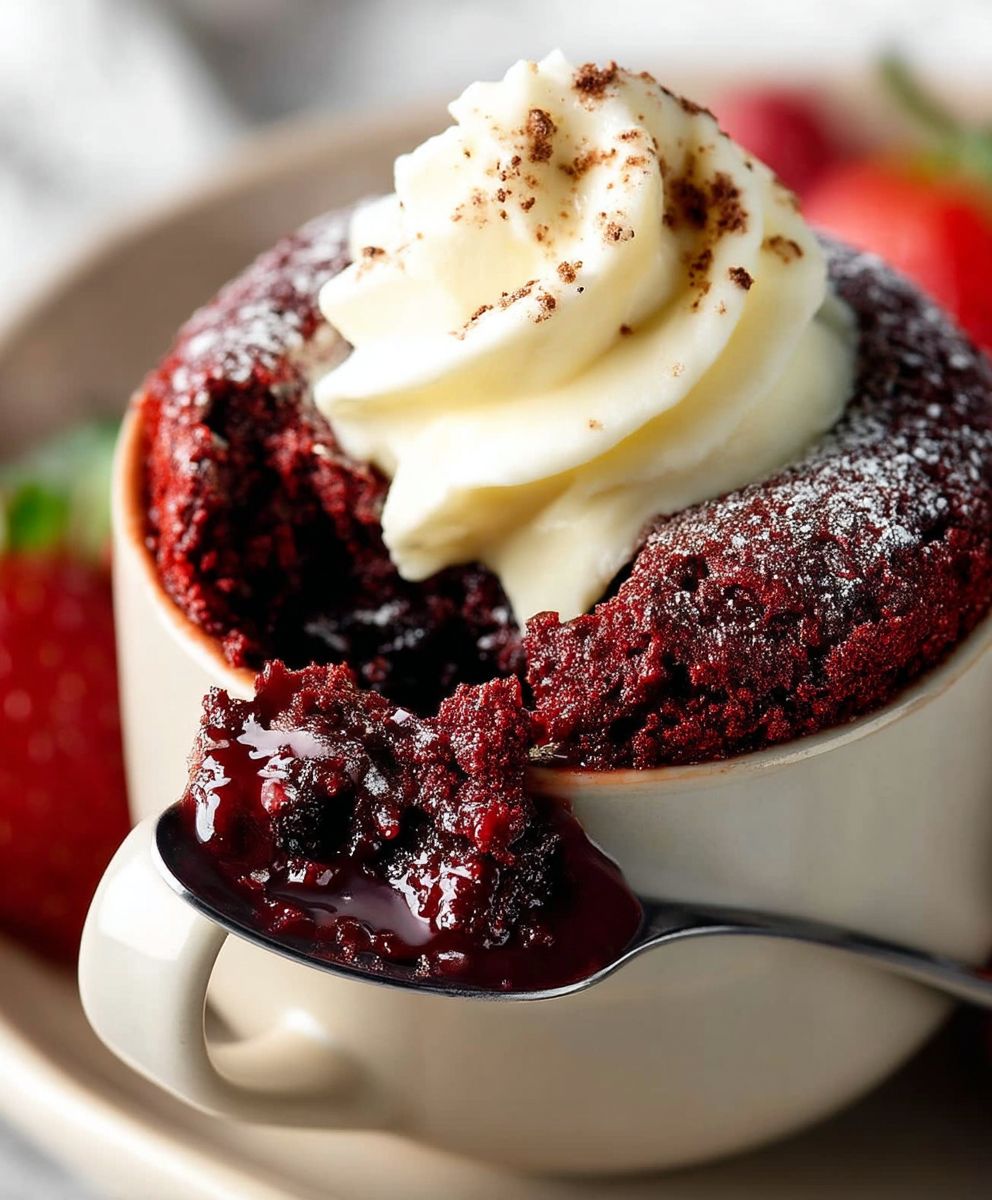
Red Velvet Mug Cake: Prepare to indulge in a decadent dessert that’s ready in minutes! Have you ever craved the rich, velvety goodness of red velvet cake but didn’t want to bake an entire cake? I have the perfect solution. This single-serving sensation delivers all the classic flavors you love, without the fuss.
Red velvet cake boasts a fascinating history, rumored to have originated during the Depression era when bakers used beet juice to enhance the color and moisture of their cakes. Over time, the recipe evolved, incorporating cocoa powder and buttermilk to create its signature tangy and slightly chocolatey flavor profile. The vibrant red hue, now often achieved with food coloring, adds to its allure, making it a visually stunning treat.
What makes this red velvet mug cake so irresistible? It’s the perfect combination of moist, tender crumb, subtle cocoa notes, and a hint of tanginess, all topped with a luscious cream cheese frosting (optional, but highly recommended!). Plus, its convenience is unmatched. Whether you’re a student craving a late-night treat, a busy professional needing a quick dessert fix, or simply someone who appreciates a perfectly portioned indulgence, this mug cake is your answer. So, grab your favorite mug and let’s get baking!
Ingredients:
- 4 tablespoons all-purpose flour
- 4 tablespoons granulated sugar
- 2 tablespoons unsweetened cocoa powder
- ? teaspoon baking powder
- ? teaspoon baking soda
- Pinch of salt
- 3 tablespoons milk
- 1 tablespoon vegetable oil
- ½ teaspoon white vinegar
- ½ teaspoon vanilla extract
- ? teaspoon red food coloring (liquid or gel) adjust to desired color
- Optional: Chocolate chips, cream cheese frosting, whipped cream for topping
Preparing the Red Velvet Mug Cake Batter
Alright, let’s get started! This red velvet mug cake is so easy, you’ll be enjoying a warm, delicious treat in just a few minutes. The key is to measure everything carefully, especially the leavening agents (baking powder and baking soda), to get that perfect fluffy texture.
- Combine the Dry Ingredients: In a large mug (at least 12-ounce capacity to prevent overflow), add the all-purpose flour, granulated sugar, unsweetened cocoa powder, baking powder, baking soda, and salt. Use a fork or small whisk to thoroughly combine all the dry ingredients. This ensures that the baking powder and baking soda are evenly distributed, which is crucial for the cake to rise properly. Make sure there are no lumps of cocoa powder remaining.
- Incorporate the Wet Ingredients: Now, add the milk, vegetable oil, white vinegar, vanilla extract, and red food coloring to the mug. The vinegar reacts with the baking soda to create a light and airy texture, so don’t skip it! The red food coloring is what gives the cake its signature red velvet hue. Start with ? teaspoon and add more, a drop at a time, until you achieve your desired color. Remember, the color will deepen slightly during cooking.
- Mix Until Smooth: Using the fork, mix all the ingredients together until you have a smooth batter. Be sure to scrape the bottom and sides of the mug to ensure that all the dry ingredients are fully incorporated. Overmixing can lead to a tough cake, so mix just until everything is combined. The batter should be relatively thin and pourable.
- Check for Consistency: Give the batter one last stir to make sure everything is well combined. If the batter seems too thick, add a tiny splash of milk (a teaspoon at a time) until it reaches the right consistency. It should be similar to the consistency of pancake batter.
- Add Chocolate Chips (Optional): If you’re feeling extra decadent, now is the time to add a sprinkle of chocolate chips to the batter. Gently fold them in with the fork. You can use milk chocolate, dark chocolate, or even white chocolate chips, depending on your preference.
Cooking Process
Now for the magic! Microwaving times can vary depending on your microwave’s wattage, so it’s important to keep an eye on the cake while it’s cooking. We want it to be cooked through but still moist and tender.
- Microwave on High: Place the mug in the microwave and cook on high for 60-90 seconds. Start with 60 seconds and check for doneness. The cake should be puffed up and slightly firm to the touch. If it’s still wet or gooey in the center, continue cooking in 15-second intervals until it’s done. Be careful not to overcook it, as this will result in a dry, rubbery cake.
- Check for Doneness: To check if the cake is done, insert a toothpick into the center. If the toothpick comes out clean or with a few moist crumbs attached, the cake is ready. If it comes out with wet batter, continue cooking for another 15 seconds and check again.
- Let it Cool Slightly: Once the cake is cooked, remove it from the microwave and let it cool for a minute or two. This allows the cake to set slightly and prevents it from being too hot to handle.
Assembling and Serving
The best part! Now it’s time to decorate and enjoy your delicious red velvet mug cake. Get creative with your toppings and make it your own!
- Add Frosting (Optional): If you’re using cream cheese frosting, now is the time to add it. You can either spread it on top of the cake or pipe it on using a piping bag or a zip-top bag with a corner snipped off. A simple cream cheese frosting recipe is: 2 tablespoons softened cream cheese, 2 tablespoons powdered sugar, and a splash of milk. Mix until smooth and creamy.
- Add Whipped Cream (Optional): Another great topping option is whipped cream. You can use store-bought whipped cream or make your own by whipping heavy cream with a little sugar and vanilla extract.
- Garnish (Optional): For an extra touch of elegance, you can garnish your mug cake with a sprinkle of cocoa powder, chocolate shavings, or fresh berries.
- Serve Immediately: Red velvet mug cake is best served warm, right after it’s cooked. Grab a spoon and dig in!
Tips and Variations
Want to customize your red velvet mug cake? Here are a few ideas:
- Chocolate Chips: As mentioned earlier, chocolate chips are a great addition to the batter. You can use any type of chocolate chip you like.
- Nuts: Add chopped nuts, such as pecans or walnuts, to the batter for a bit of crunch.
- Espresso Powder: A pinch of espresso powder will enhance the chocolate flavor of the cake.
- Buttermilk: Substitute the milk with buttermilk for a tangier flavor.
- Different Food Coloring: Experiment with different food colorings to create different colored mug cakes.
- Vegan Option: Use plant-based milk and oil to make this recipe vegan.
- Gluten-Free Option: Substitute the all-purpose flour with a gluten-free all-purpose flour blend.
Troubleshooting
Sometimes things don’t go exactly as planned. Here are a few common issues and how to fix them:
- Cake is Dry: You may have overcooked the cake. Try reducing the cooking time by 15 seconds next time.
- Cake is Gummy: You may have overmixed the batter. Mix just until the ingredients are combined.
- Cake Didn’t Rise: Make sure your baking powder and baking soda are fresh. Also, ensure that you’re measuring the ingredients accurately.
- Cake Overflowed: Use a larger mug or reduce the amount of batter.
Storage
While this mug cake is best enjoyed immediately, you can store leftovers in an airtight container in the refrigerator for up to 24 hours. However, the texture may change slightly.
Nutritional Information (Approximate)
Please note that the nutritional information is an estimate and may vary depending on the specific ingredients used.
- Calories: Approximately 300-400
- Fat: 15-20g
- Carbohydrates: 40-50g
- Protein: 5-7g
Enjoy!
I hope you enjoy this quick and easy red velvet mug cake recipe! It’s the perfect treat for satisfying your sweet cravings in a matter of minutes. Happy baking!

Conclusion:
This isn’t just another mug cake recipe; it’s a tiny slice of red velvet heaven ready in minutes! Seriously, if you’re craving something sweet, comforting, and utterly delicious, you absolutely must try this Red Velvet Mug Cake. The moist, tender crumb, the subtle cocoa notes, and that signature tang it all comes together in a single mug of pure bliss. It’s the perfect solution for those late-night cravings, a quick dessert after dinner, or even a little self-care treat during a busy day.
But what truly makes this recipe a must-try is its simplicity. Forget complicated baking processes and mountains of dishes. This mug cake requires minimal ingredients, a microwave, and a few minutes of your time. It’s practically foolproof, even for the most novice bakers (or, let’s be honest, those of us who just don’t feel like putting in a lot of effort!). And the best part? You get a perfectly portioned dessert, so you can indulge without feeling guilty.
Now, let’s talk about serving suggestions and variations because the possibilities are truly endless! For a classic touch, top your warm Red Velvet Mug Cake with a dollop of cream cheese frosting. You can either make a quick homemade version with cream cheese, powdered sugar, and a splash of milk, or use a store-bought frosting for even more convenience. A sprinkle of chopped walnuts or pecans adds a delightful crunch, while a dusting of cocoa powder elevates the presentation.
If you’re feeling adventurous, try adding a few chocolate chips to the batter before microwaving. The melted chocolate will create pockets of gooey goodness throughout the cake. Or, for a festive twist, stir in a pinch of cinnamon or nutmeg. You could even add a swirl of raspberry jam for a fruity and tangy complement to the red velvet flavor.
Another fun variation is to crumble the mug cake and layer it with whipped cream and fresh berries in a small glass for a mini trifle. This is a great way to impress your friends or family with a simple yet elegant dessert. And if you’re a coffee lover, try pairing your Red Velvet Mug Cake with a strong cup of coffee or a creamy latte. The bitterness of the coffee will balance the sweetness of the cake perfectly.
Honestly, I’ve made this Red Velvet Mug Cake countless times, and I’m always amazed at how satisfying it is. It’s the perfect reminder that you don’t need a lot of time or effort to create something truly special. So, what are you waiting for? Grab your favorite mug, gather your ingredients, and get ready to experience the magic of this easy and delicious dessert.
I’m so confident that you’ll love this recipe, and I can’t wait to hear about your experience! Please, please, please give this Red Velvet Mug Cake a try and then come back and share your thoughts in the comments below. Did you try any of the variations? What toppings did you use? What did you think of the flavor and texture? Your feedback is invaluable, and it helps other readers discover the joy of this simple yet satisfying treat. Happy baking (or should I say, mug-caking!)!
Red Velvet Mug Cake: Quick & Easy Recipe for a Single Serving
A quick and easy red velvet mug cake that's ready in minutes! Perfect for satisfying your sweet cravings with minimal effort.
Ingredients
- 4 tablespoons all-purpose flour
- 4 tablespoons granulated sugar
- 2 tablespoons unsweetened cocoa powder
- ? teaspoon baking powder
- ? teaspoon baking soda
- Pinch of salt
- 3 tablespoons milk
- 1 tablespoon vegetable oil
- ½ teaspoon white vinegar
- ½ teaspoon vanilla extract
- ? teaspoon red food coloring (liquid or gel) adjust to desired color
- Optional: Chocolate chips, cream cheese frosting, whipped cream for topping
Instructions
- Combine Dry Ingredients: In a large mug, combine flour, sugar, cocoa powder, baking powder, baking soda, and salt. Mix well.
- Incorporate Wet Ingredients: Add milk, vegetable oil, white vinegar, vanilla extract, and red food coloring to the mug.
- Mix Until Smooth: Mix all ingredients until you have a smooth batter, scraping the bottom and sides of the mug.
- Check for Consistency: Batter should be relatively thin and pourable. If the batter seems too thick, add a tiny splash of milk (a teaspoon at a time) until it reaches the right consistency.
- Add Chocolate Chips (Optional): Gently fold in chocolate chips, if desired.
- Microwave on High: Microwave on high for 60-90 seconds. Start with 60 seconds and check for doneness.
- Check for Doneness: Insert a toothpick into the center. If it comes out clean or with a few moist crumbs, the cake is ready. If it comes out with wet batter, continue cooking for another 15 seconds and check again.
- Let it Cool Slightly: Let it cool for a minute or two.
- Add Frosting (Optional): Spread cream cheese frosting on top.
- Add Whipped Cream (Optional): Top with whipped cream.
- Garnish (Optional): Garnish with cocoa powder, chocolate shavings, or fresh berries.
- Serve Immediately: Enjoy warm!
Notes
- Microwave times may vary depending on your microwave’s wattage.
- Be careful not to overcook the cake, as this will result in a dry, rubbery cake.
- For cream cheese frosting: Mix 2 tablespoons softened cream cheese, 2 tablespoons powdered sugar, and a splash of milk until smooth.
- Customize with chocolate chips, nuts, espresso powder, or buttermilk.
- For a vegan option, use plant-based milk and oil.
- For a gluten-free option, substitute the all-purpose flour with a gluten-free all-purpose flour blend.


Leave a Comment