
Christmas cookie bars: the ultimate holiday dessert that will disappear faster than Santa on Christmas Eve! Forget spending hours rolling out dough and meticulously decorating individual cookies. This year, embrace the ease and festive cheer of these delightful bars, a treat that’s as simple to make as it is satisfying to devour.
While the exact origins of cookie bars are a bit hazy, their popularity surged in the mid-20th century, coinciding with the rise of convenience baking. They represent a modern twist on traditional cookies, offering a quicker, less fussy way to enjoy the same beloved flavors. Think of them as a delicious shortcut to holiday happiness!
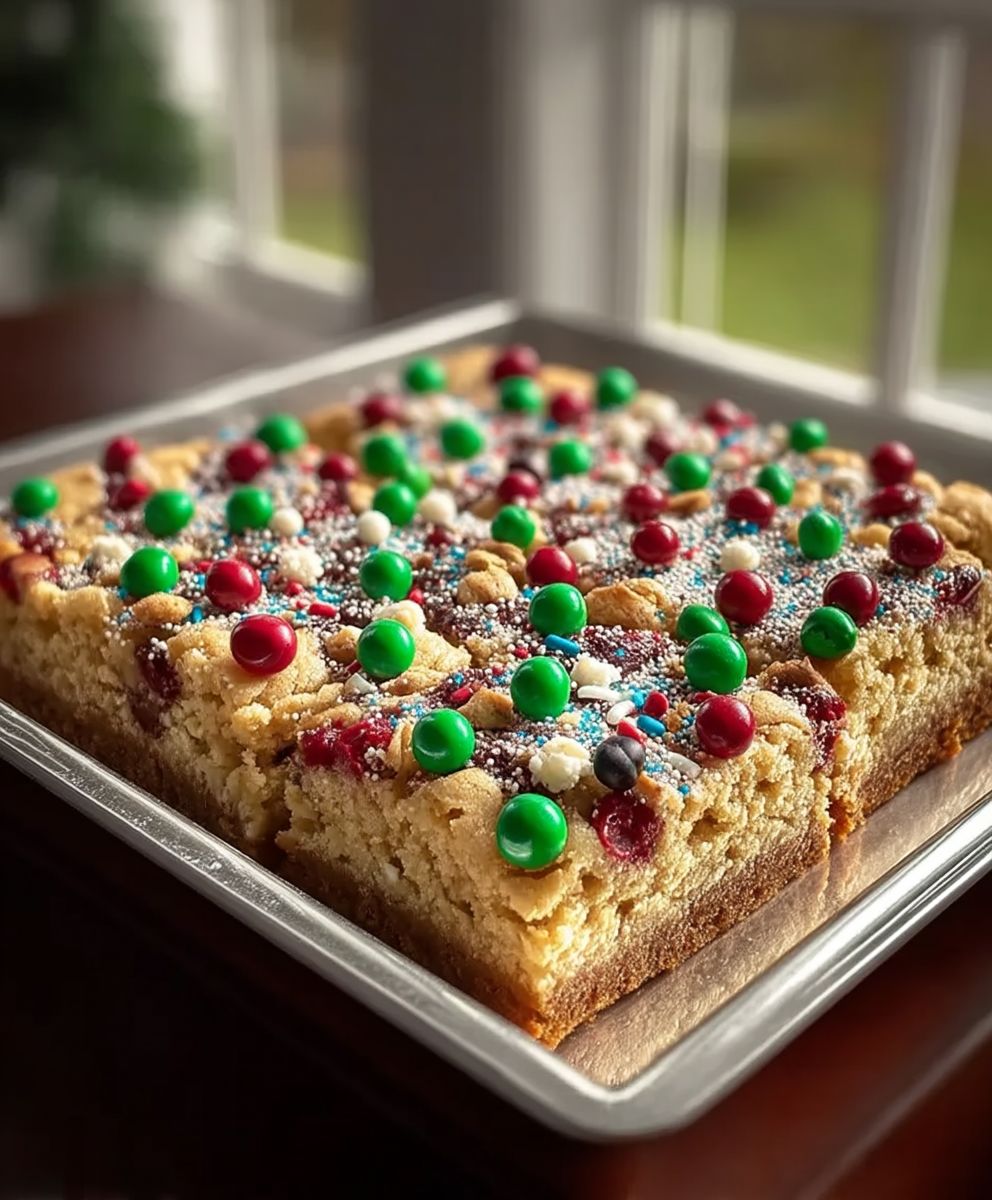
What makes Christmas cookie bars so irresistible? It’s the perfect combination of textures: a soft, chewy base loaded with colorful sprinkles, chocolate chips, and maybe even some chopped nuts. The taste is pure holiday magic buttery, sweet, and bursting with festive flavors. Plus, they’re incredibly convenient. One pan, one bake, and you’ve got a whole batch of treats ready to share (or keep all to yourself we won’t judge!). Get ready to experience the joy of Christmas baking without the stress!

Ingredients:
- 1 cup (2 sticks) unsalted butter, softened
- 1 ½ cups granulated sugar
- 2 large eggs
- 1 teaspoon vanilla extract
- 3 cups all-purpose flour
- 1 teaspoon baking powder
- ½ teaspoon baking soda
- ½ teaspoon salt
- 1 cup Christmas-themed sprinkles (red, green, and white)
- ½ cup white chocolate chips
- ½ cup milk chocolate chips
- ½ cup crushed peppermint candies
- Optional: Additional sprinkles for topping after baking
Preparing the Cookie Dough:
- Cream the Butter and Sugar: In a large bowl, or the bowl of your stand mixer, cream together the softened butter and granulated sugar until light and fluffy. This usually takes about 3-5 minutes. Make sure your butter is truly softened; otherwise, you’ll end up with lumps in your dough. I like to let mine sit out for about an hour before I start baking.
- Add the Eggs and Vanilla: Beat in the eggs one at a time, mixing well after each addition. Then, stir in the vanilla extract. The vanilla really enhances the flavor, so don’t skip it!
- Combine Dry Ingredients: In a separate medium bowl, whisk together the all-purpose flour, baking powder, baking soda, and salt. Whisking ensures that the baking powder and soda are evenly distributed, which is crucial for a good rise.
- Gradually Add Dry Ingredients to Wet Ingredients: Gradually add the dry ingredients to the wet ingredients, mixing on low speed until just combined. Be careful not to overmix! Overmixing can lead to tough cookies. I usually add the dry ingredients in three additions, mixing until just incorporated after each addition.
- Stir in the Festive Mix-Ins: Gently fold in the Christmas sprinkles, white chocolate chips, milk chocolate chips, and crushed peppermint candies. Make sure everything is evenly distributed throughout the dough. This is where the magic happens, and the bars start to look really festive!
Baking the Cookie Bars:
- Prepare the Baking Pan: Preheat your oven to 350°F (175°C). Grease and flour a 9×13 inch baking pan. Alternatively, you can line the pan with parchment paper, leaving an overhang on the sides for easy removal. This is my preferred method because it makes cleanup a breeze!
- Press the Dough into the Pan: Press the cookie dough evenly into the prepared baking pan. You can use your hands or the back of a spoon to spread it out. Make sure the dough is evenly distributed so the bars bake uniformly.
- Bake the Bars: Bake for 25-30 minutes, or until the edges are golden brown and a toothpick inserted into the center comes out with just a few moist crumbs. Keep a close eye on them, as baking times can vary depending on your oven.
- Cool Completely: Remove the baking pan from the oven and let the cookie bars cool completely in the pan before cutting. This is important because if you try to cut them while they’re still warm, they’ll crumble. I usually let them cool for at least an hour.
Cutting and Serving:
- Cut into Bars: Once the cookie bars are completely cool, cut them into squares or rectangles. The size is up to you! I usually cut them into about 24 bars.
- Optional: Add Extra Sprinkles: If desired, sprinkle additional Christmas sprinkles over the top of the bars for an extra festive touch. This is a great way to add some extra sparkle!
- Serve and Enjoy: Serve the Christmas cookie bars and enjoy! These are perfect for holiday parties, gift-giving, or just a sweet treat for yourself.
Tips and Variations:
- Softening the Butter: Make sure your butter is properly softened before creaming it with the sugar. The butter should be soft enough to easily press your finger into, but not melted. If you’re short on time, you can microwave the butter in 5-second intervals, checking it frequently to avoid melting.
- Using Different Chocolate: Feel free to experiment with different types of chocolate chips. Dark chocolate chips, peanut butter chips, or even chopped chocolate bars would all be delicious.
- Adding Nuts: If you like nuts in your cookies, you can add ½ cup of chopped pecans, walnuts, or almonds to the dough.
- Gluten-Free Option: To make these cookie bars gluten-free, simply substitute the all-purpose flour with a gluten-free all-purpose flour blend. Make sure the blend contains xanthan gum, as this helps to bind the ingredients together.
- Vegan Option: To make these cookie bars vegan, substitute the butter with a vegan butter alternative, the eggs with flax eggs (1 tablespoon of ground flaxseed mixed with 3 tablespoons of water per egg), and the chocolate chips with vegan chocolate chips.
- Storage: Store the cookie bars in an airtight container at room temperature for up to 3 days. You can also freeze them for up to 2 months. To freeze, wrap the bars individually in plastic wrap and then place them in a freezer-safe bag or container.
- Peppermint Extract: For an even stronger peppermint flavor, add ¼ teaspoon of peppermint extract to the dough along with the vanilla extract. Be careful not to add too much, as peppermint extract can be quite potent.
- Frosting: If you want to add frosting, a simple buttercream or cream cheese frosting would be delicious. You can tint the frosting with food coloring to make it even more festive.
- Sprinkle Variety: Don’t limit yourself to just red, green, and white sprinkles! Use any combination of sprinkles that you like. Gold and silver sprinkles would also look beautiful.
- Making Ahead: The cookie dough can be made ahead of time and stored in the refrigerator for up to 2 days. Just be sure to wrap it tightly in plastic wrap. When you’re ready to bake, let the dough sit at room temperature for about 30 minutes to soften slightly before pressing it into the pan.
Troubleshooting:
- Bars are too dry: This could be due to overbaking or using too much flour. Make sure to measure the flour accurately and don’t overbake the bars.
- Bars are too crumbly: This could be due to not enough butter or overmixing the dough. Make sure your butter is properly softened and don’t overmix the dough.
- Bars are too soft: This could be due to underbaking or using too much butter. Bake the bars until the edges are golden brown and a toothpick inserted into the center comes out with just a few moist crumbs.
- Bars are browning too quickly: If the bars are browning too quickly, you can tent the baking pan with aluminum foil to prevent them from burning.
- Sprinkles are melting: Some sprinkles can melt in the oven. To prevent this, use high-quality sprinkles that are designed for baking. You can also add some of the sprinkles after the bars have baked and cooled slightly.
Nutritional Information (Approximate, per bar):
- Calories: 250
- Fat: 12g
- Saturated Fat: 7g
- Cholesterol: 35mg
- Sodium: 150mg
- Carbohydrates: 35g
- Sugar: 20g
- Protein: 2g
Note: Nutritional information is approximate and may vary depending on the specific ingredients used.
Why This Recipe Works:
This recipe is a guaranteed crowd-pleaser for several reasons. First, the combination of butter and sugar creates a rich and flavorful base for the cookie bars. The addition of vanilla extract enhances the overall taste and aroma. The baking powder and baking soda provide the perfect amount of lift, resulting in bars that are soft and chewy, not dense or cakey. The Christmas sprinkles, white chocolate chips, milk chocolate chips, and crushed peppermint candies add a festive touch and a variety of textures and flavors that everyone will love. The recipe is also very versatile, allowing you to customize it with your favorite mix-ins and toppings. Finally, the bars are easy to make and require no special equipment or skills. Even beginner bakers can successfully make these delicious Christmas cookie bars!
Conclusion:
And there you have it! These Christmas cookie bars are truly a must-try this holiday season. They’re incredibly easy to make, require minimal effort compared to individual cookies, and deliver maximum festive flavor. Forget spending hours rolling out dough and meticulously decorating these bars are your shortcut to holiday baking bliss. The combination of the soft, chewy base, the creamy frosting, and the explosion of colorful sprinkles creates a symphony of textures and tastes that will delight everyone from the little ones to the seasoned cookie connoisseurs.
But the best part? They’re incredibly versatile! Feel free to get creative with your toppings. Not a fan of sprinkles? Try chopped nuts, mini chocolate chips, crushed peppermint candies, or even a drizzle of melted white chocolate. For a richer flavor, you could add a tablespoon of molasses to the dough. If you’re feeling adventurous, experiment with different extracts almond, peppermint, or even a hint of orange would add a unique twist.
Serving Suggestions and Variations:
These Christmas cookie bars are perfect for so many occasions. Serve them warm with a scoop of vanilla ice cream for a decadent dessert. Pack them in festive tins as thoughtful homemade gifts for friends and neighbors. Bring them to your next holiday potluck and watch them disappear in minutes. Or simply enjoy them with a cup of hot cocoa by the fireplace on a cozy winter evening.
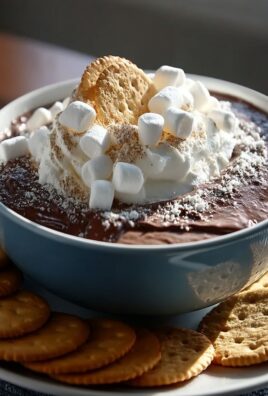
For a fun variation, consider making a “cookie bar sundae” bar. Set out the cooled and frosted bars, along with bowls of various toppings like whipped cream, chocolate sauce, caramel sauce, chopped nuts, and different types of sprinkles. Let everyone customize their own perfect cookie bar sundae! You could even add a scoop of ice cream to each bar for an extra special treat.
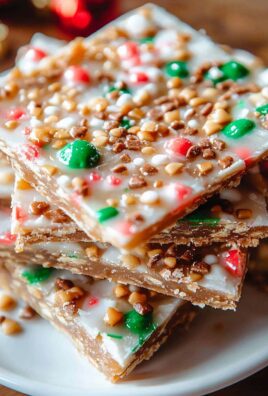
Another great idea is to cut the bars into smaller squares and use them as part of a holiday dessert platter. Arrange them alongside other festive treats like gingerbread men, sugar cookies, and peppermint bark for a visually stunning and delicious spread.
And if you’re looking for a way to use up leftover candy canes, crush them into small pieces and sprinkle them on top of the frosting for a refreshing peppermint crunch. The possibilities are truly endless!
I truly believe that these Christmas cookie bars will become a new holiday tradition in your home. They’re so simple to make, yet so incredibly satisfying. The joy of baking and sharing these treats with loved ones is what the holiday season is all about.
So, what are you waiting for? Preheat your oven, gather your ingredients, and get ready to create some holiday magic in your kitchen. I’m confident that you’ll love these bars as much as I do.
I can’t wait to hear about your experience making these Christmas cookie bars! Please, please, please try this recipe! Share your photos and stories in the comments below. Let me know what variations you tried and how they turned out. Did you add any unique toppings? Did you make them for a special occasion? I’m eager to see your creations and hear your feedback. Happy baking, and happy holidays!
Christmas Cookie Bars: Easy Recipe & Festive Ideas
Festive Christmas cookie bars with sprinkles, white chocolate, milk chocolate, and peppermint. Great for holiday parties and gifts!
Ingredients
- 1 cup (2 sticks) unsalted butter, softened
- 1 ½ cups granulated sugar
- 2 large eggs
- 1 teaspoon vanilla extract
- 3 cups all-purpose flour
- 1 teaspoon baking powder
- ½ teaspoon baking soda
- ½ teaspoon salt
- 1 cup Christmas-themed sprinkles (red, green, and white)
- ½ cup white chocolate chips
- ½ cup milk chocolate chips
- ½ cup crushed peppermint candies
- Optional: Additional sprinkles for topping after baking
Instructions
- Cream the Butter and Sugar: In a large bowl, or the bowl of your stand mixer, cream together the softened butter and granulated sugar until light and fluffy (3-5 minutes).
- Add the Eggs and Vanilla: Beat in the eggs one at a time, mixing well after each addition. Stir in the vanilla extract.
- Combine Dry Ingredients: In a separate medium bowl, whisk together the all-purpose flour, baking powder, baking soda, and salt.
- Gradually Add Dry Ingredients to Wet Ingredients: Gradually add the dry ingredients to the wet ingredients, mixing on low speed until just combined. Be careful not to overmix!
- Stir in the Festive Mix-Ins: Gently fold in the Christmas sprinkles, white chocolate chips, milk chocolate chips, and crushed peppermint candies.
- Prepare the Baking Pan: Preheat oven to 350°F (175°C). Grease and flour a 9×13 inch baking pan or line with parchment paper.
- Press the Dough into the Pan: Press the cookie dough evenly into the prepared baking pan.
- Bake the Bars: Bake for 25-30 minutes, or until the edges are golden brown and a toothpick inserted into the center comes out with just a few moist crumbs.
- Cool Completely: Remove from oven and let cool completely in the pan before cutting.
- Cut into Bars: Once cooled, cut into squares or rectangles.
- Optional: Add Extra Sprinkles: Sprinkle additional Christmas sprinkles over the top.
- Serve and Enjoy: Serve and enjoy!
Notes
- Make sure butter is softened, not melted.
- Don’t overmix the dough.
- Cool completely before cutting to prevent crumbling.
- Experiment with different chocolate chips, nuts, or extracts.
- For gluten-free, use a gluten-free all-purpose flour blend.
- For vegan, substitute butter, eggs, and chocolate chips with vegan alternatives.
- Store in an airtight container at room temperature for up to 3 days or freeze for up to 2 months.

Leave a Comment