
Cane Tenders, those glorious, golden-fried strips of chicken perfection, are more than just a meal; they’re a culinary experience! Have you ever wondered how something so simple could inspire such devotion? I certainly have, and after countless batches and taste tests, I’m ready to share my ultimate recipe with you.
While the exact origins of the modern chicken tender are debated, the concept of breaded and fried chicken has roots that stretch back centuries. From classic Southern fried chicken to schnitzel variations across Europe, the idea of coating and frying chicken for a crispy, juicy result is a timeless culinary tradition. But Cane Tenders, in their specific form, represent a more recent innovation, focusing on the tenderloin cut for maximum tenderness and flavor.
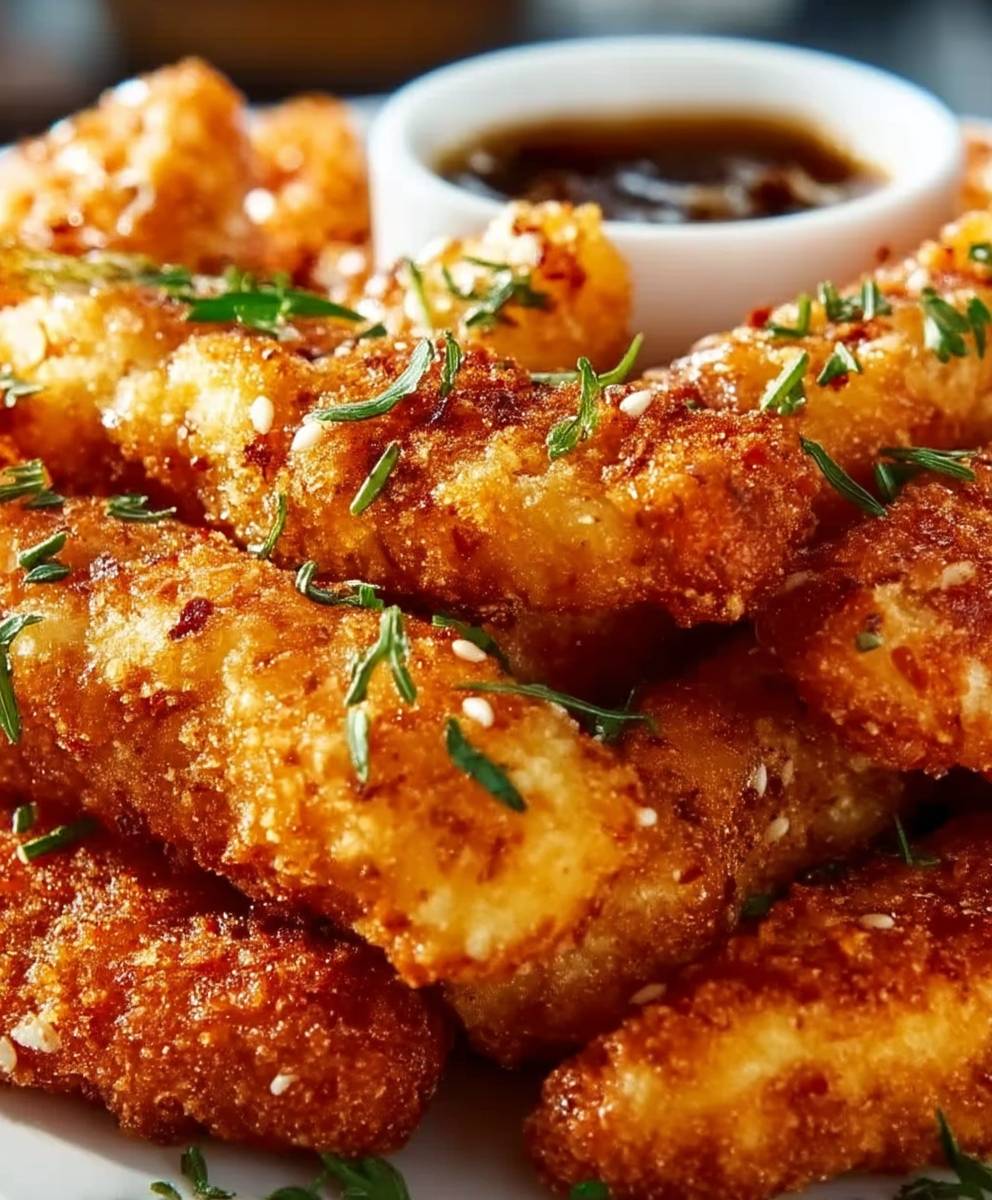
What is it about these delectable strips that makes them so irresistible? It’s a symphony of textures and tastes! The perfectly crisp, golden-brown breading gives way to incredibly juicy and tender chicken inside. The simplicity of the seasoning allows the natural flavor of the chicken to shine, making them incredibly versatile. Whether you’re dipping them in your favorite sauce, adding them to a salad, or enjoying them straight from the fryer, they’re a guaranteed crowd-pleaser. Plus, let’s be honest, they’re incredibly convenient! So, are you ready to learn how to make the best Cane Tenders you’ve ever tasted? Let’s get started!

Ingredients:
- 2 lbs boneless, skinless chicken breasts, cut into 1-inch strips
- 1 cup buttermilk
- 1 tablespoon hot sauce (such as Frank’s RedHot)
- 2 cups all-purpose flour
- 1/2 cup cornstarch
- 2 tablespoons paprika
- 2 tablespoons garlic powder
- 2 tablespoons onion powder
- 1 tablespoon dried oregano
- 1 tablespoon dried thyme
- 1 tablespoon salt
- 1 teaspoon black pepper
- 1/2 teaspoon cayenne pepper (optional, for extra heat)
- Vegetable oil, for frying
- Your favorite dipping sauce (honey mustard, BBQ sauce, ranch, etc.)
Preparing the Chicken:
- Marinate the Chicken: In a large bowl, combine the chicken strips, buttermilk, and hot sauce. Make sure all the chicken is submerged in the buttermilk mixture. Cover the bowl with plastic wrap and refrigerate for at least 2 hours, or preferably overnight. This step is crucial for tender and flavorful chicken. The buttermilk tenderizes the chicken and the hot sauce adds a subtle kick.
- Prepare the Dredging Station: While the chicken is marinating, prepare your dredging station. In a large, shallow dish (like a baking dish or pie plate), whisk together the flour, cornstarch, paprika, garlic powder, onion powder, oregano, thyme, salt, pepper, and cayenne pepper (if using). The cornstarch helps create a crispier coating, and the spices add a ton of flavor. Make sure everything is well combined.
Dredging and Coating:
- Remove Chicken from Marinade: Take the chicken out of the refrigerator. Let the excess buttermilk drip off each piece before dredging. You don’t want the coating to be too wet, as this can lead to soggy tenders.
- Dredge the Chicken: Working in batches, dredge each chicken strip in the flour mixture, making sure to coat it completely. Press the flour mixture onto the chicken to ensure it adheres well. This is where you build up that crispy crust!
- Double Dredge (Optional, but Recommended): For an extra crispy coating, you can double dredge the chicken. After the first dredge, dip the chicken back into the buttermilk mixture (just a quick dip!) and then dredge it again in the flour mixture. This creates a thicker, more textured coating that will fry up beautifully.
- Rest the Dredged Chicken: Place the dredged chicken strips on a wire rack lined with parchment paper. Let them rest for about 15-20 minutes before frying. This allows the coating to adhere even better and helps prevent it from falling off during frying.
Frying the Chicken:
- Heat the Oil: Pour about 2-3 inches of vegetable oil into a large, heavy-bottomed pot or Dutch oven. Heat the oil over medium-high heat to 350-375°F (175-190°C). Use a deep-fry thermometer to monitor the temperature of the oil. Maintaining the correct temperature is essential for crispy, evenly cooked chicken. If the oil is too cold, the chicken will absorb too much oil and become greasy. If the oil is too hot, the outside will burn before the inside is cooked through.
- Fry the Chicken: Carefully add the chicken strips to the hot oil in batches, being careful not to overcrowd the pot. Overcrowding will lower the oil temperature and result in soggy chicken. Fry for about 4-6 minutes per batch, flipping halfway through, until the chicken is golden brown and cooked through. The internal temperature of the chicken should reach 165°F (74°C). Use a meat thermometer to check for doneness.
- Remove and Drain: Use a slotted spoon or spider to remove the fried chicken tenders from the oil and place them on a wire rack lined with paper towels to drain excess oil. This helps keep them crispy.
Serving:
- Serve Immediately: Serve the chicken tenders immediately while they are hot and crispy.
- Dipping Sauces: Offer a variety of dipping sauces, such as honey mustard, BBQ sauce, ranch dressing, ketchup, or your favorite homemade sauce.
- Sides: Serve with classic sides like french fries, coleslaw, mashed potatoes, or corn on the cob.
Tips and Tricks for Perfect Cane’s Tenders:
- Don’t Skip the Buttermilk: The buttermilk is key to tenderizing the chicken and adding flavor. Don’t substitute it with regular milk unless you add a tablespoon of lemon juice or vinegar to it and let it sit for 5 minutes to curdle slightly.
- Use a Thermometer: A deep-fry thermometer is essential for maintaining the correct oil temperature. This will ensure that the chicken cooks evenly and doesn’t burn.
- Don’t Overcrowd the Pot: Frying in batches is important to maintain the oil temperature and prevent the chicken from becoming soggy.
- Rest the Chicken After Dredging: Letting the dredged chicken rest for a few minutes allows the coating to adhere better and prevents it from falling off during frying.
- Double Dredge for Extra Crispiness: If you want an extra crispy coating, double dredge the chicken.
- Season Generously: Don’t be afraid to season the flour mixture generously. This is where most of the flavor comes from.
- Adjust the Heat: If you like your chicken tenders spicy, add more cayenne pepper to the flour mixture.
- Keep Warm in the Oven: If you’re making a large batch, you can keep the cooked chicken tenders warm in a preheated oven at 200°F (93°C) until ready to serve. Place them on a wire rack in the oven to prevent them from becoming soggy.
- Leftovers: Leftover chicken tenders can be stored in an airtight container in the refrigerator for up to 3 days. Reheat them in the oven or air fryer for best results. Avoid microwaving them, as this will make them soggy.
- Air Fryer Option: For a healthier option, you can air fry the chicken tenders. Preheat your air fryer to 400°F (200°C). Spray the chicken tenders with cooking spray and air fry for 10-12 minutes, flipping halfway through, until golden brown and cooked through.
Variations:
- Spicy Chicken Tenders: Add more cayenne pepper or other chili powder to the flour mixture for a spicier kick. You can also add a dash of hot sauce to the buttermilk marinade.
- Lemon Pepper Chicken Tenders: Add lemon pepper seasoning to the flour mixture for a zesty flavor.
- Parmesan Chicken Tenders: Add grated Parmesan cheese to the flour mixture for a cheesy flavor.
- Honey Garlic Chicken Tenders: After frying, toss the chicken tenders in a honey garlic sauce for a sweet and savory flavor.
- Buffalo Chicken Tenders: After frying, toss the chicken tenders in buffalo wing sauce for a classic buffalo flavor.
Troubleshooting:
- Chicken is Soggy: This is usually caused by overcrowding the pot, frying at too low of a temperature, or not draining the chicken properly after frying. Make sure to fry in batches, maintain the correct oil temperature, and drain the chicken on a wire rack lined with paper towels.
- Coating is Falling Off: This can be caused by not pressing the flour mixture onto the chicken firmly enough, not letting the dredged chicken rest before frying, or using too much buttermilk. Make sure to press the flour mixture onto the chicken, let the dredged chicken rest, and remove excess buttermilk before dredging.
- Chicken is Burning: This is usually caused by frying at too high of a temperature. Lower the heat and monitor the oil temperature with a deep-fry thermometer.
- Chicken is Not Cooked Through: This can be caused by frying at too low of a temperature or not frying the chicken long enough. Increase the heat slightly and fry the chicken for a longer period of time, until the internal temperature reaches 165°F (74°C).
Equipment Needed:
- Large bowl
- Shallow dish (for dredging)
- Whisk
- Plastic wrap
- Wire rack
- Parchment paper
- Large, heavy-bottomed pot or Dutch oven
- Deep-fry thermometer
- Slotted spoon or spider
- Meat thermometer
Conclusion:
So there you have it! This recipe for crispy, juicy Cane Tenders is more than just a meal; it’s an experience. From the satisfying crunch to the flavorful, tender chicken inside, every bite is a little piece of comfort food heaven. I truly believe this is a must-try recipe for anyone who loves chicken, and especially for those who are looking for a delicious and easy weeknight dinner option.
Why is this recipe a must-try? Well, beyond the incredible taste, it’s also surprisingly simple to make. You don’t need any fancy equipment or hard-to-find ingredients. The instructions are straightforward, and even a beginner cook can achieve restaurant-quality results. Plus, it’s a crowd-pleaser! Whether you’re feeding a family of four or hosting a casual get-together, these Cane Tenders are guaranteed to be a hit. They are perfect for game day, birthday parties, or just a fun weekend meal.
But the best part? The versatility! While I love serving these Cane Tenders with classic sides like creamy coleslaw and crispy french fries, the possibilities are endless. For a lighter meal, try pairing them with a fresh salad or some grilled vegetables. You could also chop them up and add them to a wrap or a sandwich for a quick and easy lunch.
Serving Suggestions and Variations:
* Dipping Sauces: Don’t limit yourself to just one dipping sauce! Offer a variety of options like honey mustard, barbecue sauce, ranch dressing, or even a spicy sriracha mayo. Get creative and experiment with different flavor combinations.
* Spice It Up: If you like a little heat, add a pinch of cayenne pepper or some hot sauce to the breading mixture. You can also use a spicy marinade for the chicken tenders.
* Make it a Meal: Serve the Cane Tenders with a side of mashed potatoes and gravy for a hearty and satisfying meal.
* Tender Salad: Slice the tenders and put them on top of a bed of lettuce, tomatoes, cucumbers, and your favorite dressing.
* Tender Wraps: Wrap the tenders in a tortilla with lettuce, tomato, cheese, and your favorite sauce.
I’m so excited for you to try this recipe! I know you’re going to love it as much as I do. The key to perfect Cane Tenders is to ensure the oil is at the right temperature and to not overcrowd the pan. This will help the tenders cook evenly and get that beautiful golden-brown color.
So, what are you waiting for? Head to the kitchen, gather your ingredients, and get ready to make some amazing Cane Tenders! And most importantly, don’t forget to share your experience with me. I’d love to hear what you think of the recipe, what variations you tried, and what dipping sauces you enjoyed the most. You can leave a comment below, tag me on social media, or send me an email. I can’t wait to see your creations! Happy cooking!
Cane Tenders: Your Ultimate Guide to Raising Happy & Healthy Dogs
Crispy and juicy fried chicken tenders, marinated in buttermilk and coated in a flavorful blend of spices. Perfect with your favorite dipping sauce!
Ingredients
- 2 lbs boneless, skinless chicken breasts, cut into 1-inch strips
- 1 cup buttermilk
- 1 tablespoon hot sauce (such as Frank’s RedHot)
- 2 cups all-purpose flour
- 1/2 cup cornstarch
- 2 tablespoons paprika
- 2 tablespoons garlic powder
- 2 tablespoons onion powder
- 1 tablespoon dried oregano
- 1 tablespoon dried thyme
- 1 tablespoon salt
- 1 teaspoon black pepper
- 1/2 teaspoon cayenne pepper (optional, for extra heat)
- Vegetable oil, for frying
- Your favorite dipping sauce (honey mustard, BBQ sauce, ranch, etc.)
Instructions
- Marinate the Chicken: In a large bowl, combine the chicken strips, buttermilk, and hot sauce. Make sure all the chicken is submerged in the buttermilk mixture. Cover the bowl with plastic wrap and refrigerate for at least 2 hours, or preferably overnight.
- Prepare the Dredging Station: In a large, shallow dish, whisk together the flour, cornstarch, paprika, garlic powder, onion powder, oregano, thyme, salt, pepper, and cayenne pepper (if using).
- Remove Chicken from Marinade: Take the chicken out of the refrigerator. Let the excess buttermilk drip off each piece before dredging.
- Dredge the Chicken: Working in batches, dredge each chicken strip in the flour mixture, making sure to coat it completely. Press the flour mixture onto the chicken to ensure it adheres well.
- Double Dredge (Optional): For an extra crispy coating, dip the chicken back into the buttermilk mixture (just a quick dip!) and then dredge it again in the flour mixture.
- Rest the Dredged Chicken: Place the dredged chicken strips on a wire rack lined with parchment paper. Let them rest for about 15-20 minutes before frying.
- Heat the Oil: Pour about 2-3 inches of vegetable oil into a large, heavy-bottomed pot or Dutch oven. Heat the oil over medium-high heat to 350-375°F (175-190°C). Use a deep-fry thermometer to monitor the temperature of the oil.
- Fry the Chicken: Carefully add the chicken strips to the hot oil in batches, being careful not to overcrowd the pot. Fry for about 4-6 minutes per batch, flipping halfway through, until the chicken is golden brown and cooked through. The internal temperature of the chicken should reach 165°F (74°C). Use a meat thermometer to check for doneness.
- Remove and Drain: Use a slotted spoon or spider to remove the fried chicken tenders from the oil and place them on a wire rack lined with paper towels to drain excess oil.
- Serve Immediately: Serve the chicken tenders immediately while they are hot and crispy with your favorite dipping sauces and sides.
Notes
- The buttermilk is key to tenderizing the chicken and adding flavor. Don’t skip it!
- Use a deep-fry thermometer to maintain the correct oil temperature.
- Don’t overcrowd the pot when frying.
- Letting the dredged chicken rest allows the coating to adhere better.
- Double dredge for extra crispiness.
- Season the flour mixture generously.
- Adjust the cayenne pepper to your desired heat level.
- For a healthier option, air fry at 400°F (200°C) for 10-12 minutes, flipping halfway through.
- Leftovers can be stored in the refrigerator for up to 3 days. Reheat in the oven or air fryer.


Leave a Comment