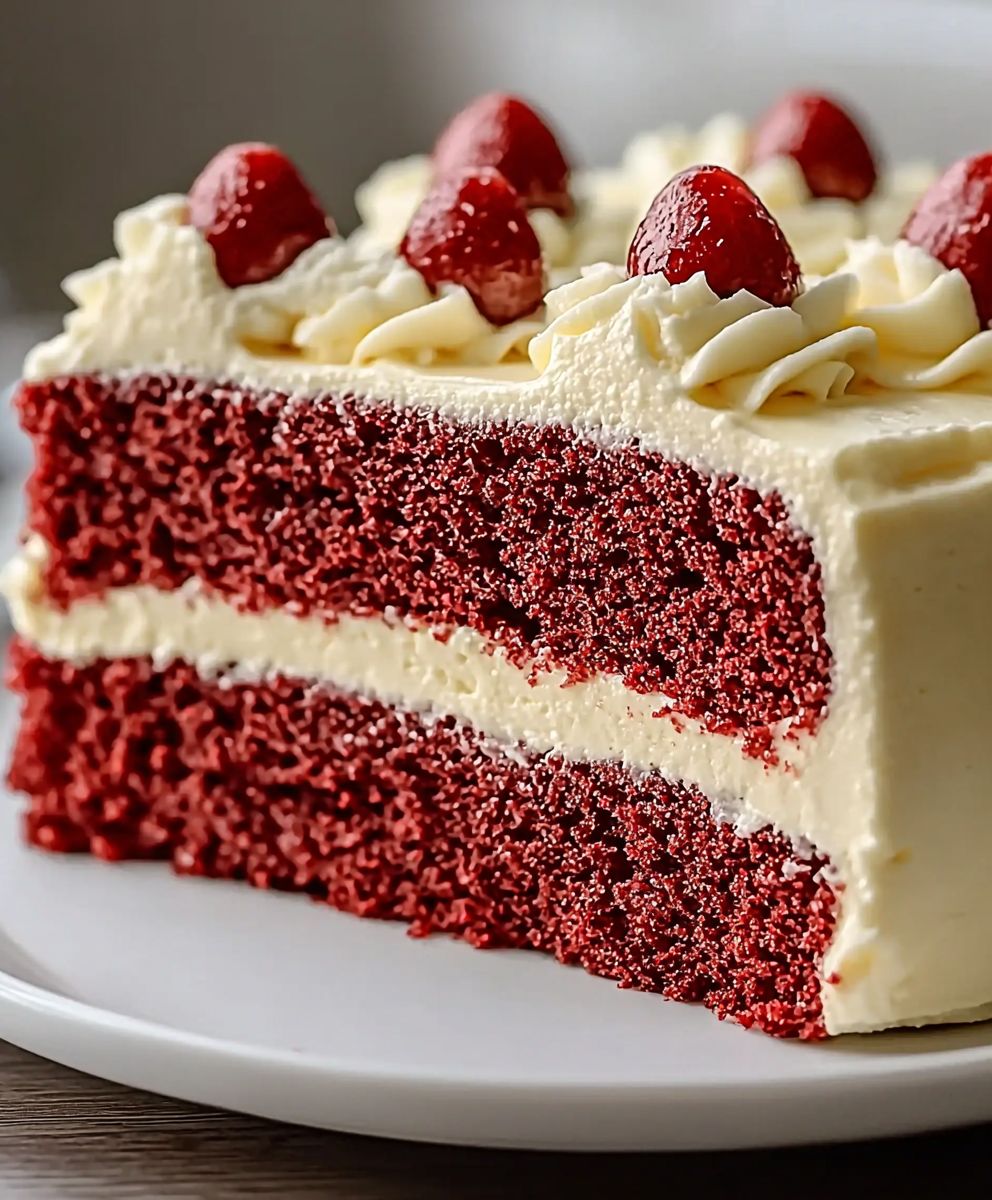
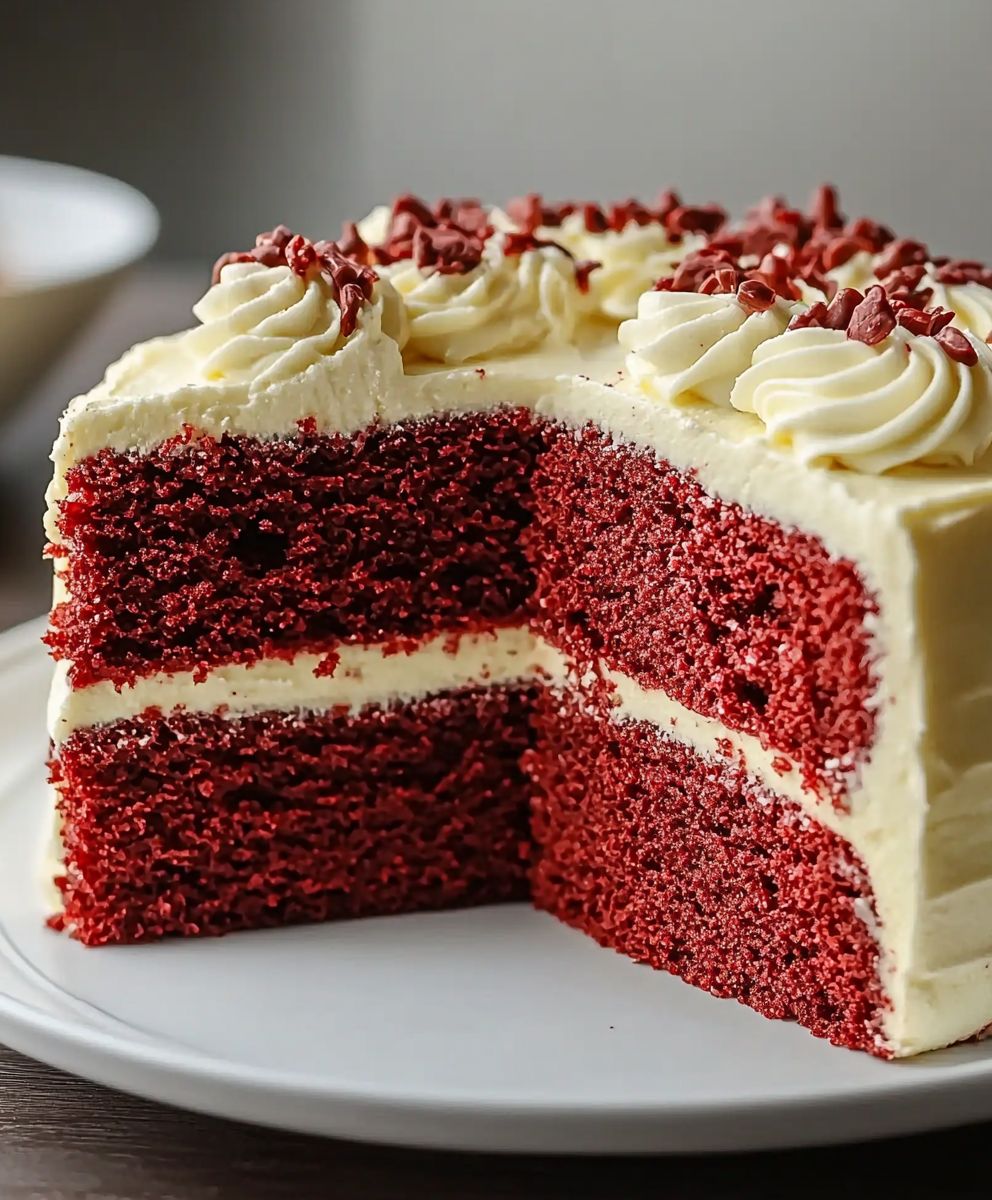
Red velvet cake: just the name conjures up images of decadent, crimson layers slathered in creamy frosting, doesn’t it? I’m about to share my foolproof recipe for this iconic dessert, a cake that’s as visually stunning as it is delicious. Forget dry, bland imitations; this recipe guarantees a moist, tender crumb and a flavor that will have everyone begging for seconds.
The history of red velvet cake is shrouded in a bit of mystery, with several origin stories floating around. Some believe it originated during the Depression era, where beet juice was used to enhance the color and moisture of cakes. Others credit the Waldorf-Astoria Hotel in New York City for its creation. Regardless of its true beginnings, red velvet cake has become a beloved classic, especially in the Southern United States, where it’s often served at special occasions and holidays.
But what makes this cake so irresistible? It’s the perfect balance of flavors and textures. The slight tang from the buttermilk and vinegar complements the rich cocoa notes, while the cream cheese frosting adds a luscious, tangy sweetness. The vibrant red hue makes it a showstopper, and the incredibly moist texture is simply divine. Whether you’re a seasoned baker or a complete novice, this recipe is easy to follow and promises a truly unforgettable red velvet cake experience. So, let’s get baking!
Ingredients:
- For the Cake:
- 2 ½ cups all-purpose flour
- 2 cups granulated sugar
- 1 teaspoon baking soda
- 1 teaspoon baking powder
- 1 teaspoon salt
- 1 cup (2 sticks) unsalted butter, softened
- 2 large eggs
- 1 cup buttermilk
- 2 tablespoons unsweetened cocoa powder
- 1 ounce (2 tablespoons) red food coloring
- 1 teaspoon white vinegar
- 1 teaspoon vanilla extract
- For the Cream Cheese Frosting:
- 8 ounces cream cheese, softened
- 1 cup (2 sticks) unsalted butter, softened
- 4 cups powdered sugar
- 1 teaspoon vanilla extract
- Pinch of salt
Preparing the Red Velvet Cake Batter
- Preheat and Prepare Your Pans: First things first, preheat your oven to 350°F (175°C). This is crucial for even baking. While the oven is heating up, grease and flour two 9-inch round cake pans. You can also line the bottoms with parchment paper rounds for extra insurance against sticking. Trust me, this step is worth it!
- Combine Dry Ingredients: In a large bowl, whisk together the flour, sugar, baking soda, baking powder, and salt. Make sure everything is evenly distributed. This ensures that the leavening agents work properly and the cake rises beautifully.
- Cream Butter and Sugar: In a separate large bowl (or the bowl of your stand mixer), cream together the softened butter and sugar until light and fluffy. This usually takes about 3-5 minutes. The mixture should be pale and airy. This step is important for creating a tender crumb.
- Add Eggs: Beat in the eggs one at a time, mixing well after each addition. Make sure each egg is fully incorporated before adding the next. This helps to emulsify the batter and create a smooth texture.
- Combine Wet Ingredients: In a small bowl, whisk together the buttermilk, cocoa powder, red food coloring, vinegar, and vanilla extract. The vinegar reacts with the baking soda to create a light and airy texture, and the red food coloring gives the cake its signature vibrant color.
- Alternate Wet and Dry Ingredients: Gradually add the wet ingredients to the butter and sugar mixture, alternating with the dry ingredients. Begin and end with the dry ingredients. Add about one-third of the dry ingredients, mix until just combined, then add half of the wet ingredients, mix until just combined. Repeat, adding another third of the dry ingredients, then the remaining wet ingredients. Finish with the remaining dry ingredients. Be careful not to overmix the batter, as this can result in a tough cake. Mix until just combined.
- Divide Batter: Divide the batter evenly between the prepared cake pans. I like to use a kitchen scale to ensure that each pan has the same amount of batter. This helps the cakes bake evenly.
Baking the Red Velvet Cake
- Bake the Cakes: Bake for 30-35 minutes, or until a wooden skewer inserted into the center comes out clean. The baking time may vary depending on your oven, so keep an eye on the cakes.
- Cool the Cakes: Let the cakes cool in the pans for 10 minutes before inverting them onto a wire rack to cool completely. Make sure the cakes are completely cool before frosting.
Preparing the Cream Cheese Frosting
- Cream Cheese and Butter: In a large bowl (or the bowl of your stand mixer), beat the softened cream cheese and butter together until smooth and creamy. This usually takes about 2-3 minutes. Make sure there are no lumps.
- Add Powdered Sugar: Gradually add the powdered sugar, one cup at a time, beating well after each addition. Start on low speed to prevent the powdered sugar from flying everywhere.
- Add Vanilla and Salt: Stir in the vanilla extract and salt. Mix until smooth and creamy. Taste and adjust sweetness if needed.
Assembling the Red Velvet Cake
- Level the Cakes: If the cakes have domed on top, use a serrated knife to level them. This will ensure that the cake layers are even and the frosting is applied smoothly.
- Frost the First Layer: Place one cake layer on a serving plate or cake stand. Spread a generous layer of cream cheese frosting evenly over the top.
- Add the Second Layer: Carefully place the second cake layer on top of the frosting.
- Frost the Entire Cake: Frost the top and sides of the cake with the remaining cream cheese frosting. You can create a smooth finish or add swirls and decorative touches.
- Chill the Cake: Refrigerate the cake for at least 30 minutes before serving. This will allow the frosting to set and make the cake easier to slice.
- Optional Garnishes: You can garnish the cake with red velvet cake crumbs, fresh berries, or chocolate shavings. Get creative and have fun!
Tips and Tricks for the Perfect Red Velvet Cake
- Use Room Temperature Ingredients: Make sure your butter, eggs, and cream cheese are at room temperature. This helps them to emulsify properly and creates a smoother batter and frosting.
- Don’t Overmix the Batter: Overmixing can develop the gluten in the flour, resulting in a tough cake. Mix until just combined.
- Use High-Quality Red Food Coloring: Gel food coloring is more concentrated than liquid food coloring, so you’ll need less of it to achieve the desired color.
- Adjust the Sweetness: If you prefer a less sweet frosting, you can reduce the amount of powdered sugar.
- Make Ahead: The cake layers can be baked ahead of time and stored in the refrigerator for up to 2 days. The frosting can also be made ahead of time and stored in the refrigerator for up to 3 days. Bring the frosting to room temperature before using.
- Freezing: The cake can be frozen for up to 2 months. Wrap the cake tightly in plastic wrap and then in foil. Thaw in the refrigerator overnight before serving.
Troubleshooting Your Red Velvet Cake
- Cake is Dry: Make sure you’re not overbaking the cake. Check for doneness with a wooden skewer. Also, ensure you’re using the correct amount of liquid ingredients.
- Cake is Dense: This could be due to overmixing the batter or not using enough leavening agents.
- Frosting is Too Soft: Make sure your cream cheese and butter are not too warm. If the frosting is too soft, refrigerate it for a few minutes before using.
- Frosting is Lumpy: Make sure your cream cheese and butter are completely smooth before adding the powdered sugar. Sifting the powdered sugar can also help.
Variations on Red Velvet Cake
- Red Velvet Cupcakes: Use the same batter to make cupcakes. Bake for 18-20 minutes.
- Red Velvet Cheesecake: Add a layer of cheesecake filling to the center of the cake.
- Red Velvet Cake Pops: Crumble the baked cake and mix it with frosting. Roll into balls and dip in melted chocolate.
- Chocolate Chips: Add chocolate chips to the batter for an extra chocolatey treat.
- Nuts: Add chopped nuts to the batter or frosting for added texture and flavor.
Serving Suggestions
- With Coffee or Tea: Red velvet cake is a perfect accompaniment to a cup of coffee or tea.
- For Special Occasions: This cake is perfect for birthdays, holidays, or any special occasion.
- As a Dessert: Serve as a decadent dessert after a meal.
- With Ice Cream: Serve with a scoop of vanilla ice cream for an extra special treat.
Nutritional Information (Approximate)
Please note that the following nutritional information is an estimate and may vary depending on the specific ingredients used and portion sizes.
- Calories: 450-550 per slice
- Fat: 25-35g
- Saturated Fat: 15-20g
- Cholesterol: 100-150mg
- Sodium: 200-300mg
- Carbohydrates: 50-60g
- Sugar: 40-50g
- 2 ½ cups all-purpose flour
- 2 cups granulated sugar
- 1 teaspoon baking soda
- 1 teaspoon baking powder
- 1 teaspoon salt
- 1 cup (2 sticks) unsalted butter, softened
- 2 large eggs
- 1 cup buttermilk
- 2 tablespoons unsweetened cocoa powder
- 1 ounce (2 tablespoons) red food coloring
- 1 teaspoon white vinegar
- 1 teaspoon vanilla extract
- 8 ounces cream cheese, softened
- 1 cup (2 sticks) unsalted butter, softened
- 4 cups powdered sugar
- 1 teaspoon vanilla extract
- Pinch of salt
- Preheat oven to 350°F (175°C). Grease and flour two 9-inch round cake pans. Line bottoms with parchment paper rounds.
- In a large bowl, whisk together flour, sugar, baking soda, baking powder, and salt.
- In a separate large bowl, cream together softened butter and sugar until light and fluffy (3-5 minutes).
- Beat in eggs one at a time, mixing well after each addition.
- In a small bowl, whisk together buttermilk, cocoa powder, red food coloring, vinegar, and vanilla extract.
- Gradually add wet ingredients to the butter and sugar mixture, alternating with dry ingredients. Begin and end with dry ingredients. Mix until just combined, being careful not to overmix.
- Divide batter evenly between prepared cake pans.
- Bake for 30-35 minutes, or until a wooden skewer inserted into the center comes out clean.
- Let cakes cool in pans for 10 minutes before inverting onto a wire rack to cool completely.
- In a large bowl, beat softened cream cheese and butter together until smooth and creamy (2-3 minutes).
- Gradually add powdered sugar, one cup at a time, beating well after each addition. Start on low speed.
- Stir in vanilla extract and salt. Mix until smooth and creamy. Taste and adjust sweetness if needed.
- If cakes have domed, use a serrated knife to level them.
- Place one cake layer on a serving plate. Spread a generous layer of cream cheese frosting evenly over the top.
- Carefully place the second cake layer on top of the frosting.
- Frost the top and sides of the cake with the remaining cream cheese frosting.
- Refrigerate the cake for at least 30 minutes before serving.
- Garnish with red velvet cake crumbs, fresh berries, or chocolate shavings.
- Use room temperature ingredients for best results.
- Don’t overmix the batter.
- Use high-quality gel food coloring for vibrant color.
- Adjust sweetness of frosting to your preference.
- Cake layers and frosting can be made ahead of time.
- Cake can be frozen for up to 2 months.
Conclusion:
And there you have it! This red velvet cake recipe isn’t just another cake; it’s an experience. From the vibrant color to the unbelievably moist crumb and the tangy cream cheese frosting, every bite is a little slice of heaven. I truly believe this is a must-try recipe for anyone who appreciates a classic dessert with a touch of elegance. It’s perfect for birthdays, holidays, or even just a special weekend treat.
But why is this particular red velvet cake recipe so special? It’s all about the balance. The subtle cocoa flavor, the hint of tang from the buttermilk, and the perfect amount of sweetness all come together to create a symphony of flavors that will dance on your taste buds. Plus, the cream cheese frosting is the ideal complement, adding a rich and creamy counterpoint to the cake’s delicate texture. I’ve spent years perfecting this recipe, tweaking it here and there until I achieved what I consider to be red velvet cake perfection.
Now, let’s talk about serving suggestions and variations! While this cake is absolutely divine on its own, there are plenty of ways to customize it to your liking. For a more festive presentation, try adding fresh berries like raspberries or strawberries on top. A dusting of cocoa powder or a sprinkle of chocolate shavings can also elevate the look and add an extra layer of flavor.
If you’re feeling adventurous, you could even try making red velvet cupcakes instead of a full-sized cake. Simply adjust the baking time accordingly, and you’ll have adorable individual treats that are perfect for parties or lunchboxes. Another fun variation is to add a layer of chocolate ganache between the cake layers for an extra decadent touch. Or, for a lighter option, consider using a whipped cream frosting instead of cream cheese frosting. The possibilities are endless!
I also love serving this cake with a scoop of vanilla ice cream or a dollop of whipped cream. A warm cup of coffee or tea is the perfect accompaniment, too. No matter how you choose to enjoy it, I’m confident that this red velvet cake will become a new favorite in your household.
I’ve poured my heart and soul into this recipe, and I’m so excited for you to try it. I truly believe that baking is an act of love, and I hope that this cake brings joy and happiness to you and your loved ones. So, go ahead, gather your ingredients, preheat your oven, and get ready to create something truly special.
I can’t wait to hear about your baking adventures! Please, please, please, try this red velvet cake recipe! Once you do, I would absolutely love to hear about your experience. Did you make any variations? Did you serve it with anything special? What did your family and friends think? Share your photos and stories in the comments below! Your feedback is invaluable, and it helps me continue to improve and share recipes that you’ll love. Happy baking! I’m sure you’ll find this recipe to be a keeper.
Red Velvet Cake: The Ultimate Guide to Baking Perfection
Moist red velvet cake with tangy cream cheese frosting, perfect for any occasion.

Leave a Comment