
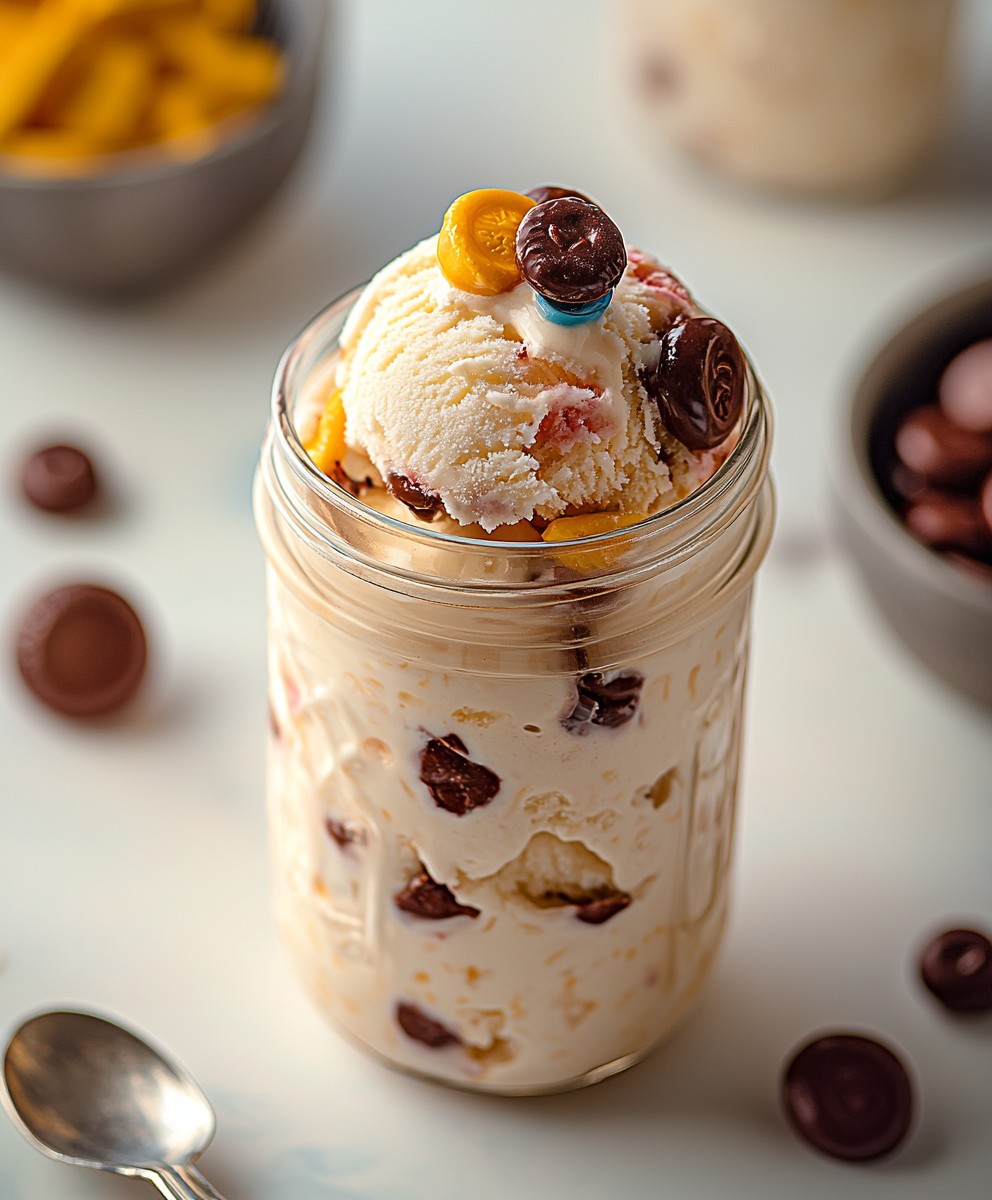
Mason Jar Ice Cream: the easiest, most fun way to whip up a batch of creamy, dreamy homemade ice cream! Forget fancy ice cream makers and complicated recipes. This method is so simple, even the kids can get involved, making it the perfect family activity for a hot summer day. Are you ready to ditch the store-bought stuff and create a personalized frozen treat that will have everyone begging for more?
While the exact origins of shaking ice cream in a jar are a bit hazy, the concept of making ice cream at home has been around for centuries. Before electric freezers, ice cream was a laborious process, often reserved for special occasions. This mason jar method brings that nostalgic charm into the modern kitchen, offering a quick and accessible way to enjoy a classic dessert. It’s a delightful throwback to simpler times, when homemade goodness was the ultimate indulgence.
People adore this Mason Jar Ice Cream recipe for its sheer simplicity and the incredible results. The taste is undeniably superior to many store-bought brands, offering a richer, creamier texture that melts in your mouth. Plus, the customization options are endless! From classic vanilla to decadent chocolate chip cookie dough, you can tailor your ice cream to perfectly suit your cravings. And let’s be honest, there’s something incredibly satisfying about shaking your way to a delicious dessert. It’s a fun, engaging, and rewarding experience that makes this Mason Jar Ice Cream a guaranteed crowd-pleaser. So, grab your mason jar, gather your ingredients, and let’s get shaking!

Ingredients:
- 2 cups (480ml) heavy cream, cold
- 1 cup (240ml) whole milk, cold
- ¾ cup (150g) granulated sugar
- 1 teaspoon pure vanilla extract
- Pinch of salt
- Optional mix-ins: Chocolate chips, chopped nuts, fruit pieces, cookie crumbles, sprinkles (to taste)
Preparing the Ice Cream Base:
- Chill Your Mason Jar: Before you even think about mixing ingredients, pop your mason jar (a quart-sized one works best) into the freezer for about 15-20 minutes. A cold jar helps the ice cream freeze faster and more evenly. Trust me, this little step makes a difference!
- Combine the Cream and Milk: In a separate bowl (I like to use a large glass measuring cup for easy pouring), whisk together the heavy cream and whole milk. Make sure they’re both nice and cold this is crucial for a creamy texture.
- Add Sugar, Vanilla, and Salt: Pour in the granulated sugar, vanilla extract, and a tiny pinch of salt. The salt might seem odd, but it actually enhances the sweetness and balances the flavors. Whisk everything together until the sugar is completely dissolved. You shouldn’t feel any gritty sugar granules at the bottom of the bowl.
- Taste Test (Optional but Recommended!): Give your ice cream base a little taste. This is your chance to adjust the sweetness or vanilla flavor to your liking. If you want it sweeter, add a little more sugar (a tablespoon at a time). If you want a stronger vanilla flavor, add a few extra drops of vanilla extract.
- Pour into the Mason Jar: Carefully pour the ice cream base into your chilled mason jar. Leave about an inch or two of space at the top, as the mixture will expand slightly as it freezes.
The Shaking Process:
- Seal the Jar Tightly: Make sure the lid of your mason jar is screwed on very tightly. You don’t want any leaks! I usually double-check to make sure it’s secure.
- Shake, Shake, Shake! (Phase 1): Now comes the fun part! Shake the mason jar vigorously for about 5-7 minutes. You’ll feel the mixture sloshing around at first, but as it starts to freeze, it will become thicker and harder to shake. This is a good sign!
- Check for Consistency: After the initial shaking, open the jar and check the consistency of the ice cream. It should be starting to thicken around the edges, but the center might still be liquid. If it’s still very liquid, seal the jar back up and shake for another minute or two.
- Add Your Mix-Ins (Optional): If you’re adding any mix-ins, now’s the time! Gently fold in your chocolate chips, chopped nuts, fruit pieces, cookie crumbles, or sprinkles. Be careful not to overmix, as this can make the ice cream icy.
- Shake, Shake, Shake! (Phase 2): Seal the jar again and continue shaking for another 3-5 minutes. The ice cream should be noticeably thicker now.
- Final Check: Open the jar one last time to check the consistency. The ice cream should be soft-serve consistency. If it’s still too soft, you can either shake it for a few more minutes or place it in the freezer for a short period (30-60 minutes) to firm up.
Freezing and Serving:
- Freeze for at Least 2 Hours: Place the mason jar in the freezer for at least 2 hours, or until the ice cream is firm enough to scoop. The longer it freezes, the firmer it will become.
- Let it Thaw Slightly (Optional): If the ice cream is too hard to scoop straight from the freezer, let it thaw for a few minutes at room temperature. This will make it easier to scoop and serve.
- Scoop and Enjoy! Scoop your homemade mason jar ice cream into bowls or cones and enjoy! You can add extra toppings, like whipped cream, chocolate sauce, or sprinkles, if you like.
- Storage: If you have any leftover ice cream (which is unlikely!), you can store it in the freezer for up to a week. Just make sure the lid is tightly sealed to prevent freezer burn.
Tips and Tricks for Perfect Mason Jar Ice Cream:
- Use High-Quality Ingredients: The better the quality of your ingredients, the better your ice cream will taste. Use fresh, cold heavy cream and whole milk for the best results.
- Don’t Overfill the Jar: Leave enough space at the top of the jar to allow for expansion as the ice cream freezes. Overfilling the jar can cause it to leak or even break.
- Shake Vigorously: The key to creamy mason jar ice cream is vigorous shaking. Don’t be afraid to put some muscle into it!
- Experiment with Flavors: Once you’ve mastered the basic recipe, feel free to experiment with different flavors and mix-ins. Try adding cocoa powder for chocolate ice cream, coffee extract for coffee ice cream, or mashed fruit for fruity ice cream.
- Adjust the Sweetness to Your Liking: If you prefer a less sweet ice cream, reduce the amount of sugar in the recipe. If you prefer a sweeter ice cream, add a little more sugar.
- Be Patient: Making mason jar ice cream takes a little time and effort, but it’s well worth it in the end. Don’t rush the process, and be patient while the ice cream freezes.
- Consider Using a Freezer Bag: If you’re worried about the mason jar breaking, you can use a freezer bag instead. Place the ice cream mixture in a freezer bag, seal it tightly, and then place the bag inside another freezer bag for extra protection. Shake the bag vigorously until the ice cream is frozen.
- Add Alcohol (Carefully!): A tablespoon or two of alcohol (like vodka or rum) can help prevent the ice cream from freezing too hard. However, be careful not to add too much, as it can affect the flavor and texture of the ice cream.
- For a Vegan Option: Substitute the heavy cream and whole milk with full-fat coconut milk. The rest of the recipe remains the same. Be aware that the texture will be slightly different, but still delicious!
- Troubleshooting: If your ice cream is too icy, it could be due to several factors: not enough fat, too much sugar, or not shaking vigorously enough. Try adjusting the recipe and shaking more vigorously next time. If your ice cream is too hard, it could be due to over-freezing. Let it thaw for a few minutes before serving.
Flavor Variations:
- Chocolate Chip Cookie Dough: Add ½ cup of chocolate chip cookie dough pieces to the ice cream base before shaking.
- Strawberry: Add 1 cup of chopped fresh strawberries to the ice cream base before shaking.
- Mint Chocolate Chip: Add ½ teaspoon of peppermint extract and ½ cup of mini chocolate chips to the ice cream base before shaking.
- Coffee: Add 1 tablespoon of instant coffee granules to the ice cream base before shaking.
- Peanut Butter Cup: Add ½ cup of chopped peanut butter cups to the ice cream base before shaking.
- Cookies and Cream: Add ½ cup of crushed Oreo cookies to the ice cream base before shaking.
- Salted Caramel: Swirl in a few tablespoons of salted caramel sauce after the ice cream has partially frozen.
Enjoy your homemade Mason Jar Ice Cream!
Conclusion:
And there you have it! This Mason Jar Ice Cream recipe is truly a game-changer, and I’m confident it will become a staple in your household, just like it has in mine. Forget complicated ice cream makers and lengthy churning processes. This method is so simple, so quick, and so incredibly satisfying that you’ll wonder why you haven’t been making ice cream this way all along. Why is it a must-try? Well, first and foremost, the taste is phenomenal. The texture is surprisingly creamy, especially considering the minimal effort involved. It’s a pure, unadulterated ice cream experience that lets the flavors shine through. Plus, the customization options are endless! You’re in complete control of the ingredients, so you can tailor it to your exact preferences and dietary needs. Beyond the ease and deliciousness, this recipe is also a fantastic way to get kids involved in the kitchen. They’ll love shaking the jar and watching the magic happen as the liquid transforms into a frozen treat. It’s a fun and educational activity that creates lasting memories. Now, let’s talk serving suggestions and variations. The possibilities are truly limitless! For a classic treat, serve your Mason Jar Ice Cream in a bowl with your favorite toppings like sprinkles, chocolate sauce, whipped cream, and cherries. Or, get creative and use it as a base for milkshakes, sundaes, or even ice cream sandwiches. If you’re feeling adventurous, try experimenting with different flavor combinations. Add fresh fruit like berries, peaches, or bananas for a fruity twist. Stir in chocolate chips, nuts, or cookie pieces for added texture and flavor. You can even incorporate extracts like vanilla, almond, or peppermint to create unique and exciting ice cream creations. For those with dietary restrictions, this recipe is easily adaptable. Use dairy-free milk alternatives like almond milk, coconut milk, or oat milk to create a vegan version. Substitute sugar with honey, maple syrup, or a sugar-free sweetener for a healthier option. The beauty of this recipe is that it can be customized to suit any lifestyle. I personally love adding a swirl of peanut butter and some chopped Reese’s cups to mine for a decadent treat. My kids are partial to a simple vanilla base with rainbow sprinkles, of course! And during the summer months, I often make a batch with fresh strawberries and a touch of balsamic vinegar for a sophisticated and refreshing dessert. I truly believe that everyone should experience the joy of making their own ice cream, and this Mason Jar Ice Cream recipe makes it easier than ever. It’s a fun, simple, and delicious way to create a homemade treat that everyone will love. So, what are you waiting for? Grab a mason jar, gather your ingredients, and get shaking! I’m so excited for you to try this recipe and discover the magic of homemade ice cream. And most importantly, I want to hear about your experience! Once you’ve made your own batch of Mason Jar Ice Cream, please share your photos, variations, and feedback in the comments below. I can’t wait to see what delicious creations you come up with! Let’s spread the joy of homemade ice cream together! Happy shaking! Print
Mason Jar Ice Cream: The Easiest Homemade Recipe
- Total Time: 140 minutes
- Yield: 3 cups 1x
Description
Easy homemade ice cream in a jar! Shake and freeze for a delicious treat with endless flavor possibilities.
Ingredients
- 2 cups (480ml) heavy cream, cold
- 1 cup (240ml) whole milk, cold
- ¾ cup (150g) granulated sugar
- 1 teaspoon pure vanilla extract
- Pinch of salt
- Optional mix-ins: Chocolate chips, chopped nuts, fruit pieces, cookie crumbles, sprinkles (to taste)
Instructions
- Chill Your Mason Jar: Place a quart-sized mason jar in the freezer for 15-20 minutes.
- Combine Cream and Milk: In a bowl, whisk together the heavy cream and whole milk.
- Add Sugar, Vanilla, and Salt: Pour in the sugar, vanilla extract, and salt. Whisk until the sugar is dissolved.
- Taste Test: Adjust sweetness or vanilla flavor to your liking.
- Pour into Mason Jar: Carefully pour the ice cream base into the chilled mason jar, leaving 1-2 inches of space at the top.
- Seal the Jar Tightly: Ensure the lid of your mason jar is screwed on very tightly.
- Shake (Phase 1): Shake the mason jar vigorously for 5-7 minutes.
- Check Consistency: Open the jar and check the consistency of the ice cream. If it’s still very liquid, seal the jar back up and shake for another minute or two.
- Add Mix-Ins (Optional): Gently fold in your chocolate chips, chopped nuts, fruit pieces, cookie crumbles, or sprinkles.
- Shake (Phase 2): Seal the jar again and continue shaking for another 3-5 minutes.
- Final Check: Open the jar one last time to check the consistency. The ice cream should be soft-serve consistency. If it’s still too soft, you can either shake it for a few more minutes or place it in the freezer for a short period (30-60 minutes) to firm up.
- Freeze: Place the mason jar in the freezer for at least 2 hours, or until firm enough to scoop.
- Thaw (Optional): Let it thaw for a few minutes at room temperature if too hard to scoop.
- Scoop and Enjoy: Scoop and enjoy!
- Storage: Store in the freezer for up to a week in a tightly sealed container.
Notes
- Use high-quality, cold ingredients for the best results.
- Don’t overfill the jar.
- Shake vigorously for a creamy texture.
- Experiment with different flavors and mix-ins.
- Adjust the sweetness to your liking.
- Be patient during the freezing process.
- Consider using a freezer bag if worried about the jar breaking.
- Add a tablespoon or two of alcohol (like vodka or rum) can help prevent the ice cream from freezing too hard.
- For a vegan option, substitute heavy cream and whole milk with full-fat coconut milk.
- If your ice cream is too icy, it could be due to several factors: not enough fat, too much sugar, or not shaking vigorously enough.
- If your ice cream is too hard, it could be due to over-freezing. Let it thaw for a few minutes before serving.
- Prep Time: 10 minutes
- Cook Time: 0 minutes


Leave a Comment