
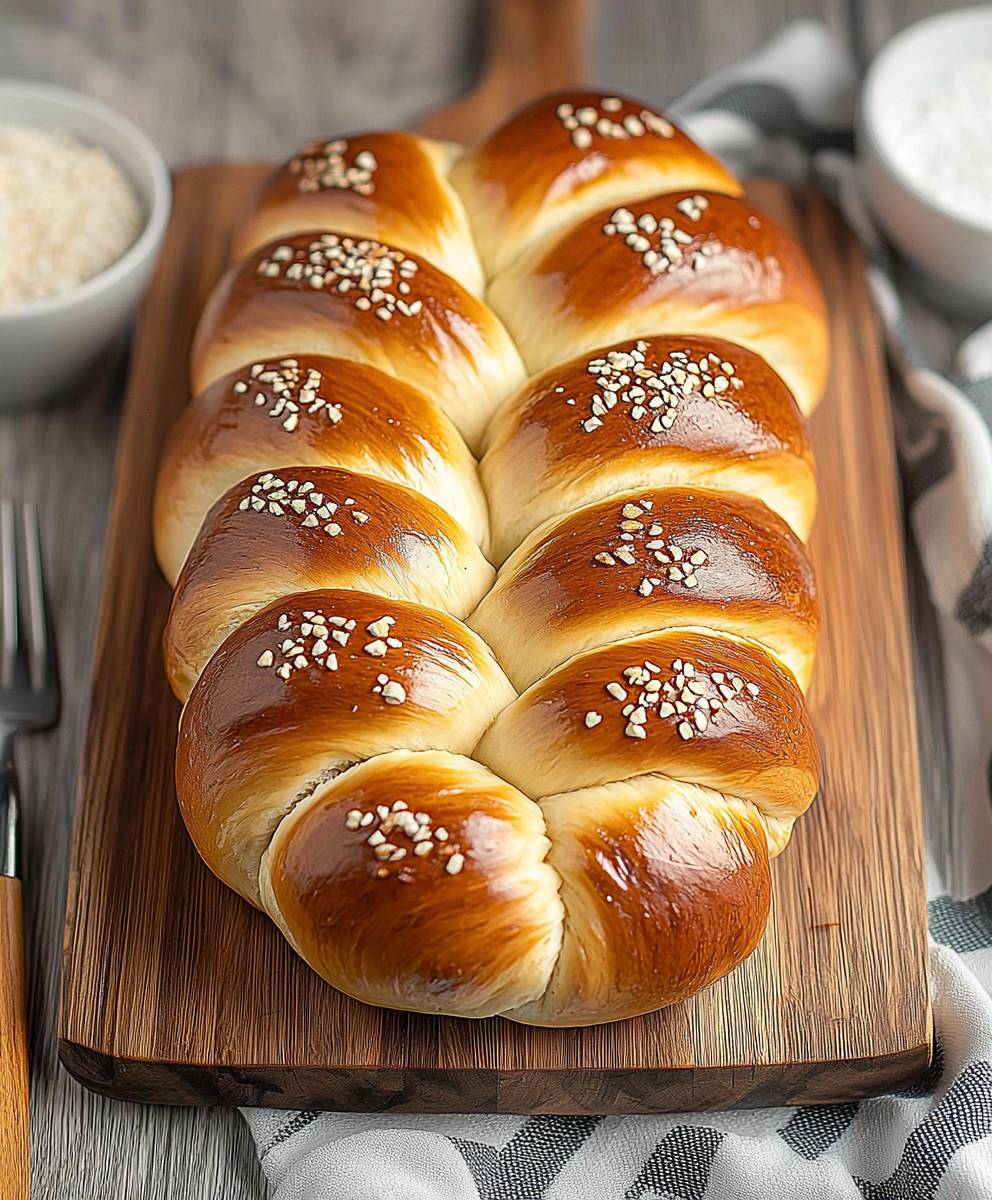
Challah Bread, with its rich, golden crust and soft, airy interior, isn’t just a loaf of bread; it’s a symbol of tradition, celebration, and togetherness. Imagine the sweet aroma filling your kitchen as this braided beauty bakes, promising a taste of something truly special. Have you ever wondered about the magic behind this iconic bread?
Challah’s history is deeply intertwined with Jewish culture, dating back centuries. Traditionally baked for Shabbat and Jewish holidays, each strand of the braid is said to represent love, truth, and peace. The act of making and sharing Challah Bread is a cherished ritual, passed down through generations, connecting families and communities.
But beyond its cultural significance, what makes challah so universally loved? It’s the perfect balance of flavors and textures. The slight sweetness, often enhanced with honey or a touch of sugar, complements the subtle richness of the eggs. The soft, almost pillowy texture is simply irresistible, making it ideal for sandwiches, French toast, or simply enjoying a slice on its own. Whether you’re drawn to its historical roots or simply crave a delicious and comforting bread, challah is sure to become a favorite in your kitchen.

Ingredients:
- For the Sponge:
- 1 cup (240ml) lukewarm water (105-115°F)
- 1 tablespoon (10g) active dry yeast
- 1 tablespoon (12g) granulated sugar
- 1 1/2 cups (180g) bread flour
- For the Dough:
- 1/2 cup (120ml) lukewarm water (105-115°F)
- 1/2 cup (100g) granulated sugar
- 1/2 cup (120ml) vegetable oil (or canola oil)
- 2 large eggs, plus 1 large egg yolk (reserve the egg white for egg wash)
- 1 tablespoon (15ml) honey
- 1 teaspoon vanilla extract
- 3 1/2 cups (420g) bread flour, plus more for dusting
- 1 1/2 teaspoons (9g) salt
- For the Egg Wash:
- 1 large egg white (reserved from the dough)
- 1 tablespoon water
- Optional Toppings:
- Sesame seeds
- Poppy seeds
- Everything bagel seasoning
- Coarse sugar
Preparing the Sponge:
The sponge is the first step in making challah bread. It helps to develop flavor and creates a lighter, more airy texture. Don’t skip this step!
- Activate the Yeast: In a large bowl, combine the lukewarm water, active dry yeast, and 1 tablespoon of sugar. Stir gently to dissolve the yeast and sugar. Let it sit for 5-10 minutes, or until the mixture becomes foamy. This indicates that the yeast is active and ready to go. If it doesn’t foam, your yeast might be old and you’ll need to start over with fresh yeast.
- Combine with Flour: Add the 1 1/2 cups of bread flour to the yeast mixture. Stir until just combined. The mixture will be shaggy and sticky, and that’s perfectly fine.
- Rest the Sponge: Cover the bowl with plastic wrap or a clean kitchen towel and let it rest in a warm place for 30-60 minutes, or until it has doubled in size and is bubbly. This resting period allows the yeast to work its magic and develop the gluten.
Making the Dough:
Now that the sponge is ready, we can move on to making the main dough. This is where the real challah magic happens!
- Combine Wet Ingredients: In a separate large bowl, whisk together the remaining 1/2 cup of lukewarm water, 1/2 cup of sugar, vegetable oil, 2 whole eggs, egg yolk, honey, and vanilla extract. Make sure everything is well combined.
- Add to the Sponge: Pour the wet ingredients into the bowl with the sponge. Stir to combine. It will look a little messy at this point, but don’t worry, it will come together.
- Add Dry Ingredients: In a separate bowl, whisk together the remaining 3 1/2 cups of bread flour and salt. Gradually add the dry ingredients to the wet ingredients, mixing with a wooden spoon or dough hook attachment on your stand mixer.
- Knead the Dough: Once the dough starts to come together, turn it out onto a lightly floured surface or continue kneading in your stand mixer with the dough hook. Knead for 8-10 minutes, or until the dough is smooth, elastic, and slightly tacky. If the dough is too sticky, add a tablespoon of flour at a time until it reaches the desired consistency. Be careful not to add too much flour, as this can make the challah dry.
- First Rise: Place the dough in a lightly oiled bowl, turning to coat all sides. Cover the bowl with plastic wrap or a clean kitchen towel and let it rise in a warm place for 1-2 hours, or until it has doubled in size. This first rise is crucial for developing the flavor and texture of the challah.
Braiding the Challah:
Braiding the challah is the fun part! There are many different braiding techniques you can use, but I’ll walk you through a simple 6-strand braid.
- Divide the Dough: Gently punch down the risen dough to release the air. Turn it out onto a lightly floured surface. Divide the dough into six equal pieces. I recommend using a kitchen scale for accuracy.
- Shape into Strands: Roll each piece of dough into a long rope, about 12-14 inches long. Try to keep the strands uniform in thickness.
- Pinch the Ends Together: Pinch the six strands together at one end. This will be the starting point of your braid.
- Braiding Technique: Number the strands from left to right 1 through 6. The braiding pattern is as follows:
- Bring strand 1 over strands 2 and 3.
- Bring strand 6 over strand 4 and 5.
- Bring strand 1 (which is now on the right) under strand 5.
- Bring strand 6 (which is now on the left) under strand 3.
- Tuck the Ends: Tuck the ends of the braid underneath the loaf to create a neat and tidy shape.
Second Rise and Baking:
Almost there! The second rise and baking are the final steps to achieving that perfect golden-brown challah.
- Second Rise: Place the braided challah on a baking sheet lined with parchment paper. Cover loosely with plastic wrap or a clean kitchen towel and let it rise in a warm place for 30-45 minutes, or until it has puffed up slightly.
- Preheat the Oven: Preheat your oven to 350°F (175°C).
- Prepare the Egg Wash: In a small bowl, whisk together the reserved egg white and 1 tablespoon of water.
- Egg Wash and Toppings: Gently brush the entire surface of the challah with the egg wash. Be careful not to deflate the dough. If desired, sprinkle with sesame seeds, poppy seeds, everything bagel seasoning, or coarse sugar.
- Bake: Bake for 30-35 minutes, or until the challah is golden brown and sounds hollow when tapped on the bottom. If the top is browning too quickly, you can tent it with aluminum foil.
- Cool: Transfer the challah to a wire rack to cool completely before slicing and serving. This is important because cutting into it while it’s still hot will result in a gummy texture.
Tips for Success:
- Use Bread Flour: Bread flour has a higher protein content than all-purpose flour, which helps to create a stronger gluten structure and a chewier texture.
- Don’t Overknead: Overkneading can result in a tough challah. Knead until the dough is smooth and elastic, but not overly stiff.
- Warm Place for Rising: A warm place is essential for the dough to rise properly. You can place the dough in a slightly warmed oven (turned off), near a sunny window, or in a warm corner of your kitchen.
- Don’t Skip the Egg Wash: The egg wash gives the challah its beautiful golden-brown color and adds a slight sheen.
- Cool Completely: Resist the urge to cut into the challah while it’s still hot. Let it cool completely to allow the crumb to set properly.
Storage Instructions:
Challah is best enjoyed fresh, but it can be stored at room temperature for up to 2 days in an airtight container or wrapped tightly in plastic wrap. For longer storage, you can freeze the challah for up to 2 months. Thaw it completely before serving.
Conclusion:
And there you have it! This Challah Bread recipe isn’t just another bread recipe; it’s an experience, a tradition, and a delicious journey all rolled into one beautifully braided loaf. I truly believe that once you’ve tasted the rich, slightly sweet, and incredibly soft texture of homemade challah, you’ll never want to go back to store-bought again. It’s a labor of love, yes, but the reward is immeasurable the aroma filling your kitchen, the satisfying squish as you slice into it, and the smiles around the table as everyone enjoys a piece. Why is this a must-try? Because it’s more than just bread. It’s a blank canvas for culinary creativity. It’s perfect for soaking up the last bits of your favorite stew, transforming into the most decadent French toast you’ve ever had, or simply enjoyed warm with a smear of butter and a sprinkle of sea salt. The possibilities are truly endless! Speaking of possibilities, let’s talk about serving suggestions and variations. For a classic experience, serve it alongside a hearty Shabbat dinner or as a special treat for brunch. But don’t stop there! Try using it to make incredible sandwiches think turkey and cranberry, grilled cheese with caramelized onions, or even a simple ham and Swiss. Feeling adventurous? Consider these variations: * Chocolate Chip Challah: Add a cup of chocolate chips to the dough for a sweet and decadent twist. * Raisin Challah: Incorporate a cup of raisins or dried cranberries for added texture and flavor. * Savory Challah: Omit the sugar and add herbs like rosemary, thyme, or garlic powder for a savory loaf that pairs perfectly with soups and stews. * Everything Bagel Challah: Brush the loaf with an egg wash and sprinkle with everything bagel seasoning before baking for a savory and flavorful crust. * Honey-Glazed Challah: Brush the baked loaf with a honey glaze for an extra touch of sweetness and shine. I’ve personally tried all of these variations, and each one brings a unique and delightful twist to the classic recipe. Don’t be afraid to experiment and find your own favorite combinations! But the real magic of this Challah Bread recipe lies in the sharing. Imagine bringing a freshly baked loaf to a friend’s house, offering it as a gift to a neighbor, or simply sharing it with your loved ones around the dinner table. It’s a gesture of warmth, generosity, and connection that transcends the simple act of baking. So, I urge you, give this recipe a try. Don’t be intimidated by the braiding it’s easier than it looks, and there are plenty of tutorials online to guide you. Embrace the process, enjoy the aroma, and savor the delicious results. And most importantly, please share your experience with me! I’d love to hear how your challah turned out, what variations you tried, and how you enjoyed it. Did you make it for a special occasion? Did you discover a new favorite way to serve it? Let me know in the comments below! Your feedback is invaluable, and it helps me to continue creating and sharing recipes that you’ll love. Happy baking, and I can’t wait to hear from you! I am sure you will love this Challah Bread as much as I do. Print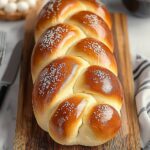
Challah Bread: The Ultimate Guide to Baking Delicious Challah
- Total Time: 240 minutes
- Yield: 1 large challah loaf 1x
Description
Rich, slightly sweet challah bread with a light, airy texture. Made with a sponge starter and braided to golden perfection, it’s perfect for holidays or any special occasion.
Ingredients
- 1 cup (240ml) lukewarm water (105-115°F)
- 1 tablespoon (10g) active dry yeast
- 1 tablespoon (12g) granulated sugar
- 1 1/2 cups (180g) bread flour
- 1/2 cup (120ml) lukewarm water (105-115°F)
- 1/2 cup (100g) granulated sugar
- 1/2 cup (120ml) vegetable oil (or canola oil)
- 2 large eggs, plus 1 large egg yolk (reserve the egg white for egg wash)
- 1 tablespoon (15ml) honey
- 1 teaspoon vanilla extract
- 3 1/2 cups (420g) bread flour, plus more for dusting
- 1 1/2 teaspoons (9g) salt
- 1 large egg white (reserved from the dough)
- 1 tablespoon water
- Sesame seeds
- Poppy seeds
- Everything bagel seasoning
- Coarse sugar
Instructions
- Prepare the Sponge: In a large bowl, combine the lukewarm water, active dry yeast, and 1 tablespoon of sugar. Stir gently to dissolve. Let sit for 5-10 minutes until foamy. Add 1 1/2 cups bread flour and stir until just combined. Cover and let rest in a warm place for 30-60 minutes, or until doubled and bubbly.
- Make the Dough: In a separate large bowl, whisk together the remaining 1/2 cup lukewarm water, 1/2 cup sugar, vegetable oil, 2 whole eggs, egg yolk, honey, and vanilla extract.
- Pour the wet ingredients into the bowl with the sponge and stir to combine.
- In a separate bowl, whisk together the remaining 3 1/2 cups bread flour and salt. Gradually add the dry ingredients to the wet ingredients, mixing with a wooden spoon or dough hook.
- Knead the dough for 8-10 minutes, or until smooth, elastic, and slightly tacky. If too sticky, add flour, 1 tablespoon at a time.
- First Rise: Place the dough in a lightly oiled bowl, turning to coat. Cover and let rise in a warm place for 1-2 hours, or until doubled.
- Braid the Challah: Gently punch down the dough. Divide into six equal pieces. Roll each piece into a 12-14 inch rope. Pinch the six strands together at one end.
- Number the strands from left to right 1 through 6. The braiding pattern is as follows:
- Bring strand 1 over strands 2 and 3.
- Bring strand 6 over strand 4 and 5.
- Bring strand 1 (which is now on the right) under strand 5.
- Bring strand 6 (which is now on the left) under strand 3.
Repeat this pattern until you reach the end of the strands. Pinch the ends together to seal the braid.
- Tuck the ends of the braid underneath the loaf to create a neat and tidy shape.
- Second Rise: Place the braided challah on a baking sheet lined with parchment paper. Cover loosely and let rise in a warm place for 30-45 minutes, or until puffed up slightly.
- Bake: Preheat oven to 350°F (175°C).
- In a small bowl, whisk together the reserved egg white and 1 tablespoon of water.
- Gently brush the entire surface of the challah with the egg wash. If desired, sprinkle with sesame seeds, poppy seeds, everything bagel seasoning, or coarse sugar.
- Bake for 30-35 minutes, or until golden brown and sounds hollow when tapped. Tent with foil if browning too quickly.
- Cool completely on a wire rack before slicing.
Notes
- Use bread flour for a chewier texture.
- Don’t overknead the dough.
- A warm place is essential for rising.
- Don’t skip the egg wash for a golden-brown color.
- Cool completely before slicing to avoid a gummy texture.
- Challah is best enjoyed fresh, but it can be stored at room temperature for up to 2 days in an airtight container or wrapped tightly in plastic wrap. For longer storage, you can freeze the challah for up to 2 months. Thaw it completely before serving.
- Prep Time: 45 minutes
- Cook Time: 35 minutes

Leave a Comment