
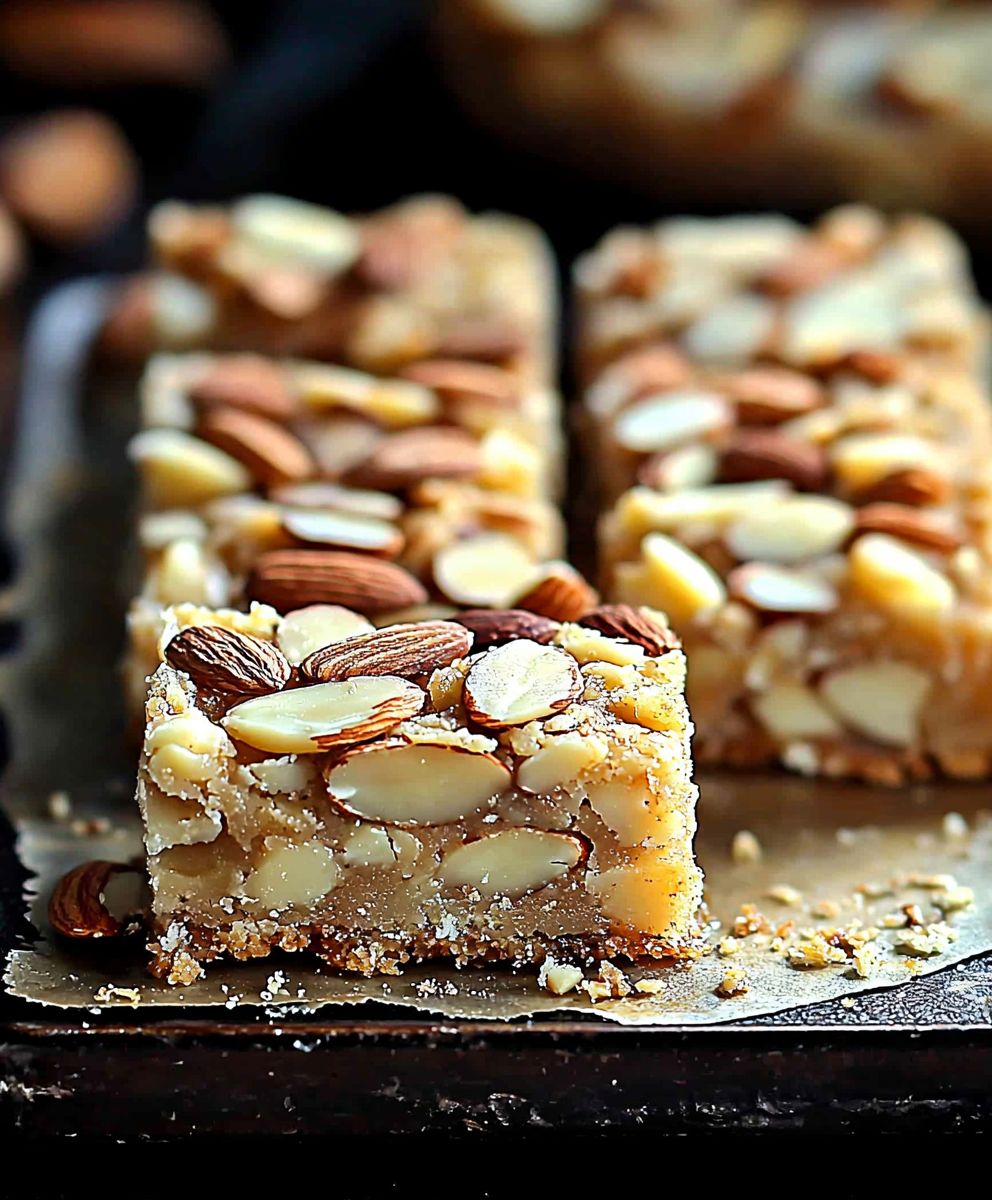
Almond bars, those golden rectangles of nutty goodness, are more than just a sweet treat; they’re a comforting classic that evokes memories of cozy kitchens and shared moments. Have you ever wondered how something so simple could be so utterly irresistible? I certainly have! These delightful bars have a rich history, with variations appearing in cookbooks across generations, each family adding their own special touch to the recipe.
The beauty of almond bars lies in their perfect balance of textures and flavors. The buttery, crumbly base gives way to a chewy, almond-studded topping, creating a symphony of sensations in every bite. But it’s not just about the taste; these bars are incredibly convenient to make. Whether you’re a seasoned baker or a kitchen novice, you’ll find this recipe surprisingly easy to follow. They are perfect for bake sales, potlucks, or simply as a delightful afternoon snack. So, let’s dive into the recipe and create some almond bar magic together!

Ingredients:
- For the Crust:
- 1 ½ cups all-purpose flour
- ½ cup (1 stick) unsalted butter, cold and cubed
- ¼ cup granulated sugar
- ¼ teaspoon salt
- 4-6 tablespoons ice water
- For the Almond Filling:
- 1 cup (2 sticks) unsalted butter, softened
- 1 ½ cups granulated sugar
- 2 large eggs
- 1 teaspoon almond extract
- ½ teaspoon vanilla extract
- 2 cups sliced almonds
- ¼ cup all-purpose flour
- Pinch of salt
- Optional Glaze:
- 1 cup powdered sugar
- 2-3 tablespoons milk or almond milk
- ¼ teaspoon almond extract
Preparing the Crust:
- Combine Dry Ingredients: In a large bowl, whisk together the flour, sugar, and salt. This ensures the salt and sugar are evenly distributed throughout the flour, which is crucial for a consistent crust.
- Cut in the Butter: Add the cold, cubed butter to the flour mixture. Using a pastry blender or your fingertips, cut the butter into the flour until the mixture resembles coarse crumbs. The key here is to work quickly so the butter stays cold. Cold butter creates steam during baking, which results in a flaky crust. If you’re using your fingertips, gently rub the butter and flour together, avoiding overworking the dough.
- Add Ice Water: Gradually add the ice water, one tablespoon at a time, mixing gently after each addition. The amount of water needed can vary depending on the humidity and the flour you’re using. Stop adding water when the dough just comes together and forms a ball. Be careful not to add too much water, as this will make the crust tough.
- Form the Dough: Gently press the dough into a disc. Wrap it tightly in plastic wrap and refrigerate for at least 30 minutes. This chilling time allows the gluten to relax, which will prevent the crust from shrinking during baking. It also helps the butter to firm up, resulting in a flakier crust.
- Preheat Oven and Prepare Pan: While the dough is chilling, preheat your oven to 350°F (175°C). Grease and flour a 9×13 inch baking pan. Alternatively, you can line the pan with parchment paper, leaving an overhang on the sides for easy removal of the bars after baking.
- Roll Out the Dough: On a lightly floured surface, roll out the chilled dough to fit the bottom of the prepared baking pan. If the dough is sticking, add a little more flour to the surface. You can also place the dough between two sheets of parchment paper to prevent sticking.
- Transfer to Pan: Carefully transfer the rolled-out dough to the prepared baking pan. Gently press the dough into the bottom and up the sides of the pan. Use a fork to prick the bottom of the crust several times. This will prevent the crust from puffing up during baking.
- Pre-bake the Crust: Bake the crust for 15-20 minutes, or until it is lightly golden brown. This pre-baking step ensures that the crust is fully cooked and doesn’t become soggy when the almond filling is added. Watch it carefully to prevent it from burning.
Preparing the Almond Filling:
- Cream Butter and Sugar: In a large bowl, cream together the softened butter and sugar until light and fluffy. This step is crucial for creating a smooth and creamy filling. Use an electric mixer for best results, and scrape down the sides of the bowl occasionally to ensure that all the butter and sugar are incorporated.
- Add Eggs: Beat in the eggs one at a time, mixing well after each addition. Make sure the eggs are at room temperature, as this will help them to incorporate more easily into the butter and sugar mixture.
- Incorporate Extracts: Stir in the almond extract and vanilla extract. The almond extract provides the signature almond flavor, while the vanilla extract enhances the overall sweetness and aroma of the filling.
- Combine Dry Ingredients: In a separate small bowl, whisk together the flour and salt. This ensures that the flour is evenly distributed and prevents lumps from forming in the filling.
- Add Dry Ingredients to Wet Ingredients: Gradually add the flour mixture to the butter mixture, mixing until just combined. Be careful not to overmix, as this can develop the gluten in the flour and result in a tough filling.
- Stir in Almonds: Stir in the sliced almonds. Make sure the almonds are evenly distributed throughout the filling. You can use a spatula or a wooden spoon to gently fold the almonds into the batter.
Assembling and Baking:
- Pour Filling Over Crust: Pour the almond filling evenly over the pre-baked crust. Spread the filling to the edges of the pan to ensure that the bars are uniform in thickness.
- Bake the Bars: Bake in the preheated oven for 30-35 minutes, or until the filling is golden brown and set. The edges of the bars should be slightly darker than the center. To prevent the top from browning too quickly, you can tent the pan with aluminum foil during the last 10-15 minutes of baking.
- Cool Completely: Remove the bars from the oven and let them cool completely in the pan before cutting. This is important because the filling will continue to set as it cools. Cutting the bars while they are still warm can result in a messy and crumbly result.
Optional Glaze:
- Whisk Ingredients: In a small bowl, whisk together the powdered sugar, milk (or almond milk), and almond extract until smooth. Add more milk if needed to reach your desired consistency. The glaze should be thin enough to drizzle but thick enough to coat the bars.
- Drizzle Over Bars: Once the bars are completely cool, drizzle the glaze evenly over the top. You can use a spoon or a fork to drizzle the glaze.
- Let Glaze Set: Let the glaze set completely before cutting the bars. This will prevent the glaze from smearing and ensure that the bars look neat and presentable.
Cutting and Serving:
- Cut into Bars: Use a sharp knife to cut the bars into squares or rectangles. For clean cuts, you can wipe the knife with a damp cloth between each cut.
- Serve and Enjoy: Serve the almond bars at room temperature. They can be stored in an airtight container at room temperature for up to 3 days or in the refrigerator for up to a week.
Conclusion:
And there you have it! These almond bars are truly something special, a delightful combination of textures and flavors that will have you reaching for seconds (and maybe thirds!). From the buttery, crumbly base to the sweet, nutty topping, every bite is a little piece of heaven. I genuinely believe this recipe is a must-try for anyone who appreciates a good homemade treat. It’s surprisingly simple to make, doesn’t require any fancy equipment, and the results are simply outstanding. But why should you take my word for it? The real magic happens when you bake these almond bars yourself and experience the aroma filling your kitchen, the golden-brown perfection emerging from the oven, and the sheer joy of sharing them with loved ones. This isn’t just a recipe; it’s an opportunity to create a moment, a memory, a delicious experience. Think of these bars as a blank canvas for your culinary creativity! While I adore them just as they are, there are so many ways you can customize them to suit your taste. For a richer, more decadent treat, try adding a layer of melted dark chocolate over the cooled bars. The bitterness of the chocolate perfectly complements the sweetness of the almonds. Or, if you’re feeling adventurous, sprinkle a pinch of sea salt over the top before baking for a delightful sweet-and-salty contrast. Serving suggestions? Oh, the possibilities! These almond bars are perfect on their own with a cup of coffee or tea. They also make a wonderful addition to a dessert platter, alongside other cookies, brownies, and cakes. For a truly special occasion, serve them warm with a scoop of vanilla ice cream and a drizzle of caramel sauce. They’re also fantastic crumbled over yogurt or granola for a delightful breakfast treat. And let’s not forget the holidays! These bars are a guaranteed crowd-pleaser at any festive gathering. Consider adding a touch of almond extract to the base for an even more intense almond flavor. You could also experiment with different types of nuts, such as pecans, walnuts, or hazelnuts, to create your own unique variation. If you’re looking for a gluten-free option, simply substitute the all-purpose flour with a gluten-free blend. Just be sure to add a binder, such as xanthan gum, to help hold the bars together. I’m confident that once you try this recipe, it will become a staple in your baking repertoire. It’s the kind of recipe that you’ll turn to time and time again, whether you’re looking for a quick and easy dessert for a weeknight treat or a show-stopping bake for a special occasion. So, what are you waiting for? Preheat your oven, gather your ingredients, and get ready to bake some seriously delicious almond bars! I can’t wait to hear what you think. Please, please, please give this recipe a try. And most importantly, don’t forget to share your experience! I’d love to see your creations and hear about any variations you’ve tried. Leave a comment below, tag me on social media, or simply tell a friend about this amazing recipe. Happy baking! I’m sure you will love these almond bars as much as I do. Print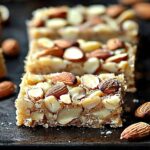
Almond Bars: The Ultimate Guide to Baking Delicious Treats
- Total Time: 75 minutes
- Yield: 24 bars 1x
Description
Buttery shortbread crust topped with a rich, almond-flavored filling. Perfect for dessert or a sweet snack!
Ingredients
- 1 ½ cups all-purpose flour
- ½ cup (1 stick) unsalted butter, cold and cubed
- ¼ cup granulated sugar
- ¼ teaspoon salt
- 4–6 tablespoons ice water
- 1 cup (2 sticks) unsalted butter, softened
- 1 ½ cups granulated sugar
- 2 large eggs
- 1 teaspoon almond extract
- ½ teaspoon vanilla extract
- 2 cups sliced almonds
- ¼ cup all-purpose flour
- Pinch of salt
- 1 cup powdered sugar
- 2–3 tablespoons milk or almond milk
- ¼ teaspoon almond extract
Instructions
- In a large bowl, whisk together the flour, sugar, and salt.
- Add the cold, cubed butter to the flour mixture. Using a pastry blender or your fingertips, cut the butter into the flour until the mixture resembles coarse crumbs.
- Gradually add the ice water, one tablespoon at a time, mixing gently after each addition. Stop adding water when the dough just comes together and forms a ball.
- Gently press the dough into a disc. Wrap it tightly in plastic wrap and refrigerate for at least 30 minutes.
- While the dough is chilling, preheat your oven to 350°F (175°C). Grease and flour a 9×13 inch baking pan.
- On a lightly floured surface, roll out the chilled dough to fit the bottom of the prepared baking pan.
- Carefully transfer the rolled-out dough to the prepared baking pan. Gently press the dough into the bottom and up the sides of the pan. Use a fork to prick the bottom of the crust several times.
- Bake the crust for 15-20 minutes, or until it is lightly golden brown.
- In a large bowl, cream together the softened butter and sugar until light and fluffy.
- Beat in the eggs one at a time, mixing well after each addition.
- Stir in the almond extract and vanilla extract.
- In a separate small bowl, whisk together the flour and salt.
- Gradually add the flour mixture to the butter mixture, mixing until just combined.
- Stir in the sliced almonds.
- Pour the almond filling evenly over the pre-baked crust.
- Bake in the preheated oven for 30-35 minutes, or until the filling is golden brown and set.
- Remove the bars from the oven and let them cool completely in the pan before cutting.
- In a small bowl, whisk together the powdered sugar, milk (or almond milk), and almond extract until smooth. Add more milk if needed to reach your desired consistency.
- Once the bars are completely cool, drizzle the glaze evenly over the top.
- Let the glaze set completely before cutting the bars.
- Use a sharp knife to cut the bars into squares or rectangles.
- Serve the almond bars at room temperature. They can be stored in an airtight container at room temperature for up to 3 days or in the refrigerator for up to a week.
Notes
- Make sure the butter is cold when making the crust for a flakier result.
- Don’t overmix the dough or filling.
- Let the bars cool completely before cutting for cleaner slices.
- For a richer flavor, toast the sliced almonds before adding them to the filling.
- Store in an airtight container at room temperature for up to 3 days or in the refrigerator for up to a week.
- Prep Time: 30 minutes
- Cook Time: 45 minutes


Leave a Comment