
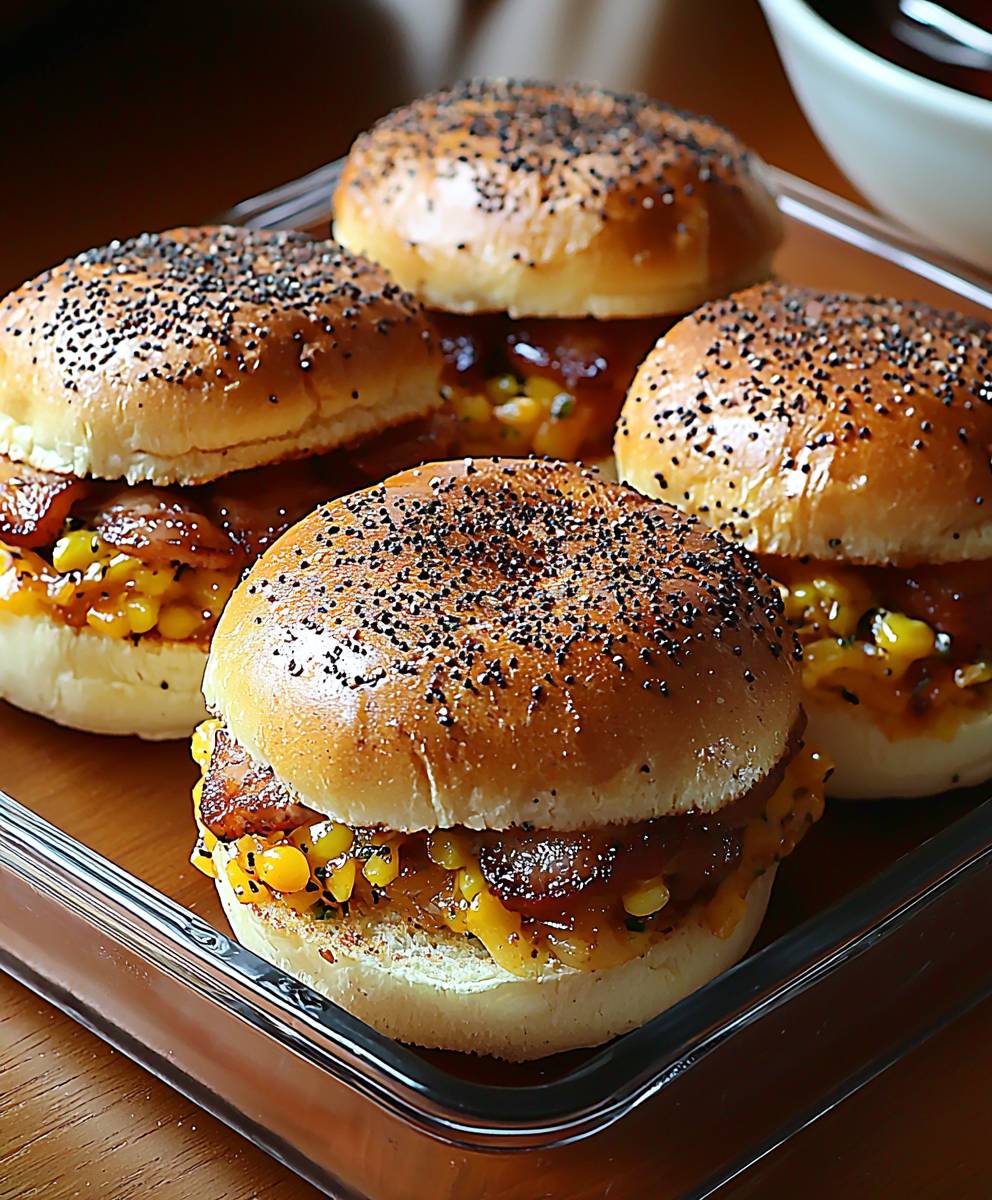
Bagel Sliders: Prepare to revolutionize your lunch game! Forget boring sandwiches; we’re about to embark on a culinary adventure that combines the chewy goodness of a bagel with the satisfying layers of a perfectly crafted slider. These aren’t just mini sandwiches; they’re a flavor explosion waiting to happen.
While the exact origins of the slider are debated, their popularity exploded in the early 20th century, offering a quick and affordable bite. Our Bagel Sliders take that classic concept and elevate it with the distinct texture and taste of a bagel. Think of it as a delicious fusion of cultures, blending the American love for handheld convenience with the Eastern European heritage of the beloved bagel.
What makes these sliders so irresistible? It’s the perfect marriage of textures the slightly crisp exterior of the bagel giving way to a soft, chewy interior, cradling a medley of savory fillings. People adore them because they’re incredibly versatile. Whether you’re craving a classic deli combination, a spicy chicken creation, or even a vegetarian delight, the bagel slider is your blank canvas. Plus, they are incredibly easy to assemble, making them ideal for quick lunches, party appetizers, or even a fun and interactive family meal. Get ready to experience the ultimate in handheld deliciousness!

Ingredients:
- 12 Mini Bagels (plain, sesame, everything your choice!)
- 1 lb Ground Beef (80/20 blend recommended for flavor)
- 1 tbsp Olive Oil
- 1 medium Yellow Onion, finely chopped
- 2 cloves Garlic, minced
- 1 tsp Dried Oregano
- 1/2 tsp Dried Basil
- 1/4 tsp Red Pepper Flakes (optional, for a little kick)
- 1/2 cup Breadcrumbs (plain or Italian seasoned)
- 1 large Egg, lightly beaten
- 1/4 cup Milk
- Salt and Black Pepper to taste
- 6 slices Cheddar Cheese, halved (or your favorite cheese)
- Optional Toppings: Lettuce, Tomato slices, Pickles, Ketchup, Mustard, Mayonnaise, Bacon, Avocado
Preparing the Meatballs:
- Sauté the Aromatics: Heat the olive oil in a large skillet over medium heat. Add the chopped onion and cook until softened and translucent, about 5-7 minutes. Add the minced garlic and cook for another minute until fragrant, being careful not to burn it. Burnt garlic is no fun!
- Combine the Meatball Ingredients: In a large bowl, combine the ground beef, sautéed onion and garlic mixture (let it cool slightly first!), dried oregano, dried basil, red pepper flakes (if using), breadcrumbs, egg, and milk. Season generously with salt and black pepper.
- Mix Gently: Use your hands to gently mix all the ingredients together until just combined. Be careful not to overmix, as this can result in tough meatballs. Think of it like you’re giving it a gentle massage, not a vigorous workout!
- Form the Meatballs: Using your hands, form the mixture into small meatballs, about 1-inch in diameter. You should get approximately 24 meatballs, enough for two meatballs per slider. If you want them perfectly uniform, you can use a small cookie scoop.
Cooking the Meatballs:
- Brown the Meatballs: Heat a tablespoon of olive oil in the same skillet over medium-high heat. Add the meatballs in batches, being careful not to overcrowd the pan. Overcrowding will steam the meatballs instead of browning them.
- Sear on All Sides: Cook the meatballs, turning occasionally, until browned on all sides. This should take about 5-7 minutes per batch. The browning adds a ton of flavor!
- Simmer in Sauce (Optional, but Recommended!): If you want to add extra flavor and moisture, you can simmer the meatballs in your favorite tomato sauce. After browning, pour about 1-2 cups of tomato sauce into the skillet. Bring to a simmer, cover, and cook for another 10-15 minutes, or until the meatballs are cooked through. This step is optional, but it really elevates the sliders. If you skip this step, make sure the meatballs are cooked through in the previous step.
- Check for Doneness: To ensure the meatballs are cooked through, you can use a meat thermometer. The internal temperature should reach 160°F (71°C). If you don’t have a thermometer, cut one meatball in half to check that it’s no longer pink inside.
Preparing the Bagels:
- Slice the Bagels: While the meatballs are cooking, slice the mini bagels in half horizontally.
- Toast the Bagels (Optional): If you like a little crunch, you can toast the bagel halves lightly in a toaster or under the broiler. Keep a close eye on them under the broiler, as they can burn quickly!
Assembling the Bagel Sliders:
- Add Cheese (Optional, but Highly Encouraged!): If you’re using cheese, place a half-slice of cheddar cheese (or your cheese of choice) on the bottom half of each bagel.
- Place the Meatballs: Place two meatballs on top of the cheese (or directly on the bagel if you’re skipping the cheese). If you simmered the meatballs in sauce, spoon a little extra sauce over them.
- Add Toppings: Now’s the time to get creative! Add your favorite toppings, such as lettuce, tomato slices, pickles, ketchup, mustard, mayonnaise, bacon, or avocado. The possibilities are endless!
- Top with the Other Half of the Bagel: Place the top half of the bagel on top of the meatballs and toppings.
- Serve Immediately: Serve the bagel sliders immediately and enjoy! These are best enjoyed warm.
Tips and Variations:
- Cheese Variations: Feel free to experiment with different types of cheese, such as mozzarella, provolone, pepper jack, or even a creamy goat cheese.
- Meat Variations: You can also use ground turkey or ground chicken instead of ground beef. Just be sure to adjust the cooking time accordingly.
- Spice it Up: For a spicier kick, add more red pepper flakes or a pinch of cayenne pepper to the meatball mixture. You could also use a spicy marinara sauce.
- Vegetarian Option: For a vegetarian option, use plant-based ground meat or make lentil meatballs.
- Make Ahead: You can prepare the meatballs ahead of time and store them in the refrigerator for up to 24 hours. Just cook them according to the instructions when you’re ready to assemble the sliders.
- Freezing: Cooked meatballs can be frozen for up to 2 months. Thaw them in the refrigerator overnight before reheating and assembling the sliders.
- Garlic Bread Bagels: For an extra garlicky flavor, brush the cut sides of the bagels with garlic butter before toasting.
- Italian Bagel Sliders: Use Italian seasoned breadcrumbs and add a sprinkle of Parmesan cheese to the meatball mixture. Serve with marinara sauce and mozzarella cheese.
- BBQ Bagel Sliders: Use BBQ sauce instead of tomato sauce and top with coleslaw for a classic BBQ flavor.
- Hawaiian Bagel Sliders: Add a slice of grilled pineapple and some ham to the sliders for a tropical twist.
- Bacon Lovers: Crumble cooked bacon into the meatball mixture and top the sliders with crispy bacon strips.
- Avocado Addition: Add slices of fresh avocado for a creamy and healthy addition.
- Pickle Power: Experiment with different types of pickles, such as dill pickles, sweet pickles, or even spicy pickles.
- Onion Options: Instead of yellow onion, try using red onion or caramelized onions for a different flavor profile.
- Herb Heaven: Add fresh herbs, such as parsley, basil, or oregano, to the meatball mixture for a burst of freshness.
- Slider Sauce: Create a special slider sauce by combining mayonnaise, ketchup, mustard, and a touch of Worcestershire sauce.
- Mini Skewers: For a fun presentation, thread the meatballs, cheese, and toppings onto mini skewers and serve them alongside the bagel halves.
- Bagel Size Matters: While this recipe calls for mini bagels, you can also use regular-sized bagels. Just adjust the number of meatballs per slider accordingly.
- Meatball Size Matters Too: Adjust the meatball size to fit your bagels. Smaller bagels, smaller meatballs.
Serving Suggestions:
- Serve these bagel sliders as an appetizer, snack, or light meal.
- They’re perfect for parties, game day gatherings, or potlucks.
- Pair them with a side of fries, onion rings, or a salad.
- Offer a variety of toppings so guests can customize their own sliders.
- Make a slider bar with different types of bagels, cheeses, meats, and toppings.
Enjoy your delicious and customizable Bagel Sliders!
Conclusion:
So, there you have it! These Bagel Sliders are truly a must-try recipe, and I’m not just saying that because I created it. The combination of the chewy bagel, savory fillings, and customizable toppings makes for an incredibly satisfying and fun eating experience. They’re perfect for a quick lunch, a party appetizer, or even a fun twist on dinner. Seriously, what’s not to love? Why are these Bagel Sliders a game-changer? Well, first, they’re incredibly easy to make. You don’t need any fancy equipment or advanced cooking skills. Second, they’re endlessly adaptable. You can swap out the ingredients to suit your taste preferences or dietary needs. Vegetarian? Load them up with grilled veggies and hummus. Craving something spicy? Add some jalapeños and a sriracha mayo. The possibilities are truly endless! Third, they’re just plain delicious. The textural contrast between the soft filling and the slightly crisp bagel is simply divine. But the real magic of these sliders lies in their versatility. Think beyond the basic ham and cheese. For a brunch-worthy slider, try smoked salmon, cream cheese, and everything bagel seasoning. Or, for a Mediterranean twist, combine feta cheese, olives, sun-dried tomatoes, and a drizzle of olive oil. If you’re feeling adventurous, try a mini pizza bagel slider with pepperoni, mozzarella, and marinara sauce. Serving Suggestions and Variations: * For a party: Arrange the sliders on a platter and let your guests customize their own. Provide a variety of fillings, toppings, and sauces. * For a quick lunch: Prepare the sliders ahead of time and pack them in a lunchbox. They’re just as good cold as they are warm. * For a fun dinner: Serve the sliders with a side of fries, salad, or soup. * Vegetarian option: Use grilled vegetables, hummus, and feta cheese. * Spicy option: Add jalapeños, sriracha mayo, or a sprinkle of red pepper flakes. * Sweet option: Use Nutella and sliced bananas for a dessert slider. Don’t be afraid to get creative and experiment with different flavor combinations. That’s the beauty of these Bagel Sliders they’re a blank canvas for your culinary imagination! I’ve even tried using mini bagels for bite-sized appetizers, which were a huge hit at my last get-together. Another fun variation is to toast the bagels before assembling the sliders for an extra crispy texture. You can also brush them with garlic butter for added flavor. I truly believe that these sliders will become a staple in your kitchen. They’re easy, delicious, and endlessly customizable. So, what are you waiting for? Grab a bag of bagels and get cooking! I’m so excited for you to try this recipe! Once you do, please, please, please come back and share your experience in the comments below. I’d love to hear what variations you tried, what toppings you loved, and any tips or tricks you discovered along the way. Your feedback is invaluable, and it helps me to continue creating recipes that you’ll love. Happy cooking! Let me know what you think of these Bagel Sliders! Print
Bagel Sliders: The Ultimate Guide to Delicious Mini Sandwiches
- Total Time: 50 minutes
- Yield: 12 Sliders 1x
Description
Mini Bagel Sliders with juicy homemade meatballs, customizable with your favorite toppings for a fun and delicious appetizer or meal!
Ingredients
- 12 Mini Bagels (plain, sesame, everything your choice!)
- 1 lb Ground Beef (80/20 blend recommended for flavor)
- 1 tbsp Olive Oil
- 1 medium Yellow Onion, finely chopped
- 2 cloves Garlic, minced
- 1 tsp Dried Oregano
- 1/2 tsp Dried Basil
- 1/4 tsp Red Pepper Flakes (optional, for a little kick)
- 1/2 cup Breadcrumbs (plain or Italian seasoned)
- 1 large Egg, lightly beaten
- 1/4 cup Milk
- Salt and Black Pepper to taste
- 6 slices Cheddar Cheese, halved (or your favorite cheese)
- Optional Toppings: Lettuce, Tomato slices, Pickles, Ketchup, Mustard, Mayonnaise, Bacon, Avocado
Instructions
- Heat the olive oil in a large skillet over medium heat. Add the chopped onion and cook until softened and translucent, about 5-7 minutes. Add the minced garlic and cook for another minute until fragrant, being careful not to burn it.
- In a large bowl, combine the ground beef, sautéed onion and garlic mixture (let it cool slightly first!), dried oregano, dried basil, red pepper flakes (if using), breadcrumbs, egg, and milk. Season generously with salt and black pepper.
- Use your hands to gently mix all the ingredients together until just combined. Be careful not to overmix, as this can result in tough meatballs.
- Using your hands, form the mixture into small meatballs, about 1-inch in diameter. You should get approximately 24 meatballs, enough for two meatballs per slider. If you want them perfectly uniform, you can use a small cookie scoop.
- Heat a tablespoon of olive oil in the same skillet over medium-high heat. Add the meatballs in batches, being careful not to overcrowd the pan.
- Cook the meatballs, turning occasionally, until browned on all sides. This should take about 5-7 minutes per batch.
- If you want to add extra flavor and moisture, you can simmer the meatballs in your favorite tomato sauce. After browning, pour about 1-2 cups of tomato sauce into the skillet. Bring to a simmer, cover, and cook for another 10-15 minutes, or until the meatballs are cooked through. If you skip this step, make sure the meatballs are cooked through in the previous step.
- To ensure the meatballs are cooked through, you can use a meat thermometer. The internal temperature should reach 160°F (71°C). If you don’t have a thermometer, cut one meatball in half to check that it’s no longer pink inside.
- While the meatballs are cooking, slice the mini bagels in half horizontally.
- If you like a little crunch, you can toast the bagel halves lightly in a toaster or under the broiler. Keep a close eye on them under the broiler, as they can burn quickly!
- If you’re using cheese, place a half-slice of cheddar cheese (or your cheese of choice) on the bottom half of each bagel.
- Place two meatballs on top of the cheese (or directly on the bagel if you’re skipping the cheese). If you simmered the meatballs in sauce, spoon a little extra sauce over them.
- Now’s the time to get creative! Add your favorite toppings, such as lettuce, tomato slices, pickles, ketchup, mustard, mayonnaise, bacon, or avocado.
- Place the top half of the bagel on top of the meatballs and toppings.
- Serve the bagel sliders immediately and enjoy! These are best enjoyed warm.
Notes
- Cheese Variations: Feel free to experiment with different types of cheese, such as mozzarella, provolone, pepper jack, or even a creamy goat cheese.
- Meat Variations: You can also use ground turkey or ground chicken instead of ground beef. Just be sure to adjust the cooking time accordingly.
- Spice it Up: For a spicier kick, add more red pepper flakes or a pinch of cayenne pepper to the meatball mixture. You could also use a spicy marinara sauce.
- Vegetarian Option: For a vegetarian option, use plant-based ground meat or make lentil meatballs.
- Make Ahead: You can prepare the meatballs ahead of time and store them in the refrigerator for up to 24 hours. Just cook them according to the instructions when you’re ready to assemble the sliders.
- Freezing: Cooked meatballs can be frozen for up to 2 months. Thaw them in the refrigerator overnight before reheating and assembling the sliders.
- Garlic Bread Bagels: For an extra garlicky flavor, brush the cut sides of the bagels with garlic butter before toasting.
- Italian Bagel Sliders: Use Italian seasoned breadcrumbs and add a sprinkle of Parmesan cheese to the meatball mixture. Serve with marinara sauce and mozzarella cheese.
- BBQ Bagel Sliders: Use BBQ sauce instead of tomato sauce and top with coleslaw for a classic BBQ flavor.
- Hawaiian Bagel Sliders: Add a slice of grilled pineapple and some ham to the sliders for a tropical twist.
- Bacon Lovers: Crumble cooked bacon into the meatball mixture and top the sliders with crispy bacon strips.
- Avocado Addition: Add slices of fresh avocado for a creamy and healthy addition.
- Pickle Power: Experiment with different types of pickles, such as dill pickles, sweet pickles, or even spicy pickles.
- Onion Options: Instead of yellow onion, try using red onion or caramelized onions for a different flavor profile.
- Herb Heaven: Add fresh herbs, such as parsley, basil, or oregano, to the meatball mixture for a burst of freshness.
- Slider Sauce: Create a special slider sauce by combining mayonnaise, ketchup, mustard, and a touch of Worcestershire sauce.
- Mini Skewers: For a fun presentation, thread the meatballs, cheese, and toppings onto mini skewers and serve them alongside the bagel halves.
- Bagel Size Matters: While this recipe calls for mini bagels, you can also use regular-sized bagels. Just adjust the number of meatballs per slider accordingly.
- Meatball Size Matters Too: Adjust the meatball size to fit your bagels. Smaller bagels, smaller meatballs.
- Prep Time: 20 minutes
- Cook Time: 30 minutes


Leave a Comment