
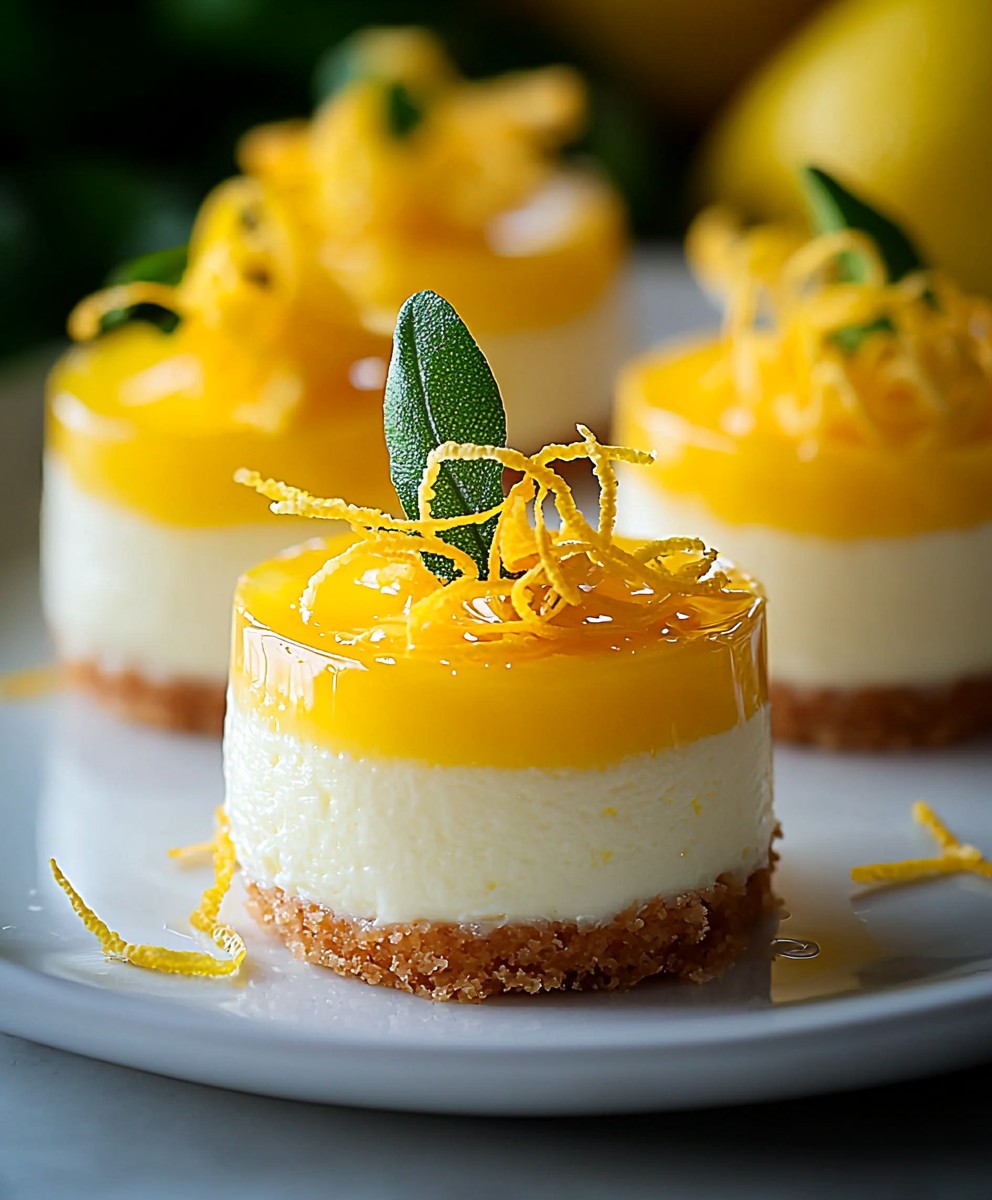
Lemon Cheesecakes, those delightful miniature desserts, are about to become your new obsession! Imagine a creamy, tangy cheesecake filling bursting with bright lemon flavor, all nestled in a perfectly crisp, buttery crust. Are you drooling yet? I know I am just thinking about them!
While the exact origins of cheesecake are debated, variations have been enjoyed since ancient Greece. The Romans adopted and adapted the recipe, spreading it throughout their empire. The modern cheesecake, however, evolved in America, and the addition of lemon is a relatively recent, but incredibly welcome, twist. It adds a refreshing zest that perfectly complements the richness of the cheese.
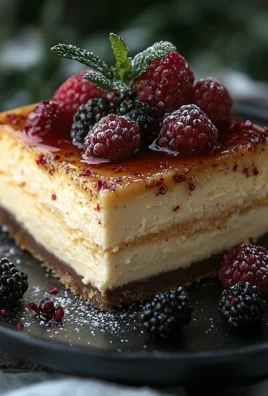
What makes these individual Lemon Cheesecakes so irresistible? It’s the perfect balance of sweet and tart, the smooth, velvety texture against the satisfying crunch of the base, and the sheer convenience of having a perfectly portioned dessert ready to enjoy. They’re elegant enough for a dinner party but simple enough to whip up for a weeknight treat. Plus, who can resist that vibrant lemon aroma that fills your kitchen while they bake? Get ready to experience cheesecake bliss!

Ingredients:
- For the Crust:
- 1 ½ cups graham cracker crumbs
- 5 tablespoons unsalted butter, melted
- ¼ cup granulated sugar
- Pinch of salt
- For the Cheesecake Filling:
- 24 ounces cream cheese, softened to room temperature
- 1 ½ cups granulated sugar
- 2 large eggs
- ½ cup heavy cream
- ¼ cup sour cream
- ¼ cup fresh lemon juice
- 2 teaspoons lemon zest
- 1 teaspoon vanilla extract
- For the Lemon Curd Topping (Optional, but highly recommended!):
- ½ cup fresh lemon juice
- ½ cup granulated sugar
- 4 tablespoons unsalted butter, cut into cubes
- 2 large egg yolks
- Pinch of salt
- Garnish (Optional):
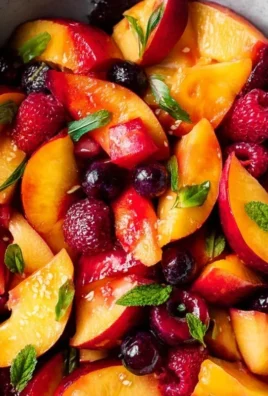
- Fresh raspberries or blueberries
- Lemon slices or twists
- Whipped cream
Preparing the Graham Cracker Crust:
- Preheat your oven to 325°F (160°C). This lower temperature helps prevent the crust from burning.
- In a medium bowl, combine the graham cracker crumbs, melted butter, granulated sugar, and salt. Mix well until all the crumbs are evenly moistened. The mixture should resemble wet sand.
- Divide the graham cracker mixture evenly among 12 muffin liners placed in a muffin tin. You can also use individual ramekins if you prefer.
- Press the crumb mixture firmly into the bottom of each muffin liner or ramekin. I like to use the bottom of a measuring cup or a small glass to ensure the crust is compact and even. This will help it hold its shape and prevent it from crumbling too much when you eat the cheesecake.
- Bake the crusts for 8-10 minutes, or until lightly golden brown. Keep a close eye on them, as they can burn quickly.
- Remove the muffin tin from the oven and let the crusts cool completely while you prepare the cheesecake filling. This is important because adding the warm filling to a warm crust can make the crust soggy.
Making the Lemon Cheesecake Filling:
- In a large bowl, beat the softened cream cheese with an electric mixer (either a stand mixer or a hand mixer) until smooth and creamy. This is a crucial step! Make sure your cream cheese is truly at room temperature, or you’ll end up with lumps in your filling. Beat it for a good 2-3 minutes to get it nice and airy.
- Gradually add the granulated sugar, beating until well combined and the mixture is smooth. Scrape down the sides of the bowl as needed to ensure all the sugar is incorporated.
- Add the eggs one at a time, beating well after each addition. Be careful not to overmix at this stage, as overmixing can incorporate too much air into the batter, which can cause the cheesecakes to crack during baking.
- Pour in the heavy cream and sour cream, and mix until just combined. Again, avoid overmixing.
- Stir in the fresh lemon juice, lemon zest, and vanilla extract. Mix until everything is evenly distributed. The lemon zest adds a wonderful burst of fresh lemon flavor, so don’t skip it!
Baking the Lemon Cheesecakes:
- Pour the cheesecake filling evenly over the cooled graham cracker crusts in the muffin liners or ramekins. Fill them almost to the top, leaving a little room for expansion.
- Place the muffin tin or ramekins in the preheated oven.
- Bake for 20-25 minutes, or until the cheesecakes are set around the edges but still slightly jiggly in the center. They will continue to set as they cool.
- Turn off the oven and crack the oven door slightly. Let the cheesecakes cool in the oven for 1 hour. This gradual cooling process helps prevent cracking.
- Remove the cheesecakes from the oven and let them cool completely at room temperature.
- Cover the cheesecakes with plastic wrap and refrigerate for at least 4 hours, or preferably overnight, to allow them to fully set and chill. This is essential for achieving that perfect cheesecake texture.
Preparing the Lemon Curd Topping (Optional):
- In a small saucepan, whisk together the lemon juice, granulated sugar, butter, egg yolks, and salt.
- Cook over medium-low heat, stirring constantly with a whisk, until the mixture thickens enough to coat the back of a spoon. This usually takes about 5-7 minutes. Be patient and keep stirring to prevent the eggs from scrambling. The curd is ready when you can run your finger across the back of the spoon and the line remains distinct.
- Remove the saucepan from the heat and strain the lemon curd through a fine-mesh sieve into a clean bowl. This will remove any lumps and ensure a smooth, silky texture.
- Let the lemon curd cool completely before topping the cheesecakes. You can speed up the cooling process by placing the bowl in an ice bath.
Assembling and Garnishing:
- Once the cheesecakes are fully chilled and the lemon curd is cooled, carefully remove the cheesecakes from the muffin liners or ramekins.
- Spoon a generous amount of lemon curd over the top of each cheesecake.
- Garnish with fresh raspberries or blueberries, lemon slices or twists, and a dollop of whipped cream, if desired. Get creative with your garnishes!
- Serve immediately and enjoy your delicious homemade lemon cheesecakes! They can be stored in the refrigerator for up to 3 days.
Tips for Success:
- Room Temperature Cream Cheese: This is the most important tip! Make sure your cream cheese is completely softened to room temperature before you start. This will ensure a smooth, lump-free filling.
- Don’t Overmix: Overmixing the cheesecake batter can incorporate too much air, which can cause the cheesecakes to crack during baking. Mix until just combined.
- Bake at a Low Temperature: Baking the cheesecakes at a lower temperature helps prevent them from cracking.
- Cool Gradually: Cooling the cheesecakes gradually in the oven helps prevent cracking.
- Chill Thoroughly: Chilling the cheesecakes for at least 4 hours, or preferably overnight, is essential for achieving that perfect cheesecake texture.
- Lemon Curd: While the lemon curd topping is optional, it really elevates these cheesecakes to the next level. The tartness of the lemon curd perfectly complements the richness of the cheesecake.
- Variations: Feel free to experiment with different flavors and toppings. You could add a swirl of raspberry jam to the cheesecake filling, or top the cheesecakes with a sprinkle of toasted coconut.
Troubleshooting:
- Cracked Cheesecakes: If your cheesecakes crack, don’t worry! They’ll still taste delicious. Cracking is usually caused by overbaking or rapid temperature changes. To prevent cracking, bake at a low temperature, cool the cheesecakes gradually in the oven, and avoid overmixing the batter. You can also cover the cracks with lemon curd or whipped cream.
- Soggy Crust: A soggy crust is usually caused by adding the warm filling to a warm crust. Make sure the crust is completely cooled before adding the filling. You can also brush the crust with melted chocolate before adding the filling to create a moisture barrier.
- Lumpy Filling: A lumpy filling is usually caused by using cold cream cheese. Make sure your cream cheese is completely softened to room temperature before you start. If you still end up with lumps, you can try straining the filling through a fine-mesh sieve.
Conclusion:
This isn’t just another dessert recipe; it’s an invitation to experience pure, unadulterated joy in every bite. These Lemon Cheesecakes are a must-try because they perfectly balance the creamy richness of cheesecake with the bright, zesty tang of fresh lemons. The result? A dessert that’s both decadent and refreshing, satisfying your sweet cravings without being overly heavy. Trust me, once you taste the velvety smooth texture and the burst of citrus, you’ll understand why I’m so enthusiastic about this recipe. But the best part? These individual cheesecakes are incredibly versatile! Serve them chilled straight from the fridge for a classic experience, or add a dollop of whipped cream and a sprinkle of lemon zest for an extra touch of elegance. For a more decadent treat, drizzle them with a homemade raspberry sauce or a rich chocolate ganache. If you’re feeling adventurous, try topping them with toasted coconut flakes or candied lemon peel for added texture and flavor. And speaking of variations, don’t be afraid to experiment! If you’re not a fan of lemons (though I highly recommend giving them a chance in this recipe!), you can easily substitute them with other citrus fruits like limes or oranges. For a more intense flavor, use Meyer lemons, which are known for their sweeter, less acidic taste. You could also add a hint of vanilla extract or almond extract to the cheesecake batter for a subtle but noticeable difference. For a truly show-stopping presentation, consider serving these Lemon Cheesecakes in individual ramekins or small mason jars. This not only looks beautiful but also makes them incredibly easy to transport and serve at parties or gatherings. You can even prepare them ahead of time and store them in the fridge for up to three days, making them the perfect dessert for busy weeknights or special occasions. These Lemon Cheesecakes are more than just a recipe; they’re an experience. They’re a chance to create something truly special, something that will impress your friends and family and leave them wanting more. They are also a great way to practice your baking skills and learn new techniques. So, what are you waiting for? Gather your ingredients, preheat your oven, and get ready to embark on a culinary adventure. I promise you won’t be disappointed. This recipe is straightforward and easy to follow, even for beginner bakers. And the end result is so rewarding that it’s well worth the effort. I’m so confident that you’ll love these Lemon Cheesecakes that I can’t wait to hear about your experience. Did you try any of the variations I suggested? Did you add your own unique twist? Share your photos and stories in the comments below! I’m always eager to see what you create and learn from your experiences. Don’t forget to rate the recipe and leave a review! Your feedback is invaluable and helps other bakers discover this delicious treat. And most importantly, have fun! Baking should be a joyful and relaxing experience, so don’t be afraid to experiment and make this recipe your own. Happy baking! I hope you enjoy these delightful Lemon Cheesecakes as much as I do. Print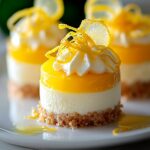
Lemon Cheesecakes: The Ultimate Guide to Baking Perfection
- Total Time: 245 minutes
- Yield: 12 mini cheesecakes 1x
Description
Tangy and creamy mini lemon cheesecakes with a buttery graham cracker crust and optional homemade lemon curd topping. Perfect for a bright and delicious dessert!
Ingredients
- 1 ½ cups graham cracker crumbs
- 5 tablespoons unsalted butter, melted
- ¼ cup granulated sugar
- Pinch of salt
- 24 ounces cream cheese, softened to room temperature
- 1 ½ cups granulated sugar
- 2 large eggs
- ½ cup heavy cream
- ¼ cup sour cream
- ¼ cup fresh lemon juice
- 2 teaspoons lemon zest
- 1 teaspoon vanilla extract
- ½ cup fresh lemon juice
- ½ cup granulated sugar
- 4 tablespoons unsalted butter, cut into cubes
- 2 large egg yolks
- Pinch of salt
- Fresh raspberries or blueberries
- Lemon slices or twists
- Whipped cream
Instructions
- Prepare the Graham Cracker Crust: Preheat oven to 325°F (160°C). In a medium bowl, combine graham cracker crumbs, melted butter, sugar, and salt. Mix well.
- Divide the mixture evenly among 12 muffin liners in a muffin tin (or individual ramekins). Press firmly into the bottom of each liner.
- Bake for 8-10 minutes, or until lightly golden brown. Let cool completely.
- Make the Lemon Cheesecake Filling: In a large bowl, beat softened cream cheese until smooth and creamy. Gradually add sugar, beating until well combined.
- Add eggs one at a time, beating well after each addition. Pour in heavy cream and sour cream, mixing until just combined.
- Stir in lemon juice, lemon zest, and vanilla extract. Mix until evenly distributed.
- Bake the Lemon Cheesecakes: Pour cheesecake filling evenly over cooled crusts.
- Bake for 20-25 minutes, or until set around the edges but slightly jiggly in the center.
- Turn off the oven, crack the door slightly, and let cheesecakes cool in the oven for 1 hour.
- Remove from oven and let cool completely at room temperature.
- Cover and refrigerate for at least 4 hours (preferably overnight).
- Prepare the Lemon Curd Topping (Optional): In a small saucepan, whisk together lemon juice, sugar, butter, egg yolks, and salt.
- Cook over medium-low heat, stirring constantly, until the mixture thickens enough to coat the back of a spoon (5-7 minutes).
- Strain the lemon curd through a fine-mesh sieve into a clean bowl. Let cool completely.
- Assemble and Garnish: Carefully remove cheesecakes from liners. Spoon lemon curd over each cheesecake. Garnish with raspberries/blueberries, lemon slices, and whipped cream (optional). Serve immediately.
Notes
- Room Temperature Cream Cheese is Key: Ensure cream cheese is fully softened to avoid lumps.
- Don’t Overmix: Overmixing can cause cracks. Mix until just combined.
- Bake Low and Cool Gradually: This helps prevent cracking.
- Chill Thoroughly: Essential for the perfect texture.
- Lemon Curd: Adds a wonderful tartness.
- Variations: Experiment with different flavors and toppings.
- Cracked Cheesecakes: Cover with lemon curd or whipped cream.
- Soggy Crust: Cool crust completely before adding filling.
- Lumpy Filling: Use fully softened cream cheese.
- Prep Time: 30 minutes
- Cook Time: 35 minutes
Leave a Comment