
Chocolate Lava Cake is a dessert that never fails to impress. With its rich, molten center and decadent chocolate flavor, this indulgent treat has become a favorite for special occasions and casual gatherings alike. Originating from the culinary world of France, the Chocolate Lava Cake has a fascinating history that dates back to the early 1980s when renowned chef Jean-Georges Vongerichten accidentally created this delightful dessert. Since then, it has captured the hearts and taste buds of chocolate lovers around the globe.
What makes Chocolate Lava Cake so beloved is not just its exquisite taste, but also its delightful texture. The contrast between the warm, gooey center and the soft, cake-like exterior creates a heavenly experience with every bite. Plus, its incredibly convenient to prepare, making it an ideal choice for both novice bakers and seasoned chefs. Whether youre celebrating a birthday, hosting a dinner party, or simply treating yourself, Chocolate Lava Cake is sure to bring joy and satisfaction to any occasion.

Ingredients:
- 1/2 cup (1 stick) unsalted butter
- 1 cup semi-sweet chocolate chips
- 2 large eggs
- 2 large egg yolks
- 1/4 cup granulated sugar
- 2 tablespoons all-purpose flour
- 1/4 teaspoon salt
- 1 teaspoon vanilla extract
- Powdered sugar, for dusting
- Vanilla ice cream or whipped cream, for serving (optional)
Preparing the Batter
1. **Preheat the Oven**: Start by preheating your oven to 425°F (220°C). This is crucial for achieving that perfect molten center in your lava cake. 2. **Melt the Butter and Chocolate**: In a medium microwave-safe bowl, combine the unsalted butter and semi-sweet chocolate chips. Microwave in 30-second intervals, stirring in between, until the mixture is completely melted and smooth. This usually takes about 1 to 1.5 minutes total. Be careful not to overheat it, as chocolate can seize up. 3. **Whisk the Eggs**: In a separate large mixing bowl, crack the 2 large eggs and add the 2 large egg yolks. Using a whisk, beat them together until they are well combined and slightly frothy. This will help incorporate air into the batter, giving it a nice rise. 4. **Add Sugar and Vanilla**: To the egg mixture, add the 1/4 cup of granulated sugar and 1 teaspoon of vanilla extract. Whisk until the mixture is pale and slightly thickened, which should take about 1-2 minutes. 5. **Combine Chocolate Mixture**: Slowly pour the melted chocolate and butter mixture into the egg mixture while continuously whisking. This will help temper the eggs and prevent them from scrambling. Mix until everything is well combined and smooth. 6. **Incorporate Dry Ingredients**: Sift in the 2 tablespoons of all-purpose flour and 1/4 teaspoon of salt. Gently fold the dry ingredients into the wet mixture using a spatula. Be careful not to overmix; you want to keep the batter light and airy.Preparing the Ramekins
7. **Grease the Ramekins**: Take four 6-ounce ramekins and generously grease them with butter. Make sure to cover the bottom and sides thoroughly to prevent sticking. You can also dust them with a little cocoa powder for an extra layer of non-stick protection. 8. **Fill the Ramekins**: Divide the batter evenly among the prepared ramekins, filling each about 3/4 full. This allows enough space for the cakes to rise without overflowing.Baking the Lava Cakes
9. **Bake**: Place the filled ramekins on a baking sheet for easier handling and transfer them to the preheated oven. Bake for 12-14 minutes. The edges should be firm, but the center should still be soft and jiggly. Keep an eye on them, as baking times can vary slightly depending on your oven. 10. **Cool Slightly**: Once baked, remove the ramekins from the oven and let them cool for about 1 minute. This brief cooling period will help the cakes set slightly, making them easier to unmold.Assembling and Serving
11. **Unmold the Cakes**: Carefully run a knife around the edges of each ramekin to loosen the cake. Place a dessert plate on top of the ramekin and quickly invert it. Gently lift the ramekin off, allowing the cake to fall onto the plate. If it doesnt come out easily, give it a gentle shake or tap. 12. **Dust with Powdered Sugar**: Once the cakes are on the plates, dust the tops with powdered sugar for a beautiful presentation. This adds a touch of sweetness and makes the cakes look extra special. 13. **Add a Scoop of Ice Cream**: For an indulgent treat, serve each lava cake with a scoop of vanilla ice cream or a dollop of whipped cream on the side. The cold creaminess pairs perfectly with the warm, gooey chocolate center. 14. **Enjoy**: Grab a fork and dig in! As you cut into the cake, the molten chocolate should ooze out, creating a delightful mess thats simply irresistible.Tips for Perfect Lava Cakes
– **Use Quality Chocolate**: The flavor of your lava cake largely depends on the chocolate you use. Opt for high-quality semi-s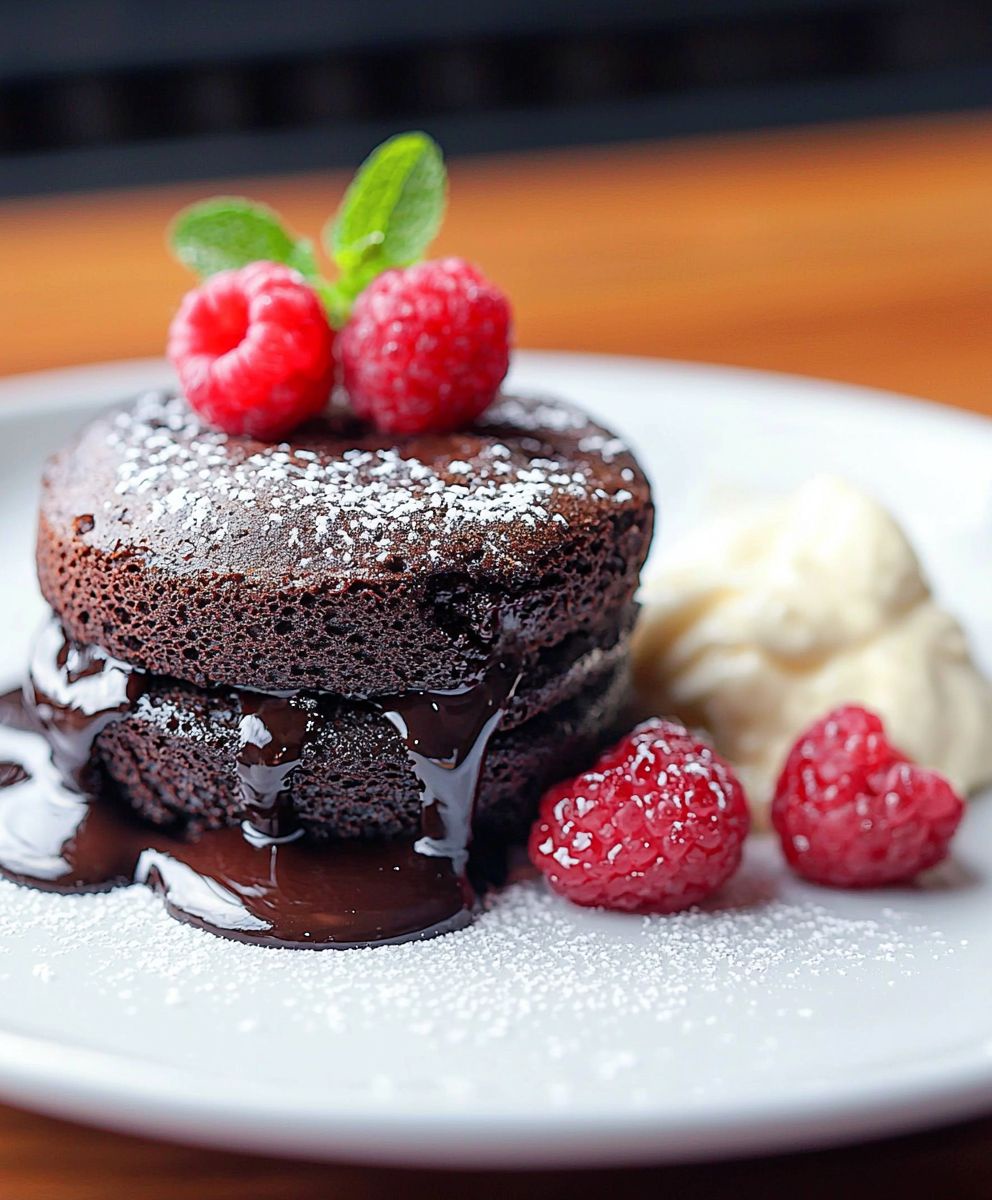
Conclusion:
In summary, this Chocolate Lava Cake recipe is an absolute must-try for anyone who loves rich, decadent desserts. The combination of a warm, gooey center and a soft, cake-like exterior creates a delightful contrast that is sure to impress your family and friends. Whether you’re celebrating a special occasion or simply indulging in a sweet treat after dinner, this dessert is guaranteed to satisfy your chocolate cravings. For serving suggestions, I recommend pairing your lava cake with a scoop of vanilla ice cream or a dollop of freshly whipped cream to balance the richness of the chocolate. You can also sprinkle some fresh berries on top for a pop of color and a hint of tartness that complements the sweetness beautifully. If you’re feeling adventurous, try adding a splash of espresso or a pinch of sea salt to the batter for an extra layer of flavor. I encourage you to give this Chocolate Lava Cake recipe a try and experience the joy of creating something so delicious right in your own kitchen. Don’t forget to share your experience with me! I would love to hear how your lava cakes turned out and any variations you tried. Happy baking, and may your chocolate dreams come true! Print
Chocolate Lava Cake: The Ultimate Recipe for Decadent Dessert Delight
- Total Time: 30 minutes
- Yield: 4 servings 1x
Description
Indulge in a rich and decadent chocolate lava cake, featuring a warm, gooey center that flows with molten chocolate. This delightful dessert is perfect for chocolate lovers, offering a perfect balance of a soft, cake exterior and a luscious, molten interior. Serve it warm with a scoop of vanilla ice cream for an irresistible treat.
Ingredients
- 200 g Zartbitterschokolade
- 100 g Butter
- 150 g Zucker
- 3 Eier
- 3 Eigelb
- 100 g Mehl
- 1 Prise Salz
- Butter und Mehl für die Förmchen
Instructions
- Preheat the oven to 425°F (220°C).
- Grease four ramekins with butter and dust with cocoa powder.
- Melt the chocolate and butter together in a double boiler or microwave.
- In a separate bowl, whisk together the eggs, egg yolks, and sugar until thick and pale.
- Stir the melted chocolate mixture into the egg mixture.
- Gently fold in the flour until just combined.
- Divide the batter evenly among the prepared ramekins.
- Bake for 12-14 minutes until the edges are firm but the center is soft.
- Let cool for 1 minute, then invert onto plates.
- Serve immediately, optionally with ice cream or whipped cream.
Notes
- Die Backzeit kann je nach Ofen variieren, daher die ersten 10 Minuten im Auge behalten.
- Die Förmchen vor dem Befüllen gut einfetten, damit der Kuchen leicht herauskommt.
- Für eine besondere Note kann eine Prise Meersalz auf die Schokolade gegeben werden.
- Servieren Sie den Kuchen sofort nach dem Backen, um den flüssigen Kern zu genießen.
- Prep Time: 15 minutes
- Cook Time: 12 minutes

Leave a Comment