
Dairy Queen Banana Milkshake is a delightful treat that brings back fond memories of summer days spent enjoying sweet, creamy indulgences. This classic milkshake has a rich history, originating from the beloved Dairy Queen chain, which has been serving up delicious frozen treats since 1940. The combination of ripe bananas and velvety ice cream creates a flavor profile that is both refreshing and satisfying, making it a favorite among milkshake enthusiasts of all ages.
What I love most about the Dairy Queen Banana Milkshake is its perfect balance of sweetness and creaminess, which makes each sip feel like a mini-vacation. The smooth texture, combined with the natural sweetness of bananas, creates a comforting experience that is hard to resist. Whether you’re enjoying it on a hot day or as a special dessert, this milkshake is not only convenient to make at home but also a guaranteed crowd-pleaser. Join me as we dive into this delicious recipe and discover how to recreate the magic of Dairy Queen in your own kitchen!

Ingredients:
- 2 ripe bananas
- 2 cups vanilla ice cream
- 1 cup milk (whole or 2% for creaminess)
- 1 teaspoon vanilla extract
- Whipped cream (for topping)
- Chocolate syrup (optional, for drizzling)
- Maraschino cherries (optional, for garnish)
Preparing the Ingredients
1. **Select the Bananas**: Start by choosing two ripe bananas. The riper they are, the sweeter your milkshake will be. Look for bananas with a few brown spots, as they will provide the best flavor. 2. **Peel and Slice**: Once you have your bananas, peel them and slice them into smaller pieces. This will make it easier for your blender to process them smoothly. 3. **Gather Other Ingredients**: Measure out the vanilla ice cream, milk, and vanilla extract. Having everything ready will make the blending process much smoother.Making the Milkshake
4. **Blend the Bananas**: In a blender, add the sliced bananas. This is the base of your milkshake, so make sure to get every piece in there. 5. **Add Ice Cream**: Next, scoop in the two cups of vanilla ice cream. This is what will give your milkshake that creamy texture we all love. 6. **Pour in the Milk**: Add one cup of milk to the blender. If you prefer a thicker milkshake, you can reduce the amount of milk slightly. For a thinner consistency, add a bit more. 7. **Add Vanilla Extract**: Pour in the teaspoon of vanilla extract. This will enhance the flavor of your milkshake and give it that classic vanilla undertone. 8. **Blend Until Smooth**: Secure the lid on your blender and blend the mixture on high speed. I usually blend for about 30-45 seconds, or until the mixture is completely smooth and creamy. If you notice any chunks of banana, blend a little longer. 9. **Taste and Adjust**: After blending, taste your milkshake. If you want it sweeter, you can add a little more banana or even a splash of honey or sugar. Blend again if you add anything.Serving the Milkshake
10. **Prepare Your Glasses**: Grab your favorite tall glasses. If you want to make it extra special, you can drizzle some chocolate syrup inside the glasses before pouring in the milkshake. This adds a nice touch and makes it look appealing. 11. **Pour the Milkshake**: Carefully pour the banana milkshake into the prepared glasses. I like to fill them about three-quarters full to leave room for whipped cream and any toppings. 12. **Top with Whipped Cream**: Generously add whipped cream on top of each milkshake. This is where you can really get creative! You can use a piping bag for a fancy look or just spoon it on. 13. **Add Toppings**: If youre feeling indulgent, drizzle some chocolate syrup over the whipped cream. You can also add a maraschino cherry on top for that classic milkshake look. 14. **Serve Immediately**: Grab some straws and serve your delicious banana milkshake right away. The sooner you enjoy it, the better!Tips for the Perfect Milkshake
15. **Use Frozen Bananas**: For an even creamier texture, consider using frozen bananas. Just peel and slice them before freezing. This will give your milkshake a thicker consistency without needing extra ice cream. 16. **Experiment with Flavors**: Feel free to get creative! You can add a scoop of peanut butter for a nutty flavor, or even a handful of chocolate chips for a chocolate banana milkshake. 17. **Adjust the Thickness**: If you find your milkshake is too thick, simply add a little more milk and blend again. If its too thin, add more ice cream or bananas. 18. **Make it a Meal**: If you want to turn this milkshake into a meal replacement, consider adding a scoop of protein powder or some oats. This will give you a nutritious boost while still tasting delicious. 19. **Store Leftovers**: If you happen to have any leftovers (which is rare!), you can store them in the freezer. Just remember to let it sit out for a few minutes before trying to blend it again, as it will be quite solid. 20. **Enjoy with Friends**: This banana milkshake is perfect for sharing. Make a double batch and enjoy it with friends or family. Its a great treat for a hot day or a fun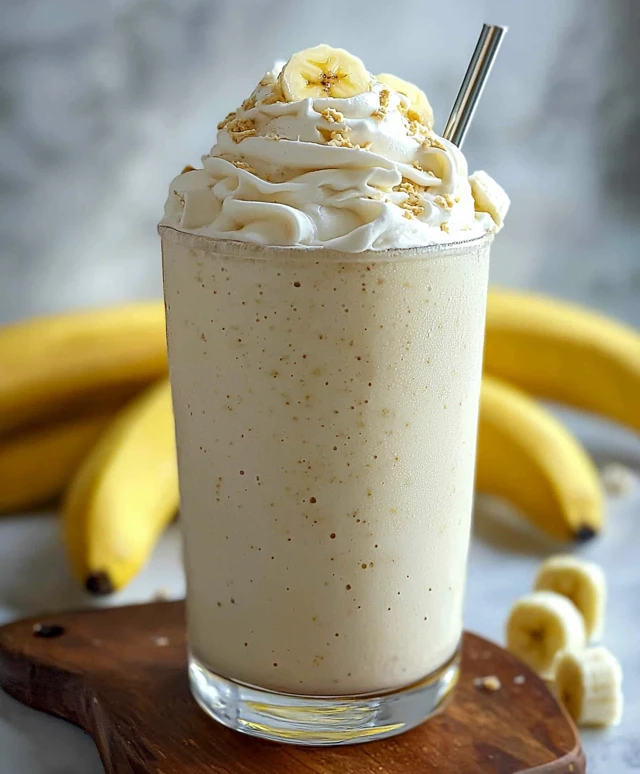
Conclusion:
In summary, the Dairy Queen Banana Milkshake is an absolute must-try for anyone who loves a creamy, delicious treat that perfectly balances the sweetness of ripe bananas with the rich flavor of ice cream. This delightful shake is not only a nostalgic favorite for many but also a versatile recipe that you can easily customize to suit your taste. Whether you prefer it extra thick, with a sprinkle of cinnamon, or topped with whipped cream and a cherry, the possibilities are endless! I encourage you to gather your ingredients and whip up this delightful Dairy Queen Banana Milkshake at home. Its a fantastic way to cool down on a hot day or simply indulge in a sweet moment. Dont forget to share your experience with friends and family, and let them know how easy it is to recreate this classic treat. Id love to hear about your variations and any creative twists you come up with! So grab your blender, and lets make some delicious memories together with this irresistible banana milkshake! Print
Dairy Queen Banana Milkshake: A Creamy Delight You Can’t Resist
- Total Time: 10 minutes
- Yield: 2 servings 1x
Description
Enjoy a creamy banana milkshake made with ripe bananas, vanilla ice cream, and a touch of vanilla extract. This refreshing treat is perfect for hot days or as a delightful dessert to share with friends!
Ingredients
- 2 ripe bananas
- 2 cups vanilla ice cream
- 1 cup milk (whole or 2% for creaminess)
- 1 teaspoon vanilla extract
- Whipped cream (for topping)
- Chocolate syrup (optional, for drizzling)
- Maraschino cherries (optional, for garnish)
Instructions
- Choose two ripe bananas with a few brown spots for optimal sweetness.
- Peel the bananas and slice them into smaller pieces for easier blending.
- Measure out the vanilla ice cream, milk, and vanilla extract.
- In a blender, add the sliced bananas.
- Scoop in the two cups of vanilla ice cream.
- Add one cup of milk. Adjust the amount for desired thickness.
- Pour in the teaspoon of vanilla extract.
- Blend on high speed for 30-45 seconds until smooth and creamy.
- Taste the milkshake and add more banana or sweetener if desired, then blend again.
- Drizzle chocolate syrup inside your glasses for a decorative touch.
- Pour the milkshake into the prepared glasses, filling them about three-quarters full.
- Add whipped cream generously on top.
- Drizzle chocolate syrup over the whipped cream and add a maraschino cherry if desired.
- Serve with straws and enjoy your delicious banana milkshake right away!
Notes
- For a creamier texture, use frozen bananas.
- Experiment with flavors by adding peanut butter or chocolate chips.
- Adjust thickness by adding more milk or ice cream as needed.
- For a meal replacement, consider adding protein powder or oats.
- Store any leftovers in the freezer and let sit out before blending again.
- Prep Time: 10 minutes
- Cook Time: 0 minutes

Leave a Comment